42
GB
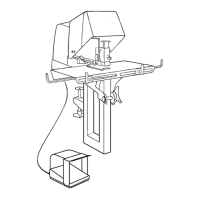
Adjusting the work table for flat stapling
When flat stapling is required the work table should be put in the horizontal
position as follows (see figure 4):
1 Release the locking handle (L) for the work table.
2 Attach the work table to the two hooks.
3 Position the work table so that the two guide pins fit into the holes in the
work table.
4 Lock the work table with the locking handle.
Adjusting the paper guides
There are two adjustable paper guides on the work table, one on the left and
one on the right hand side. See figure 2.
External paper guide (J)
Internal paper guide (K)
The external guide (J) is locked in position when it is pointing upwards. It can
be released by turning it through an angle of approx. 60°.
The internal guide (K) can be angled downwards but only in its outermost
position. The internal guide is locked in position when it is in the vertical
position. Before the internal guide can be moved it must be turned to an
intermediate position at which the lock is released.
Filling staples
Fill the machine with staples when required as shown in figure 5:
1 Turn off the switch on the machine.
2 Lift up the visor.
3 Open the magazine by pressing down the lock. Pull out the magazine.
4 Put the staples into the magazine as shown in the figure. Use the type of
staple stated on the magazine. Use only Rapid original staples.
Interruptions in operation can be caused by use of the wrong type of
staple.
5 Close the magazine so that it locks in the closed position.
Adjusting the trigger position
Automatic stapling is used only when flat stapling. When using saddle
stapling the trigger should be moved to the extreme rear position.
The distance between the staple and the edge of the stapling object is
determined by adjusting the position of the trigger as follows. See figure 6:
1 Turn off the switch on the machine.
2 Lift up the visor.
3 Adjust the trigger position (O) by lightly squeezing the rider and then
move the trigger along the hexagonal rod.
 Loading...