PEDAL iSSi II INSTRUCTIONS
6400 West 105th Street Minneapolis, MN 55438 www.rideissi.com
13124 04/15
INSTALLATION OF THE 2-BOLT CLEAT
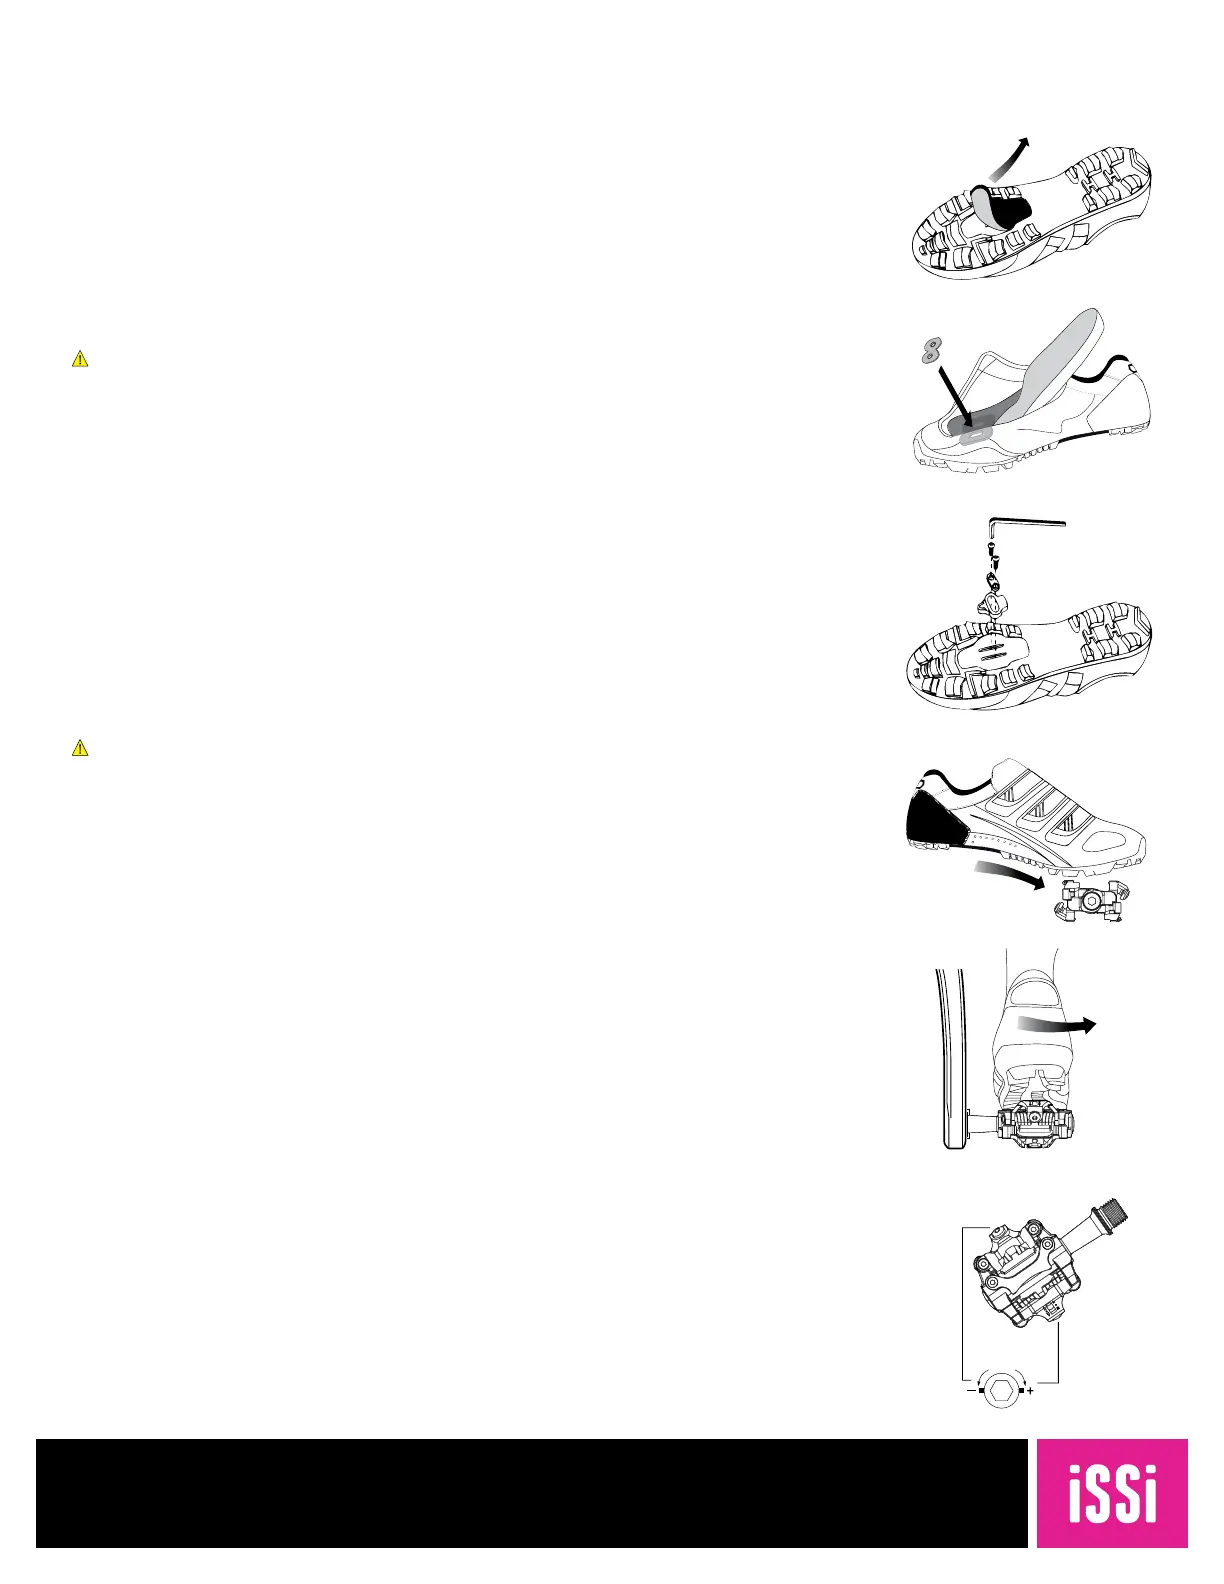
1. If there is a cover over the cleat area of the sole, remove the cover from the shoe using a pair of pliers (fig. 1).
2. If necessary, remove the insole of the shoe and install the cleat washer from the inside of the shoe (fig. 2).
3. Line up the threaded bolt holes of the cleat washer over the double channels inside the sole of the shoe (fig. 3).
4. Place a cleat on the outside of the shoe with the cleat’s rough side down for grip. Apply grease to the outside of
the cleat in the channel where the bolt washer sits.
5. Insert the bolt washer so that the countersunk holes are facing up. Apply grease to the outside of the
bolt washer.
WARNING: Fully tighten the cleat bolts before engaging the cleat into the pedal! If the cleats are not fully
tightened, the shoe will be incredibly difficult to remove and may cause damage to the shoe or cause a crash
leading to serious injury or even death. Always fully tighten the cleat bolts during the initial adjustments. Do not
attempt to make adjustments with a loose cleat.
HOW TO CLIP IN TO THE PEDALS
Engaging
Press the cleat into the pedal. The cleat of the shoe sits under the ball of the foot and over the spindle of the pedal.
Use this frame of reference to help guide the cleat into the pedal until it becomes intuitive (fig. 4).
Disengaging
Disengage your foot by twisting your heel to the outside, away from the bike. Plan ahead during initial rides and give
yourself time to disengage your foot before coming to a complete stop (fig. 5).
ADJUSTING RETENTION FORCE
The tension of the spring is adjusted for each pedal (top and bottom) with the adjustment bolt in the rear. Turn the
3mm bolt in a clockwise direction to increase retention force, and in a counterclockwise direction to decrease
retention force (fig. 6).
NOTE: On the mountain-style pedals please note there are two adjustment bolts on each pedal.
WARNING: Clipless pedals provide a secure attachment to your bicycle that can result in increased efficiency
when riding. LEARNING HOW TO USE CLIPLESS PEDALS CORRECTLY TAKES PRACTICE! WE STRONGLY SUGGEST
practicing how to enter and disengage from your pedals with a friend holding you and your bicycle upright or
positioned in a doorway where you can lean up against a side and repeatedly practice getting in and out of the
pedal. Your first rides should be in low-traffic areas or on soft grass until you feel comfortable getting in and out of
clipless pedals to avoid potential falls in hazardous traffic situations or injury.
ONGOING MAINTENANCE
To function properly, pedals and cleats must be kept clean. Occasional lubrication of cleat bolts will help prevent
rust and seizure. Pedals should be serviced if: rotating pedal emits noise, rotation by hand feels rough, and/or there
is play in the bearings.
Figure 1
Figure 3
Figure 2
Figure 4
Figure 5
Figure 6
 Loading...