Quick Start
Copyright © Itech Electronic Co., Ltd. 9
Self-test Steps
Normal self-test procedures:
1. Correctly connect the power cord. Press [Power] key to start up.
The power supply starts the self-test and the indicators on the front panel
are all lit. You can check if the indicators are normal.
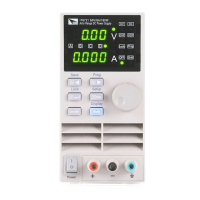
2. After the power self-test, VFD displays the state of voltage and current as
below.
Error Information References
The following error information may occur when an error occurs during Power
On self-test:
If the EEPROM was damaged or the last power status in EEPROM is lost,
the VFD will display (about 2 S) the following prompt.
If the calibration data in EEPROM is lost or the factory calibration data in
EEPROM is lost, then VFD will display (about 2 S) the following prompt.
Exception handling
If the power supply cannot start normally, please check and take measures by
reference to steps below.
1. Check whether the power line is correctly connected and confirm whether
the power supply is powered.
Correct wiring of power line => 2
Incorrect wiring of power line => Re-connect the power line and check
whether the exception is removed.
2. Check whether the power in On. [Power] key is under “ ” On status.
Yes => 3
No => Please check the [Power] key to start power and check whether the
exception is removed.
3. Check whether set power voltage of instrument is larger than the power
supply voltage. If set power voltage is 220 V and the supply voltage is 110V,
the power supply cannot start.
4. Check whether the fuse of electronic fuse is burned out.
If yes, change fuse. Detailed steps:
1) Pull out power line and take out the fuse box at power line jack with a
small screw driver. As shown below.