4
Procedure:
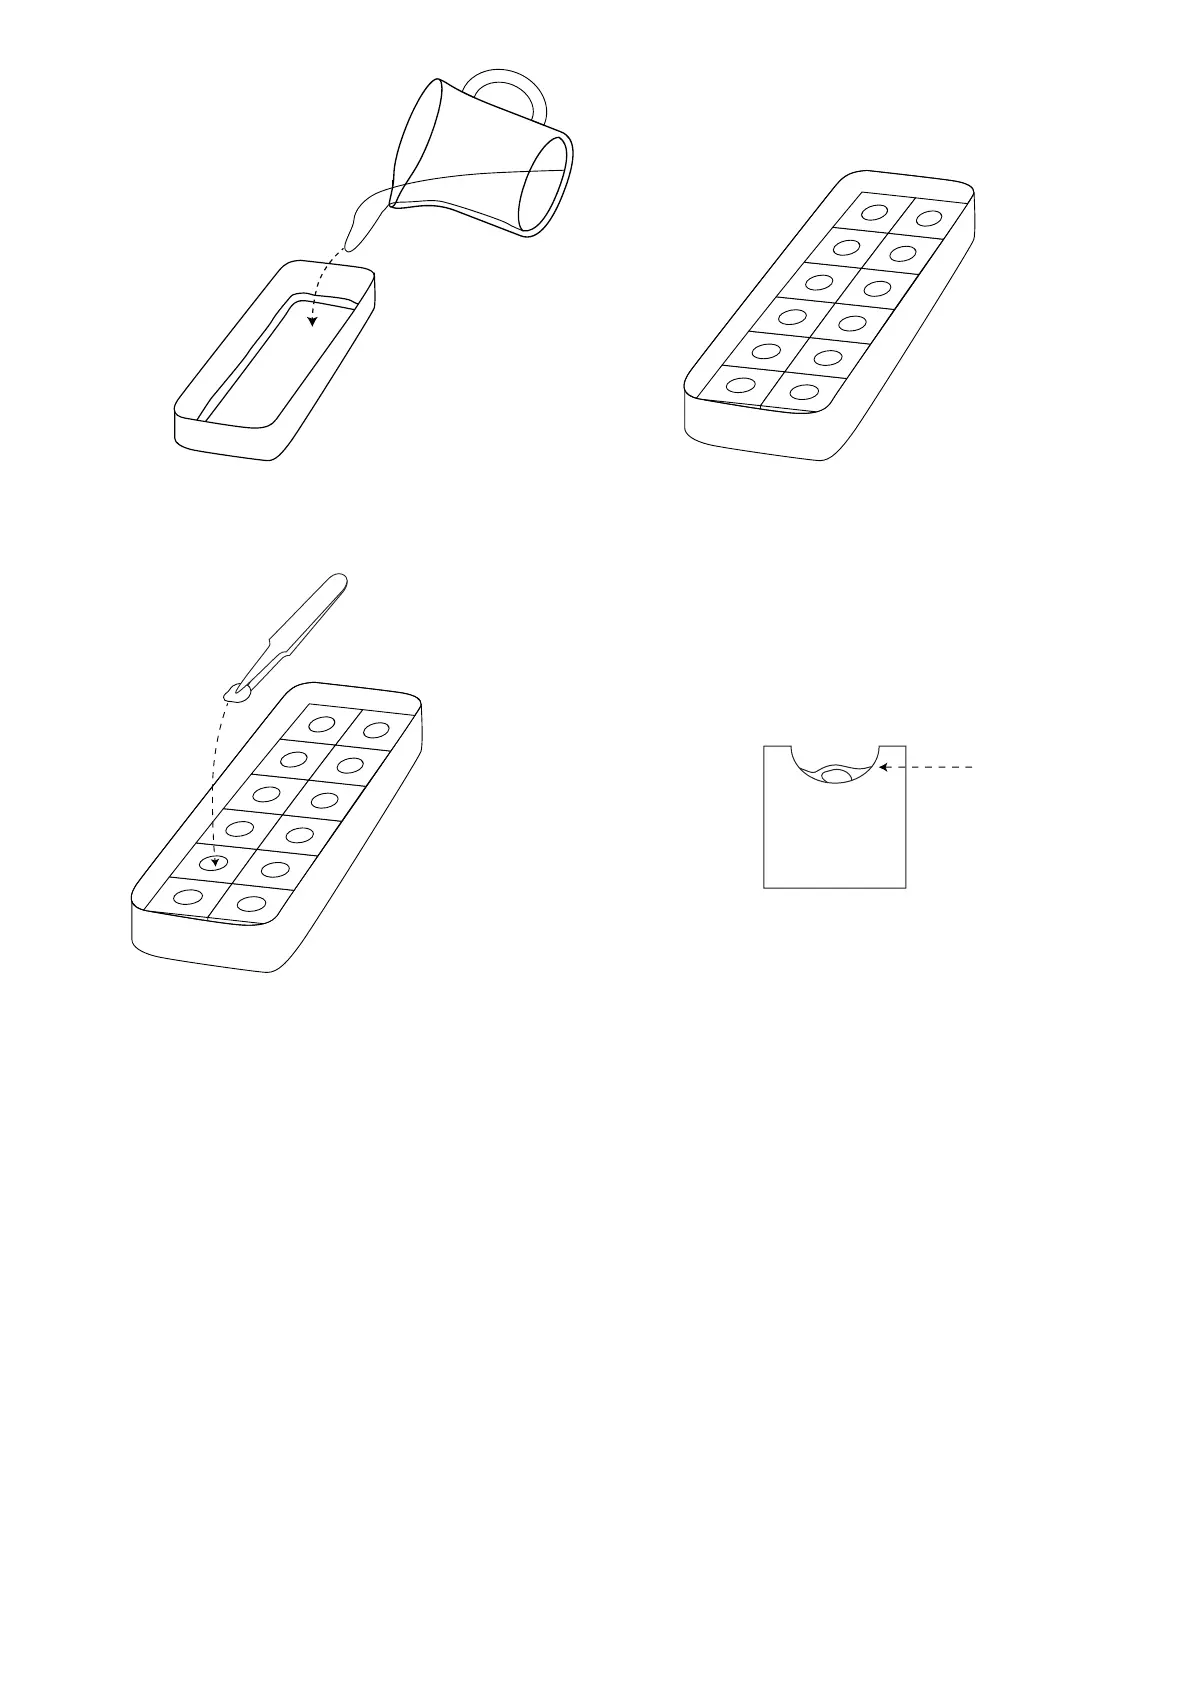
3. Use the tweezers to place one (1) or two (2)
seeds into each hole in the sponge.
4. Add water slowly to the seeding box until the water
level just reaches the top of the seed. Do not overfill
the seeding box with water, or your seeds will drown
and nothing will sprout.
NOTE: Some seeds require more water than others. Some will need water ⅓ of the way up the sponge during this
phase, and others will just need to be slightly moist, with the water level just touching the seed. Every seed works
dierently, and your results may vary. Please test out water levels on one seed before filling all of the sponges with
seeds and putting them in the seedling box.
5. Place the seeding box in the shade and wait for 24 hours.
NOTES:
• The seeding box can hold a maximum of 15 sponges. Do not try to fit more than that.
• The LED light device is not required during this process. You may unplug the main container after initial setup and
self-diagnostics until you need it again.
• Be very careful when adding water to the seed box. Too much water can drown your seeds, and too little can cause
them to dry out.
• If you are unsure about water levels, we recommend that you try the process first, with just one sponge/seed, to
figure out your seeds’ ideal water levels, so that valuable seeds are not lost.
1. Pour a small amount of water into the seeding
box (just enough to cover the bottom).
2. Sit the sponge(s) in the water, with the hole facing
upward, until it’s moistened and settles at the bottom.
Water line
 Loading...