Do you have a question about the Iveco DAILY VAN and is the answer not in the manual?
Explains the deadlock/safelock messages on the instrument display.
Describes the illumination of the seatbelt warning light and EPB activation.
Explains the meaning of red, yellow/orange, and green/blue warning lights.
Outlines maximum speed limits for different road types.
Details various vehicle controls including heating, lights, wipers, horn, and starter switch.
Lists key dimensions like fuel capacity, length, width, height, and cargo space.
Covers actions for breakdowns, child seat safety, and driver's seat adjustment.
Guides on locking, anti-theft, cargo loading, mirrors, windows, starting, fuel cap, bonnet, and tyre changing.
Instructions for preparing and opening the tail lift platform.
Procedures for raising and lowering the tail lift platform.
Guidelines for safe loading, including weight limits and load placement.
Steps for safely closing and securing the tail lift platform.
This document provides a comprehensive guide for operating and maintaining Iveco vehicles, specifically focusing on models equipped with a tail-lift. It covers general vehicle information, safety warnings, driving restrictions, detailed controls, and specific instructions for the tail-lift.
The document begins with an index, outlining the content for various Iveco models. It then provides a "Vehicle Instruction Card Supplement" that addresses general safety and operational aspects applicable to all listed vehicles.
The document clarifies that "Deadlock / safelock" messages, which appear on the instrument display when the engine is turned off, simply indicate that the doors are deadlocked. This prevents anyone inside from opening the doors from the inside in an emergency. It is described as a standard advisory message and not a cause for concern.
A seatbelt warning light may illuminate when the engine is turned on, potentially indicating that the electronic parking brake (EPB) has auto-activated to prevent vehicle movement. To deactivate these warnings and the EPB auto-activation, all passengers must fasten their seatbelts, and any luggage on seats should be removed and secured in the cargo area.
The guide categorizes warning lights by color:
The document outlines maximum speed limits (MPH) for passenger vehicles, provided it is safe to do so and in compliance with road traffic signs, local regulations, and weather conditions:
Drivers are reminded of their responsibility to comply with all applicable Road Traffic Regulations, the Highway Code, and prevailing road conditions. Europcar disclaims responsibility for any costs, claims, penalties, or fines resulting from the driver's failure to comply with these restrictions.
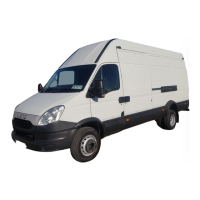
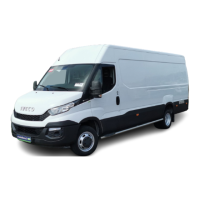
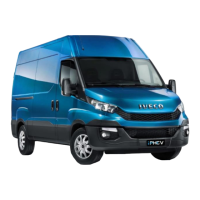
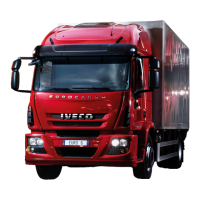
The document provides a detailed overview of the Iveco Daily Van 3.5t Luton 0.5t Tail Lift, including its controls, dimensions, and useful operational information.
A diagram labels the main controls:
Drivers are advised to check tyre pressure regularly. The legal minimum tread depth is 1.6 mm. Tyre pressures should be confirmed by consulting the reference table on the driver's door B-pillar.
Drivers should use hazard lights and attempt to park in a safe position. It is recommended to use an emergency phone rather than a mobile phone, as emergency services will then know the vehicle's location.
When parked, the handbrake should be fully applied, and the vehicle should be left in first or reverse gear for manual transmission vehicles, or in P (Park) for automatic transmission vehicles.
If the vehicle is not supplied with a spare wheel, drivers should refer to the telephone numbers on the tax disc holder for assistance.
Never use a child seat in a front passenger seat fitted with an active airbag (SRS). All fitting instructions for child seats must be followed carefully. Seat positioning and security should be checked before use.
The driver's seat features tilt, height, lumbar, and legroom adjustments.
Only the correct fuel type should be used, as indicated on the fuel filler cap labels.
When the engine is turned off, ensure the starter switch is in position II when operating electrical items such as door mirrors and windows. This vehicle does not include any manufacturer handbooks or manuals.
The vehicle features key/remote control operated central dead locking. Doors can be locked from the inside by depressing the door locking knobs.
It includes a remote anti-theft alarm and a passive arming electronic engine immobiliser that activates after the key is removed from the starter switch.
The vehicle has one (on left or right side) or two side sliding doors, opened using the handle. The floor is fitted with fixed load lashing rings for securing loads. Twin rear doors can open up to 270 degrees wide. Instructions for using the tail-lift (if fitted) are provided on page 2 of this guide.
Electric adjustment is operated by a control pad on the driver's door, or manual internal adjustment.
Electric front windows are operated via control buttons on the driver's door.
Ensure the gear selector is in neutral (or N) and the handbrake is on. Place the ignition key in the starter switch and use a normal starting routine. Select the desired gear, release the handbrake and brake pedal, and gently press the accelerator to move the vehicle. Some vehicles may have automatic transmission (use A for fully automatic, and M- or M+ for manual gear selection). Some vehicles may also be fitted with auto start-stop engines, which shut off when the gear selector is in neutral and the vehicle is at a standstill; to restart, depress the clutch.
Located on the nearside of the vehicle, it is centrally locked (or use a key to unlock). Twist off the cap anticlockwise.
Pull the bonnet release lever located in the passenger footwell, then unhook the catch under the bonnet.
The tools and jack are stored under the driver's seat. The standard spare wheel is slung underneath the vehicle, secured by a retaining bolt. Use the tools to undo the bolt and lower the wheel to the ground. To change the wheel:
Refer to the instructions on the second page of this guide. IMPORTANT: When unlocking the rear door shutter, the keys must be removed before raising the shutters, as they can become broken or damaged if this instruction is ignored.
a. Check that the platform retaining catch is fully engaged. Press the "DOWN" button until the platform descends to a convenient height. * N.B.: The platform must drop approximately 100mm from the travelling position to disengage the Traveloc before it can be opened. b. Disengage the platform retaining catch on the side of the platform (Figure 1) and pull the platform out and down to horizontal. Press down on the outer edge of the platform to automatically engage the anti-tilt latch. * THE LIFT IS NOW READY FOR USE.
a. Raise the lift to vehicle floor level by pressing the "UP" button. Release the button immediately the runner reaches the column stops. * N.B.: Holding the button beyond this point will cause undue wear on the pump. b. Lower the platform by pressing the "DOWN" button.
a. Any load applied to the platform should be placed centrally, across the platform width. b. Do not apply a load greater than the Safe Working Load (SWL). * N.B.: The SWL of the platform is certified at a load centre of 600mm from the rear edge of the platform. If the Centre of Gravity (CoG) of the load is located at a distance greater than 600mm from the rear edge, the SWL should be down-rated according to the chart shown in Figure 4. * Ensure that the load does not overhang the platform. * Ensure that the load is stable and secure on the platform throughout the operational cycle. * N.B.: Special care must be taken with wheeled loads such as roll pallets. * Do not subject the lift to shock loading by dropping heavy loads onto the platform. * Do not run forklifts etc. onto the platform even when the tail-lift is on the ground. * Do not rest the leading edge of the platform on a loading dock for use as a bridge between the vehicle and the loading dock. * Do not move the vehicle with a load on the platform. * Do not move the vehicle when the platform is not properly stowed. * N.B.: If the platform is dropped vertically below vehicle floor level to enable direct loading (e.g., at a loading dock), ensure that the vehicle is not moved until the platform has been raised to give sufficient clearance to prevent damage to the platform pivot blades.
a. Raise the platform to a convenient height for closing. * N.B.: Ensure that the traveloc retaining angle on the O/S platform blade locates below the traveloc plate on the column when folding to a vertical position. b. Stand to the left-hand side of the platform, lift the Anti-tilt Latch Lever (Figure 2) and lift the platform up to the vertical position where the platform retaining catch will automatically engage (see Figure 3: Traveloc engaged). * N.B.: Ensure that the platform retaining catch is properly engaged before releasing the platform. c. Press the "UP" button to raise the lift to the column stops where the platform will automatically engage the Traveloc.
| Brand | Iveco |
|---|---|
| Model | DAILY VAN |
| Category | Automobile |
| Language | English |