Do you have a question about the iWALKFree iWALK 2.0 and is the answer not in the manual?
Assess physical abilities, limitations, and age suitability for the iWALK 2.0.
Guidelines for selecting the correct size based on user height and leg length.
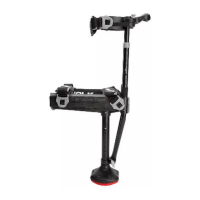
Join the main upper and lower parts of the iWALK 2.0 by inserting tubes.
Learn how to securely attach support tubes and the lower assembly.
Guide on installing the clamp, bolt, nut, and thumb screw.
Adjust height, strap tightness, and vertical alignment for proper fit.
Correctly orient the foot of the crutch for optimal performance and safety.
Set the correct height for the lower leg section of the crutch.
Adjust the upper leg section to ensure proper height and support.
Achieve the correct slight outward angle for the crutch.
Fine-tune thigh support placement for comfort and alignment.
Understand and adjust the length and tension of the straps.
Securely tighten all straps for maximum support and stability.
Proper procedure for loosening and removing the iWALK 2.0.
Final checks on height, tightness, and alignment before use.
Guidelines for choosing a suitable environment and starting stance.
Tips to prevent common errors like looking down or not committing weight.
Practice fundamental steps like leaning and stepping forward.
Transition from practice to actual walking with the iWALK 2.0.
Re-adjust straps for optimal tension after initial use.
Transition from learning settings to maximum efficiency settings.
Instructions for safely ascending and descending stairs.
Extend tubes and nest thigh supports for repackaging.
Securely attach the knee platform to the upper assembly.
Nest lower assembly tubes and place small parts bag.
Slide crutch into bag and place user guide for shipping.
Find email and phone number for assistance.
| Product Name | iWALKFree iWALK 2.0 |
|---|---|
| Category | Mobility Aid |
| Type | Hands-Free Crutch |
| Adjustable Height | Yes |
| Color | Black |
| Material | Aluminum, Plastic |
| Intended Use | Lower leg injuries |
| Weight Capacity | Up to 275 lbs (125 kg) |