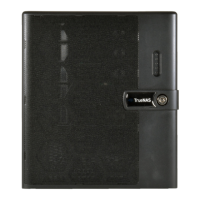
The TrueNAS Mini Storage Appliance is a network-attached storage (NAS) solution designed for various data management needs, offering a blend of performance, reliability, and ease of use. This guide focuses on the 3rd Generation Mini Family, including the Mini X, Mini X+, and Mini XL+ models. These devices are built to support iXsystems-qualified HDDs and SSDs, specifically those designed for NAS environments, which are engineered to run cooler and quieter than standard desktop drives.
Function Description:
The TrueNAS Mini appliances serve as centralized storage systems, providing a platform for data storage, sharing, and management over a network. They support all features of the TrueNAS software, offering a robust and flexible environment for both home and small business users. The devices are designed for hot-swappable drives, allowing for easy expansion and maintenance without system downtime. They can be managed through a web interface, offering both TrueNAS CORE and TrueNAS SCALE options, and also provide console access for initial setup and troubleshooting.
Important Technical Specifications:
TrueNAS Mini X and Mini X+:
- Drive Bays: Five hot-swappable 3.5" drive bays. Optional 2.5" drive adapters are available for these bays.
- Additional SSD Bays: Two dedicated 2.5" drive bays for SSDs.
- USB Ports: Two USB 2.0 ports on the front panel. The Mini X also has a USB 3.0 port on the rear, while the Mini X+ has two USB 2.0 ports on the rear.
- Network Ports:
- Mini X: Four Gigabit Ethernet (GbE) network ports.
- Mini X+: Two 10 Gigabit Ethernet (GbE) network ports.
- Video Output: VGA connector.
- Management Port: IPMI (Intelligent Platform Management Interface) out-of-band management port for remote administration.
- Serial Port: The Mini X includes a serial port.
- Indicators: Power indicator, disk activity light, network activity indicators, and a unit identification indicator.
- Buttons: Power button and reset button.
TrueNAS Mini XL+:
- Drive Bays: Eight hot-swappable 3.5" drive bays. Optional 2.5" drive adapters are available for these bays.
- Additional SSD Bays: One dedicated 2.5" drive bay for SSDs.
- USB Ports: One USB 3.0 port and one USB 2.0 port on the front panel. Two USB 2.0 ports on the rear.
- Network Ports: Two 10 Gigabit Ethernet (GbE) network ports.
- Video Output: VGA connector.
- Management Port: IPMI out-of-band management port.
- Indicators: Power indicator, disk activity light, network activity indicators, and a unit identification indicator.
- Buttons: Power button and reset button.
General Specifications:
- Power: Standard power connector.
- Chassis: Similar chassis and front panels across the Mini family, with variations in internal components and port locations.
- Security: Drive bay doors can be locked using provided keys to prevent unauthorized drive removal.
Usage Features:
Drive Installation and Removal:
- 3.5" Hard Drives: Drive trays are easily removed by releasing a latch (pushing a circular button, swinging the latch left, then pulling). Hard drives are mounted into trays with four screws. Trays are inserted gently until they stop, then the latch is swung closed to lock. Empty bays should retain filler inserts for protection.
- 2.5" SSDs (Mini X/X+): These models have two dedicated 2.5" drive bays. To remove a tray, slide the button left, swing the latch right, and slide the tray out. Filler trays are removed by unscrewing them. SSDs are secured into the trays with provided screws. Reinsertion follows the reverse process, ensuring the latch is closed until it locks.
- 2.5" SSDs (Mini XL+): This model has a single dedicated 2.5" SSD bay. The removal process is similar to the Mini X/X+ SSD trays. SSDs are attached to the tray with four screws from the bottom, after removing the SSD tray filler.
- 3.5" to 2.5" SSD Adapters: Users can convert 3.5" hard drive trays into 2.5" SSD trays using adapters. SSDs are attached to the adapter with M3 screws, ensuring the connector faces outward. The adapter is then placed in a drive tray and secured with an M3 screw. The entire assembly is then installed into a 3.5" drive bay.
Power and Networking:
- Power On/Off: The power button turns the system on. Pressing and holding the power button during operation performs a hard power off. The reset button reboots the system. By default, the Mini powers on automatically when connected to a live power source and restores power after an outage.
- Network Connection: Connect a network cable to a gigabit networking port on the Mini and to a router or switch.
- High Draw USB Devices: It is crucial to unplug high-draw USB devices (e.g., bus-powered USB hard drives) from the rear USB ports before powering off the Mini to prevent exceeding the power supply's +5Vsb line specifications.
Console and Web Interface:
- Console Setup: A VGA monitor and USB keyboard can be connected for direct console access, providing a menu for configuring network interfaces, DNS, resetting passwords, and more.
- Web Interface Access: The TrueNAS web interface can be accessed via
truenas.local or the Mini's IP address from a web browser on the same network.
- Default Credentials:
- TrueNAS CORE: Username
root, Password abcd1234.
- TrueNAS SCALE: Username
admin, Password abcd1234.
- Security: It is highly recommended to change default passwords immediately after the first login.
- Hostname: The hostname can be changed in the web UI under Network > Global Configuration.
- Out-of-Band Management (OOBM): IPMI provides remote management capabilities. OOBM credentials are randomized and located on the back of the chassis. It is recommended to place IPMI on a separate, secure network without Internet access.
Maintenance Features:
Firmware Management:
- BIOS and IPMI Firmware: The system comes with optimal BIOS and IPMI firmware. Users are strongly advised NOT to upgrade these firmwares unless specifically instructed by iXsystems support, as improper upgrades can lead to system instability.
Software Updates and Versions:
- Changing TrueNAS Versions: New and legacy versions of TrueNAS CORE and SCALE are available for download from the TrueNAS website. To install a different version, download the ISO file, flash it to a USB drive using tools like BalenaEtcher or Rufus, plug the USB drive into the Mini, and select it from the boot menu during system startup. Installation instructions are available on the TrueNAS Documentation Hub.
Troubleshooting and Support:
- Documentation Hub: Comprehensive software configuration and usage instructions, as well as additional hardware guides, are available on the TrueNAS Documentation Hub.
- Community Forums: Users can interact with other TrueNAS users and discuss configurations on the TrueNAS Community forums.
- Contacting iXsystems Support: For shipping damage, missing parts, or technical issues, users can contact iXsystems support via email or phone. Support contact information, including hours of operation and international numbers, is provided in the manual. It's important to have hardware serial numbers ready for quick reference.