A
Andrea PattersonAug 9, 2025
How to fix incorrect tyre inflation in Jabiru Aircrafts?
- MMatthew MejiaAug 9, 2025
To correct incorrect tyre inflation on your Jabiru Aircrafts, inflate the tyre to the pressure indicated in the manual.
How to fix incorrect tyre inflation in Jabiru Aircrafts?
To correct incorrect tyre inflation on your Jabiru Aircrafts, inflate the tyre to the pressure indicated in the manual.
What to do if main wheels are out of alignment on Jabiru j200?
If the main wheels of your Jabiru Aircrafts are out of alignment, align them according to the specifications provided in the manual.
What to do if landing gear attaching parts are not tight on Jabiru j200?
If the landing gear attaching parts on your Jabiru Aircrafts are not tight: * Tighten any loose parts. * Replace any defective parts.
Why does my Jabiru Toy aircraft lean to one side?
Your Jabiru Toy aircraft may lean to one side due to several reasons: * Incorrect tyre inflation: Inflate the tyres to the pressure indicated. * Loose landing gear attaching parts: Tighten any loose parts and replace any defective ones. * Leg de-lamination: Install new part(s).
Why do the tyres on my Jabiru Toy wear excessively?
Excessive tyre wear on your Jabiru Toy can be attributed to: * Incorrect tyre inflation: Inflate the tyres to the recommended pressure. * Main wheels out of alignment: Align the main wheels as specified. * Leg de-lamination: Install new part(s).
Outlines responsibilities for LSA owners/operators regarding maintenance and airworthiness.
Lists recommended bolt torque values for all J-series aircraft, specifying conditions.
Details specific Loctite products and their applications in aircraft maintenance.
Details procedures for towing, jacking, and handling the aircraft.
Covers mandatory inspections for airframe, control cables, and engine bay hoses.
Provides a chart detailing inspection intervals for various aircraft systems.
Offers guidance on critical inspections for moving parts, metal parts, wiring, and bolts.
Details steps for engine run-up before inspection, observing critical parameters.
Provides guidance for the 100-hourly propeller inspection, including visual checks.
Outlines guidance for the 100-hourly inspection of the engine compartment.
Provides guidance for the 100-hourly inspection of the aircraft fuel system.
Details the 100-hourly inspection procedures for the aircraft landing gear.
Provides guidance for the 100-hourly inspection of the aircraft airframe.
Details the 100-hourly inspection of primary and secondary control systems.
Describes the procedure for weighing the aircraft and determining its center of gravity.
Details inspections and replacement criteria for primary control cables.
Provides inspections to address potential control surface jamming issues.
Outlines the process for checking and adjusting main wheel alignment.
Details the procedure for setting up fuel gauge decals for accurate fuel indication.
Explains how to calibrate inbuilt fuel gauges in Dynon EMS D10 units to Jabiru float gauges.
Describes how to correct free-play in wing and strut attachment points.
Explains the installation and inspection of the ShockWatch indicator for overload detection.
Provides procedures for aiming landing lights for Night-VFR operations.
Provides a procedure for removing the main undercarriage, including jacking steps.
Describes the main wheel assembly and provides steps for removal and disassembly.
Describes the main gear leg and provides removal and installation procedures.
Provides troubleshooting guidance for common main undercarriage issues.
Describes the nose wheel assembly and provides removal/installation steps.
Describes the nose gear leg and provides removal, inspection, and installation steps.
Provides troubleshooting guidance for common nose leg issues like shimmy.
Describes the brake master cylinder and provides removal/installation procedures.
Describes wheel brake assemblies, including disc and caliper details.
Provides procedures for installing brake pad linings using rivets.
Details the procedure for bleeding the aircraft brake system.
Explains how to adjust brake pads, with a warning for specific brake assemblies.
Provides troubleshooting steps for common brake system issues.
Describes control cables and provides removal, inspection, and installation procedures.
Describes aileron construction and provides removal, inspection, and balancing procedures.
Details the procedure for rigging ailerons using templates and adjustments.
Describes the electric flap drive assembly, including its removal and inspection.
Details specific flap rigging requirements for the J170-SP model using a template.
Details the control column description, removal, installation, and inspection.
Describes the elevator construction and provides removal, installation, and balancing procedures.
Describes control cables and provides removal, inspection, and installation procedures.
Details the elevator trim control lever assembly and its removal/installation.
Describes trim control cables and provides removal, inspection, and installation procedures.
Details the rudder centring system and its removal, inspection, and installation.
Describes rudder control cables and provides removal, inspection, and installation procedures.
Details rudder rigging procedures using templates and measurements.
Describes flexible hoses used for fuel and oil, and provides removal/inspection steps.
Provides installation procedures for propellers, including torque values.
Details the procedure for propeller balancing using specific tools and tolerances.
Describes pitot/static systems, including water traps and maintenance importance.
Describes necessary repairs for sub-assemblies and components, emphasizing consultation.
Sets forth mandatory replacement times, inspection intervals, and procedures.
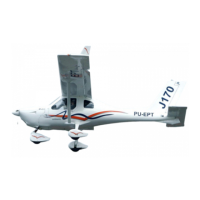
| Type | Light Aircraft |
|---|---|
| Manufacturer | Jabiru Aircraft |
| Seating Capacity | 2 |
| Engine | Jabiru 2200 |
| Length | 6.10 m (20 ft 0 in) |
| Max Takeoff Weight | 600 kg |