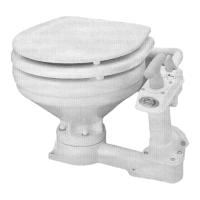
Positioning and Mounting
(continued)
small bead of silicone or latex sealant may
be
applied around base
where it
mntads the mounting surface to prevent moisNre
horn
getting
under the toilet base.
NOTICE: Do not use
Polysulfide base sealants because they may
chemically attack the plastic which can result in breakage.
Plumbing
If
lnstalltng new Inlet thm-hulllseacock, ensure that 11 1s posltloned on
a pan of the hull
wh~ch 1s wetted at all anglos of heel or blm and hee of
water b~rbulence at anv hull s&. If dischamina waste overboard
(che& legal restrictio& for o;erboard dlschario): ensure discharge
thm-hulVseaco& Is both aft of and hlgher than the lnlet mm-hull/
seacock. All inlet
dmbiia
shwld
be
a minimwn of
34'
ID and
dlscharge pumoing a mlnhum of 1-112' ID. All hose ends should be
double damped with stainless steel hose clamps
If
the toilot is above
waterline mute hoses to
seacocks, holding tank or treatment device via
-
a route as direct as poss~ble However, for maxlmum sealing effoct on
the
dlschargejoker valve. ~t
IS
recommended that the d~scharge hose is
looped upward about
8'
above the discharm elbow before it descends
to its
teril~tion point All bends and elbows in plumbing should
be
kept to a minimum. It should not bo
necessary
to use any sealing
compound when attaching hoses to the inlet
or
discharge porn.
Flood hazard. If toilet is Installed below the
waterline,
it
must be Installed with pmperly
positioned vented loops. Failure to do
so
can
result in flooding which can cause loss of
If the toilet is,
or
can
be,
below the waterline, at any normal (induding
static) attitude of vessel heel
and/or trim. a
314"
vented
IWD
must be
Installed In a longth of hose mnnecnng the flush~ng
io the rear of
me bowl The
vonted lwp flnlng must
be
possoned
8'
above the
waterline at all
anales of heel and trim. To amm~lish this. remove the
314. hose suppllod wlth toilet and replacs wlth a new lengi of hose
long enough to properly
position the vented loop.
If
the toilet is
plumbed for overboard discharge, a
1-112" vented loop must
be
installed in the discharge hose. The waste vented loop fitting must
MAlNTENANCElSERVlCE INSTRUCTIONS
Maintenance
Periodic maintenance is generally not required; however, after long
periods of non-use, the toilet may be easier to operate if lubricated.
To do this, fill bowl half-way with warm water and add a few dmps of
mineral oil or
baby oil. With
the
wetldw bowl selector in the dw bowl
poslbon, empty bowl uslng long complete strokes To wlntenzi tollet.
operate the pump In the dry bowl mo& to evacuate as much water as
possible. Drain the remaining water from the base by removing the
base plug or sponge from bottom of bowl. if charging the holding tank
with anti-freeze by pumping it through the toilet, use only ethylene
glycol based anti-freeze. To use petroleum based anti-freeze can
cause damage to the internal rubber toilet parts.
Service
Before ~erformina anv service. flush the toilet lona enouoh to ensure
all
wade 1s flushid frbm the dlschargo hose ~lo;e bothlnlet and
dlscharge (11 appltcaolc) seacocks and put a 'DO NOT OPEN"
notice on each to guard against accidental opening and flooding
while service is being performed.
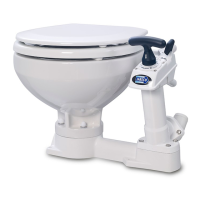
SEAL REPLACEMENT
-
Ltfl handle and wrap rod with one t~rn
o! tape just under the handle. Gently ras iston rod on lape)
w
th Cers and unscrew handle.
HOLB
PI~ON
ROD
A
TALL
TIMI&
OR IT MAY DROP DOWN INTO PUMP. Remove
bumper washer and unscrew and remove
seallrod guide
assembly. Wrap threads
01
piston rod with one turn of tape to
protect new seal and install new
reallrod guide assemoly.
Remove tape from threads and reinstall bumper washer and
handle.
Tiahten handle snugly (do not overlighten) and remove
-.
. -.
remainin fa e.
MPJOR
~V~RHAUL
-
Loosen hose clam~s on inlet hose and
remove it from the
ump Remove bowl link hose from real of
pump assembly.
&move the two screws that secure the
also
be
positioned
8'
above me waterline at all angles of heel
ancVor trim and ideally should
be
located
as
close to the toilet
as
~racbl.
(See
WARNING.)
Flood hazard. Close
Inlet and outlet seearcks
prlor to disassembllng toilet Failure to do
so
can result in flooding which can cause loss of
property and
Ufe.
I
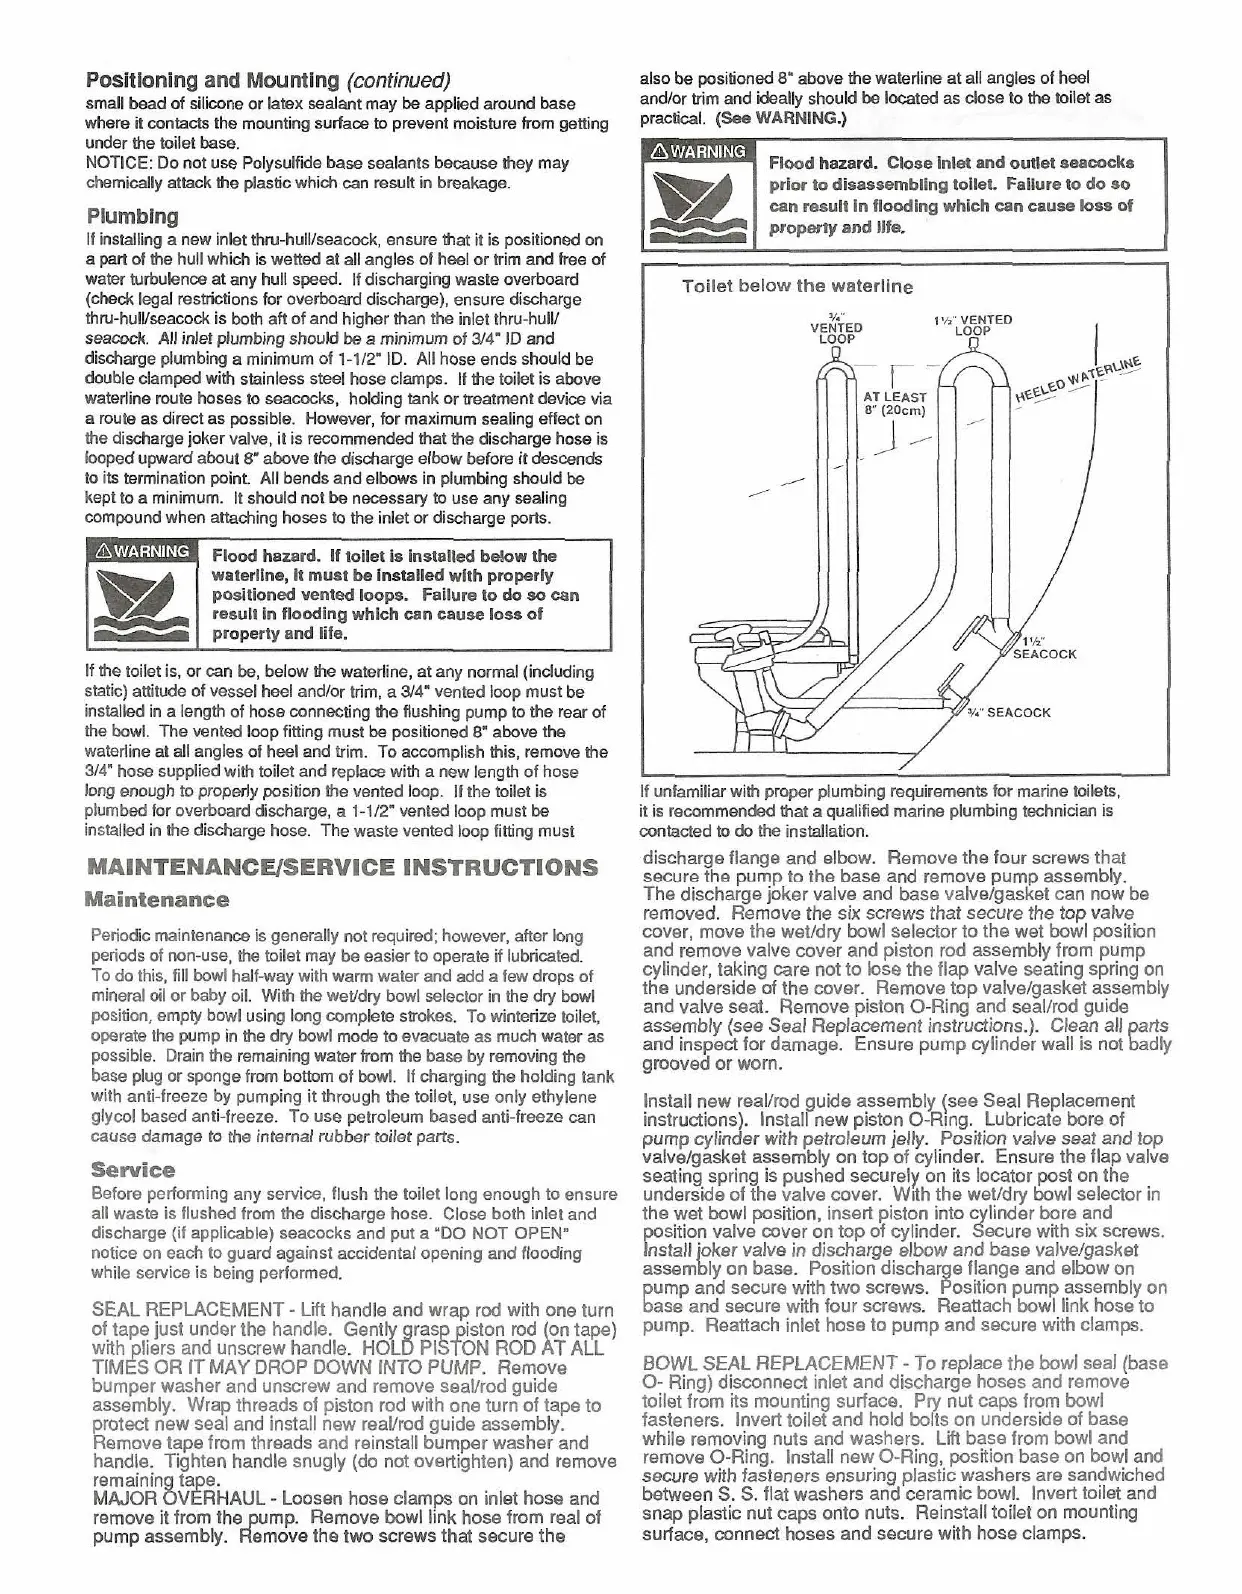
Toilet below the
waterline
I
Y."
VENTEO
I'/<'
VENTEO
LOOP
LOOP
n
I
I
I
/
If unfamiliar with proper plumbing requirements for marine toilets.
it is recommended that a qualified marine plumbing technician is
contacted to
&
the installation.
discharge flange and elbow. Remove the four screws that
secure the pump to the base and remove pump assembly.
The discharge joker valve and base
valvelgasket can now be
removed. Remove the six screws that secure the top valve
cover, move the
wetldry bowl selector to the wet bowl position
and remove valve cover and piston rod assembly from pump
cylinder, taking care not to lose the flap valve seating spring on
the underside
of
the cover. Remove top valvelgasket assembly
and valve seat. Remove piston 0-Ring and seallrod guide
assembly (see Seal Replacement instructions.). Clean all
and inspect for damage. Ensure pump cylinder wall is not
g$
grooved or worn.
lnstall new
reallrod guide assembly (see Seal Replacement
instruct~ons). Install new plston 0-R~ng. Lubricate bore of
pump cylinder with
petroleum jelly. Position valve
seat
and top
valvelaasket assemblv on top of cvlinder. Ensure the flap valve
seating spring is
pushbd securely on its locator post on the
underside of the valve cover.
With the wetld~ bowl selector in
~
~
~~
~
the wet bowl posit;on, inserl piston into
lind6r bore and
'3
postion valve cover on top of qlinder.
ec-re witn six screws.
Install oker valve
in
discharge e.bow and base varve/gasket
assembly on base. Position o.scharge flange and elbow on
gump and secure with two screws. Position pump assembly on
ase and secure with four screws. Reattach bowl link hose to
pump. Reattach inlet hose to pump and secure with clamps,
BOWL SEAL REPLACEMENT
-
To replace rhe bowl seal (base
0-
Rng) disconnect inlet and discharge hoses and remove
toilet
from its mounting surface. Pry nut caps from bowl
fasteners.
Invert toilet and hold bolts on underside of base
while removing nuts and washers.
Lii
base from bowl and
remove
0-Rina. Install new 0-Rina. wsition base on bowl and
secure with
faieners ensuring plagi~c washers are sandw~cned
between S. S. flat washers and ceramic bowl. lnven toilet and
snap plastic nut caps onto nuts. Reinstall toilet on
mount~ng
sufiace, connect hoses and secure with hose clamps.
 Loading...