1
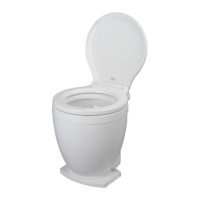
ELECTRIC TOILET BASE KIT
FEATURES
• HighCapacityMaceratorandBowlScavengerPump
• FlexibleImpellerFlushPump
• PermanentMagnetTypeMotor,FullyEnclosed,
withStainlessSteelShaft
• ComplieswithUSCG183.410andISO8846
MARINEforIgnitionProtection
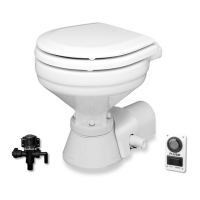
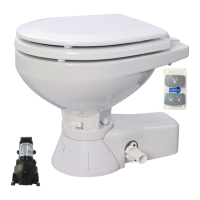
• SimplePushButtonSwitchincluded
• AllCorrosionResistantMaterialsforMarineUse
SPECIFICATIONS
• 5/8"or3/4"Inlet,1"OutletBackFlowCheckValve
inDischarge
• 1"x1-1/2"HoseAdaptorincludedtoadaptto1-1/2"
wasteplumbing
• ThruFlowApprox.1-1/2Qts.per5Secondsof
Operation
VARIATIONS
MODELNO. DESCRIPTION
37010-0092* ToiletConversion,12VoltEMC
37010-0097* ToiletConversion,24VoltEMC
*This model is Marked and complies with EN50081-1 for
suppression of electro-magnetic interference.
APPLICATION
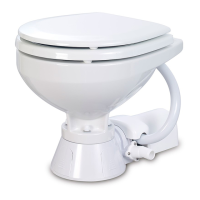
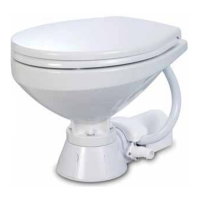
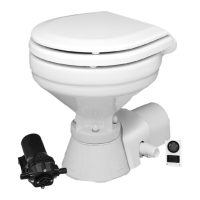
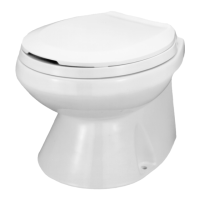
TheJabscoelectrictoiletmaybeinstalledaboveorbelow
thewaterline.Flushpumpisself-primingwithaverticallift
up to 4 feet; discharge macerator pump can operate
againstaverticalheadupto4feet.
The37010seriescanbeusedtoconverttheRaritanPH
orCompact,Wilcox-Crittenden“HeadMate”,GrocoHC,
Brydon No. 9127,9128,orNo. 59128andvirtuallyany
other model marine toilet using the “standard” bowl
configuration with a 3-3/4" diameter bolt circle, 4 hole
patterninthebase.Checkthedimensionaldrawingtobe
surethebowlwillfittheflangedimensionsasshown.
The37010seriesincludesthecompletemotorizedbase
assembly,bowlgasket,fourboltsandwashersforbowl,
two5/8"to3/4"pumpportadaptors,3/4"whitehose,1"
to1-1/2"dischargeportadaptor,andmomentarycontrol
switch.
ASSEMBLY
1. Overallheightafterconversionmayincreaseupto1"
onsomemodels,checktobesureadequatespaceis
availableiflocatedunderseatsorbunks.
2. Screw 6mm machine screws with starlock washer
under each head into nuts positioned in the hex
recessonthetopofthebasetoformbowlattachment
studs(seeexplodedview).
3. Removecompletemanualbaseassemblyandmount
bowlonJabscomotorizedbase.NOTE:M6x50mm
longmachinescrewssuppliedaresuitableformost
bowls;howeversomebowlflangesareheavierand
longermachinescrewsmustbe used.Place plastic
washers against bowl flange, positioning base for
mostconvenienthoseconnectionarrangement.
4. Connect pump outlet to rear bowl connection with
3/4" hose. Install the hose clamp on the pump
dischargeportonly.
5. Positioncompletetoiletassemblyandfastensecurely
onflatsurface.Besurenottowarptoiletbasewhen
tighteningtoiletbasedown.
6. Connectexistinginlethosetopumpinletport.A5/8"
to 3/4" sleeve adaptor is included for fitting to
commonly used 3/4" inlet hose size. Make sure all
connectionsareairtightandfreeofsharpbendsor
restrictions.
7. Connect1"dischargehosetodischargeport(1-1/2"
hose when using 1-1/2" discharge adaptor) and
make suitable connection to holding tank or other
dischargesystem.Avoidsharpbendsorrestrictions.
8. For installation below the waterline, install a vented
loopintheintakehoseandpositionabout8"above
thewaterlineatallanglesofheelortrim.**Avented
loopshouldalsobeusedfordischargeifconnected
toathru-hullfitting.
9. For installations above water line, make a loop in
dischargelineabout8inchesabovebaseofbowlto
retainwaterinbowl.Someinstallationsmayneeda
check valve in the intake line to aid primeability of
flushwaterpump.
10. Ifthru-hullseacockscannotbeconvenientlyoperated
fromtoiletlocation,installsuitableshut-offvalvesfor
inletanddischargeconnections.
** In some installations when a vented loop is installed in the
intake hose, the flushing pump primeability and flow
characteristics are reduced and may adversely affect toilet
function. To restore pump performance, connect a solenoid
valve (Jabsco No. 37068-2000) to the vent air inlet to
interrupt the air supply during the flush cycle. Screw the 1/4”
brass connector onto the vented loop and wire the solenoid
in parallel with the toilet motor. See Diagram 1 for installation
and wiring illustration.
Model 37010-Se ries
Conversion Kits