-20-
20:
~~t.J
THREAD TENSION
*
1I'W111lUii¥~~*1J
t,
J:T
l
tiln~~:n~t-f:
o
t~r~~~~:hiPiJ
=l
ri7:JO.
I
5~
0.2Nli:..fl o
2,
iJ.'iPJ~
§f.
- ~
•JL(
1J
~
8
ft
lli!J
~~~
~
3'Hf:J
!fki
tl&"
:ill
ft
'JI~ffft':J
~
th!
o
~u
*
1-nrn
~
i.J,
m
:±1
ff.J
if.,
111
i~~~m
·ti;;*:n~
.
3,
~f~fi$A~-~~~.
mmm
-
M*
h
~
@)
iffi)
fj
0
*
~ilqit!~~J~l~L()J
l,
JI
BL(1J
~~
~f:
0
reJ~
~
~*7J
ip.]
-'n
Y!J0.4---0.5N
/i
t;
.
2,
9:!¥~~
-
~'*:t
Jfm:
8
;tnm
=
~
.
HL(:JJ~
@l
c~Jim
-
W~-
~
.
cm
=
~1L(7Jrn{~Wj*i
-
®)
3,
mm
-
~•:n•
8
illfi~~.
~ll•w~r£~~
-
4,
JfJ
it
-
~;;~
1J
l*
@l
iJ.~
-
'i'J
'Y-
~t
M,
:hill~
rt
U!Ht'>J
tXt
1m
.
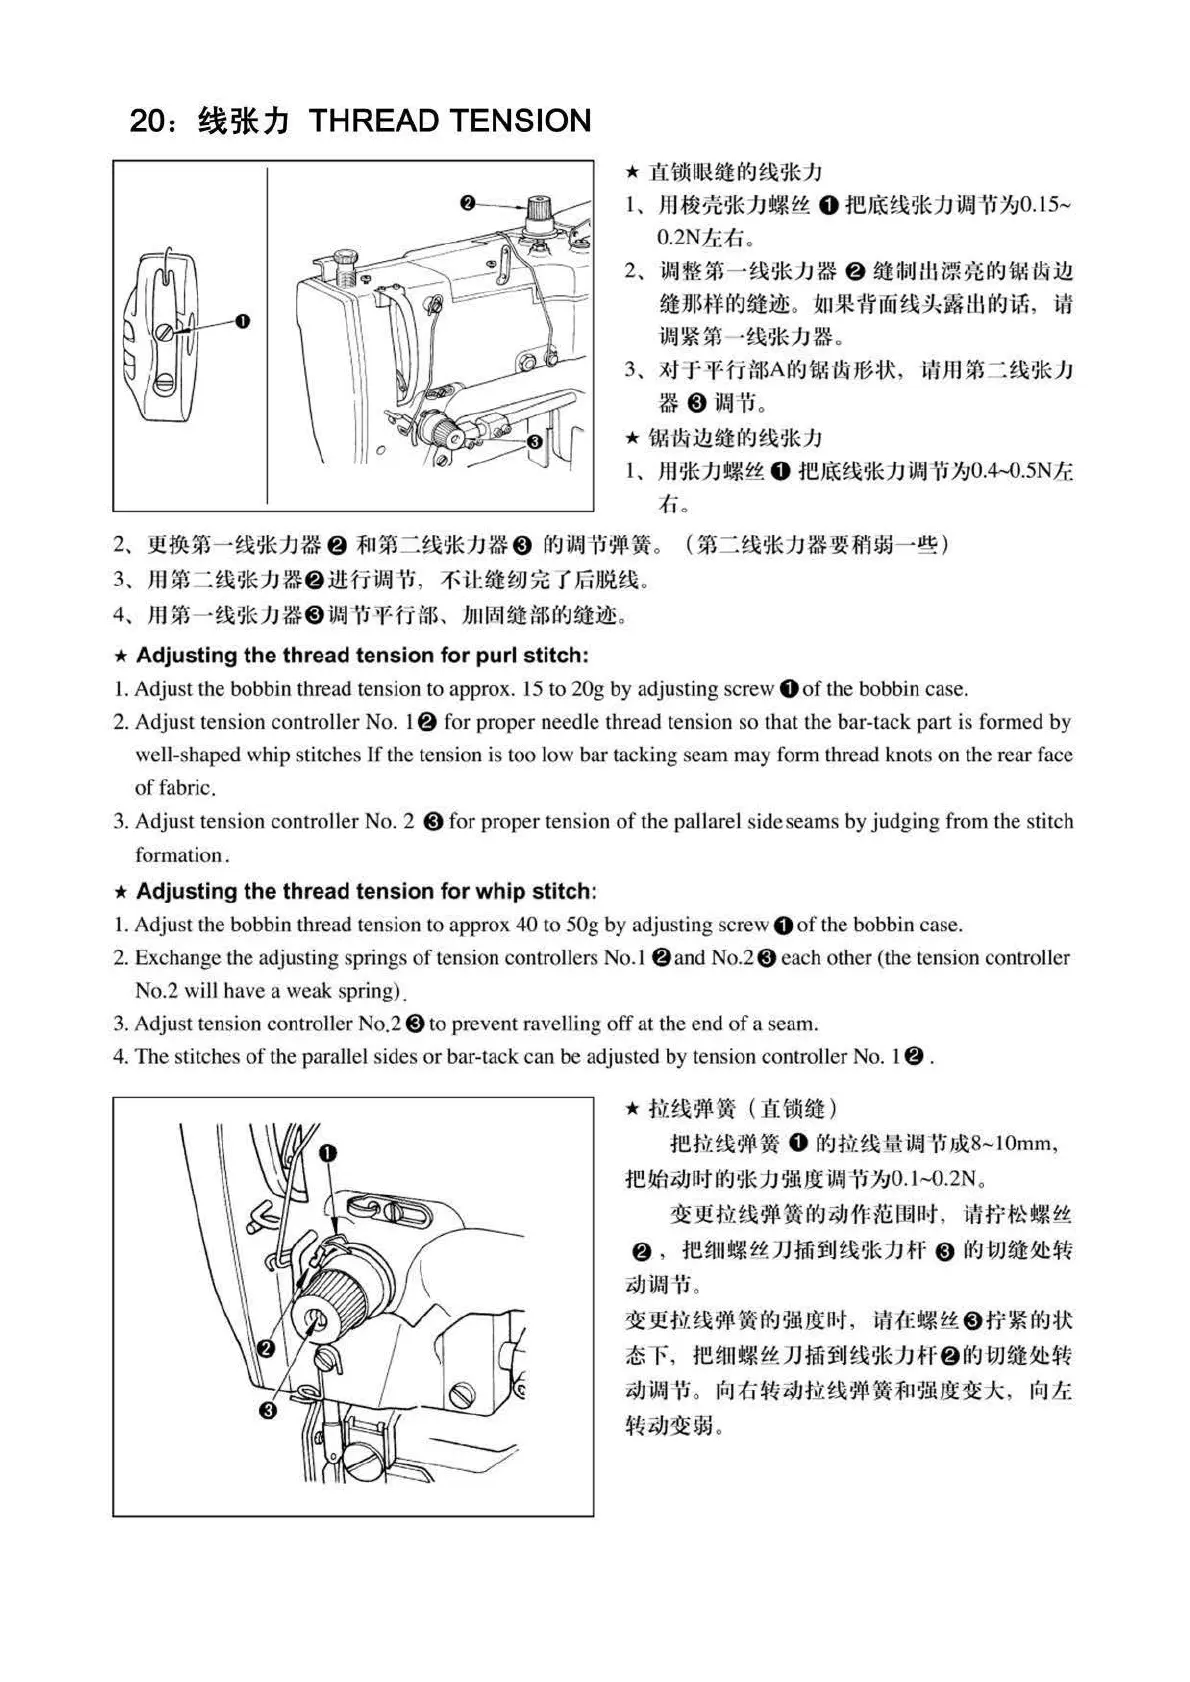
* Adjusting the thread tension for purl stitch:
1. Adjust the bobbin thread tension to approx. 15 to
20g
by adjusting scr
ew
O
of
the bobbin case.
2.
Adjust
tension controller No. 18 for proper ne
ed
le thread tension
so
that
the bar-tack
part
is formed by
well-shaped whip stitches
If
the tension
is
too l
ow
bar tacking seam may form thre
ad
knots on the rear face
offabdc.
3.
Adjust tension
co
ntroll
er
No. 2
@)
for
proper
tension
of
the paUar
e]
side
seams by
judging
fr
om
the stitch
formation.
* Adjusting the thread tension for whip stitch:
I. Adjust the bobbin thread tension to approx
40
to
50g
by adjusting screw 0
of
the bobbin case.
2. Exchange the adjusting springs
of
tension controllers No.I 8 and No.2
@)
each other
(t
he tension contro
ll
er
No.2 will have a weak
sp
ring).
3.
Adjust tension
co
ntroller No.2
@)
to prevent ravelling
off
at the end
of
a seam.
4.
The
stitches
of
the parallel sides
or
bar-tack can
be
adjusted by tension contro
ll
er
No. 18 .
*
:fiHfl
~lp.
1tt
( 1f.
1JMti
)
1~-tfl~~~l~
0
(;I':J:J'Q:t1Ui
1
·
i~~
'r'i
nX,8~
lOmm,
te~l;IJ!r.t~t':J~~::1J
~li'tJJt
ir.iJ
fi:>'!JO.l,..,0.2N
.
~E*M~-~~
~rum~
.
m~~•*
8 .
re~~~n•~~*~#
8
~~•~•
4/J~-',
':i
.
~~~~~2~~-~.
~U~*
8
W~~~
~~.
m~•~nm~M*hff
8
~~•~•
~-~0
~~-~~M--~~~~*
·
~~
$!i
i;l
}
~
00
•
From the library of: Superior Sewing Machine & Supply LLC