Do you have a question about the Jacuzzi AT1201-DF and is the answer not in the manual?
Handle with care, avoid dropping, and be aware of hazardous gases when installing.
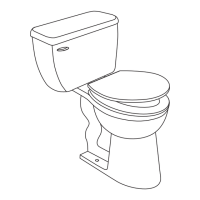
Ensure all parts are present and contact customer service for missing or damaged items.
Insert floor flange brass bolts into the toilet flange with bolt heads down and threaded ends facing up.
Place wax ring over the raised outlet ring of the bowl, pressing firmly to adhere.
Lower the bowl onto the floor flange bolts, ensuring it's level and pressing to create a watertight seal.
Attach retaining washers, metal washers, and small nuts to floor flange bolts and tighten securely.
Cut excess floor flange brass bolts to ensure floor bolt caps fit, leaving no more than 1/4 inch.
Install foam gasket, rubber washer, brass bolts, metal washers, and nuts to attach the tank to the bowl.
Connect the water supply line to the tank and shut-off valve, tightening securely but not overtightening.
Adjust the water level by turning the adjustment inner pipe on the fill valve if needed.
Place seat on bowl, insert seat bolts with washers, and secure with seat nuts.
Provides 1.6 gallon for power flush or 1.0 gallon for water savings.
Clean with mild soap and water; avoid abrasive cleaners and in-tank chlorine cleaners.
Covers manufacturing defects for one year; excludes installation errors, water damage, or misuse.