Page 7
9. Turn on booster pump.
10. At pool side, read the pressure gauge installed on
cleaner hose. Pressure should be set (see Table
1) for the length of hose in your pool.
11. If the pressure is too low, replace the speed
adjustment washer with "D" or "E" speed adjust-
ment washer (follow steps 1-10). Each letter up
will increase pressure approximately 2 psi.
12 If the pressure is too high, replace the speed
adjustment washer with "A" or "B" speed adjust-
ment washer (follow steps 1-10). Each letter
down will decrease pressure approximately 2 psi.
13. When the Ray-Vac speed is properly adjusted,
turn off all pumps.
14. Remove the pressure gauge and filter screen
case from the pool wall. Unthread the quick
disconnect fitting from the filter screen case.
Remove the washer and speed adjustment disk.
Place the washer back into the quick
disconnect fitting.
15. Unthread the filter screen case from the end of
the hose. Thread the quick disconnect fitting back
onto the hose end (see Fig. 6).
16. Push the quick disconnect fitting into the pool wall
fitting.
17. Shake the water out of the pressure gauge and
store the unit for future adjustment (if necessary).
18. Turn on the filter pump to prime the system.
When there is pressure in the system, turn on the
booster pump.
19. Check operation of the cleaner.
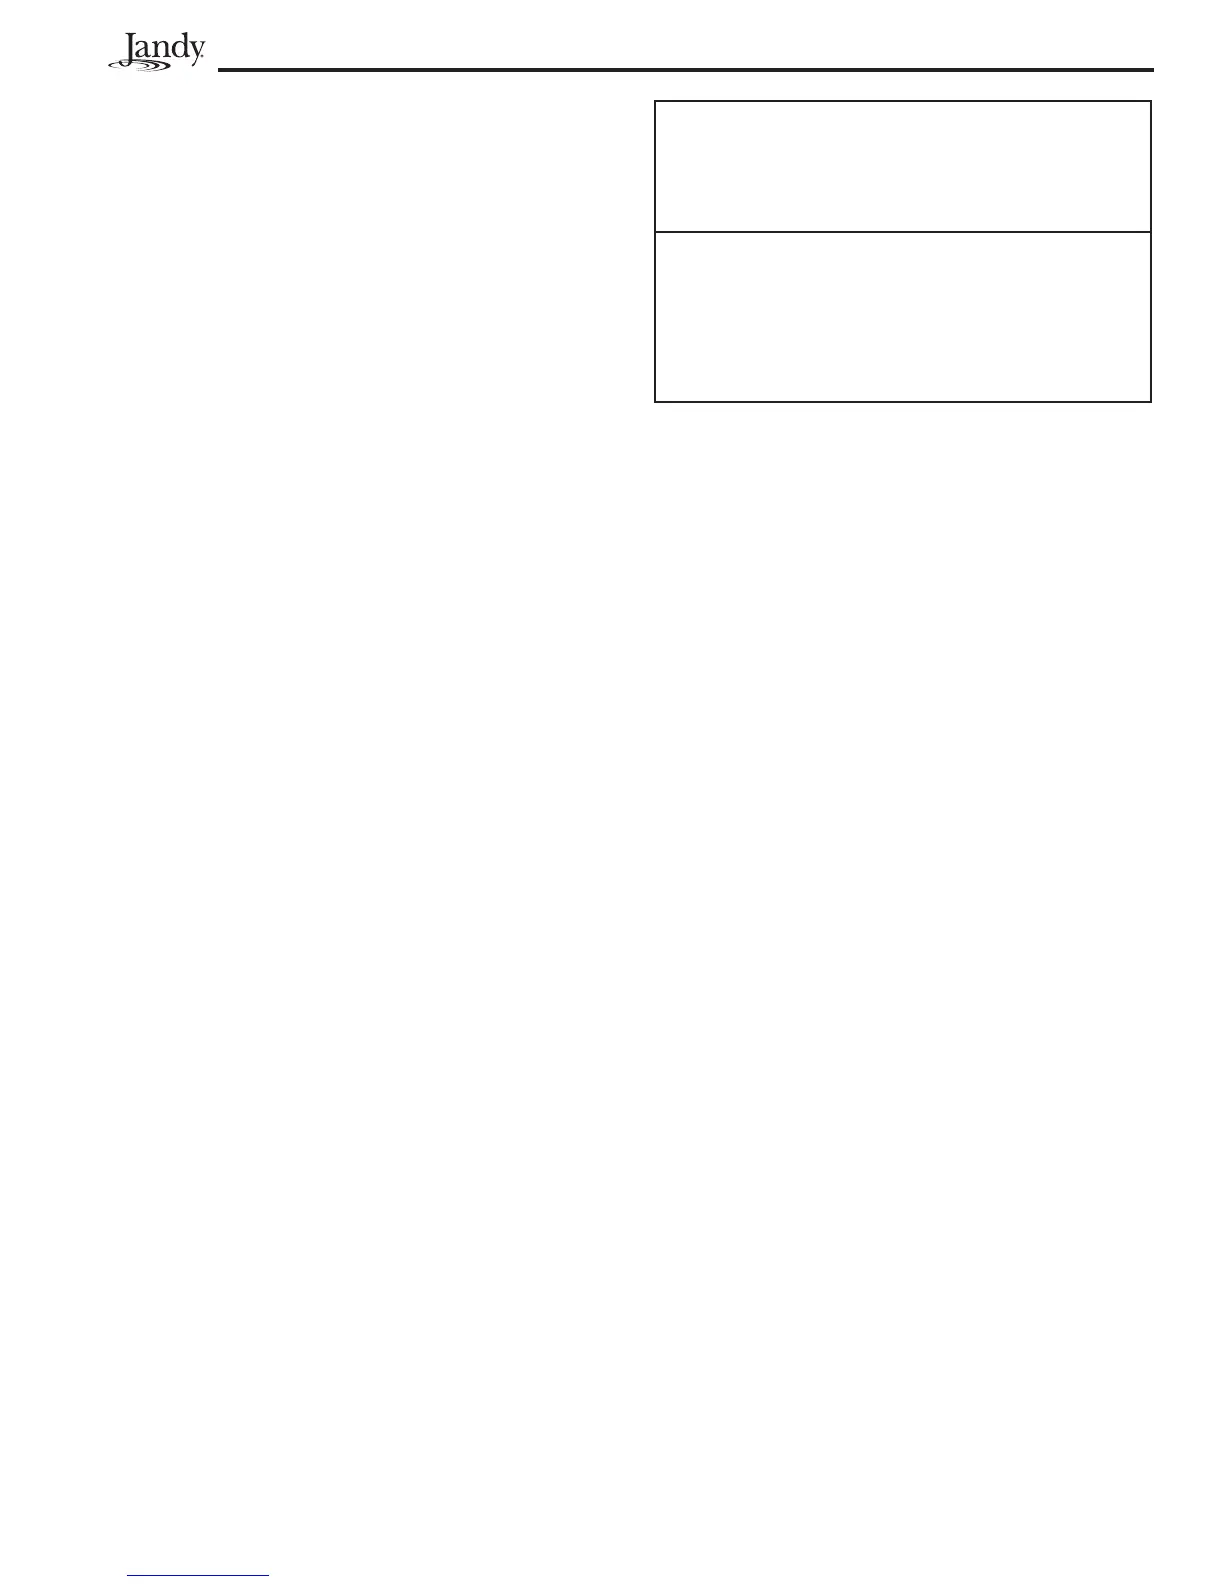
Length of hose
between wall
fitting and nose
of Ray-Vac
Pressure
Setting on
Gauge
21' 5"
24' 5"
27' 5"
30' 5"
33' 5"
18 psi
19 psi
20 psi
21 psi
22 psi
Table 1. Ray-Vac Pressure Settings
NOTE: Information in this table is a "guideline" only.