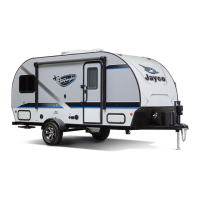
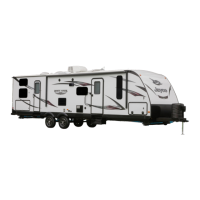
This manual describes the operation and maintenance of a 2019 Jayco Hummingbird Towable RV. It covers various systems and components, including safety features, pre-travel information, vehicle operation, slideout systems, electrical systems, fuel and propane systems, plumbing, heating and cooling, appliances, electronics, interior, exterior, and checklists for travel, camping, and storage.
Safety Features
The RV is equipped with several safety features to protect occupants.
- Secondary Means of Escape (Exit Window): The RV has one or more exit windows, easily identified by red latches and a label. These windows allow for quick exit in emergencies. Users are cautioned to exercise care when opening to avoid damage and to ensure all windows are closed and locked during transit.
- Fire Safety: In case of fire, occupants should immediately call 911 and evacuate. If the fire is large or fuel-fed, clear the vehicle and let the Fire Department handle it. Do not use water on electrical fires.
- Fire Extinguisher: A dry chemical fire extinguisher, suitable for Class B (grease, cooking oils, flammable liquids) or Class C (electrical) fires, is installed by the entrance door. It is not rechargeable or refillable and should not be tested by squeezing the trigger. Regular inspection (at least weekly) is recommended.
- Smoke Alarm: The smoke alarm is battery-operated (one standard 9V battery) and should be tested weekly. It indicates low battery with a "beep" once per minute for 30 days before replacement is needed. It will not alert hearing-impaired residents. Only recommended replacement batteries should be used, and rechargeable batteries are not suitable. The alarm should not be disconnected.
- Combination Carbon Monoxide/Propane Alarm: This alarm is hardwired to the 12-volt electrical system and continuously draws a small amount of current. It detects carbon monoxide (CO) and propane gas. Symptoms of CO poisoning include headache, nausea, vomiting, fatigue, drowsiness, confusion, and fast heart rate. The alarm should not be disconnected. If it sounds, occupants should immediately move to fresh air and call emergency services. The alarm has LED indicators for normal operation (steady green), CO alarm (red LED, 4 beeps), propane gas alarm (red LED flash, steady tone), and malfunction/low battery (alternating red/green LED, beep every 15 seconds). An "end of life" alarm flashes red/red, green/green, and beeps every 25-30 seconds, indicating immediate replacement is needed. The alarm should be vacuumed annually and cleaned with a damp cloth, avoiding abrasive cleaners or paint.
- Formaldehyde: Some RV components contain formaldehyde-based adhesives. Ventilation by opening windows and using a fan can help dissipate fumes.
- Cold Weather Usage: In freezing temperatures, precautions include preparing fresh water and drainage systems for freeze-ups, ensuring sufficient power for the furnace (which increases battery and propane use), ventilating to reduce condensation, and checking outside extrusions for frozen moisture before operation.
- Tow Vehicle: The tow vehicle's Gross Vehicle Weight Rating (GVWR) must not be exceeded by the RV's GVWR. Consult the automotive dealer for towing information.
- Vehicle Labels: Decals and data plates provide safe operation and service instructions. The 17-digit VIN and 8-digit serial number should be recorded.
- Weight Terms:
- GAWR (Gross Axle Weight Rating): Load-carrying capacity of a single axle system.
- GCWR (Gross Combined Weight Rating): Maximum allowable loaded weight of the trailer, including full propane and water.
- GVWR (Gross Vehicle Weight Rating): Maximum permissible weight of the fully loaded trailer.
- OCCC (Occupant And Cargo Carrying Capacity): GVWR minus the weight of the trailer (as manufactured), personal cargo, propane, and potable water.
- UVW (Unloaded Vehicle Weight): Weight of the trailer as manufactured with full propane.
- Weight and Capacity Labels: Located on the roadside front corner and inward surface of the entry door. These labels are specific to the RV and should not be removed.
- Loading Your Recreation Vehicle: All loose items must be secured before travel. Cargo should be distributed side-to-side to avoid exceeding GAWR for either axle. Heavy objects should be loaded on the floor. The RV's load capacity is by weight, not volume. Do not exceed GVWR.
- Cargo Carrying Accessory Receiver (if so equipped): For cargo carrying accessories ONLY. Load limit is 300 lbs maximum. Towing other vehicles or exceeding the load limit will void the warranty and can cause serious injury.
- Rear Bumper: Not designed to carry cargo. Items exceeding 100 lbs (including spare tire) or extending beyond the bumper will damage it and void the warranty.
- Bike Rack (if so equipped): Refer to the manufacturer's manual. Bikes must be properly secured to the rack.
- Travel Trailer Hitch (customer supplied): Hitch class rating should be equal to or greater than the RV's GVWR and hitch weight. A frame-mounted hitch is required.
- Travel Trailer Hitch Weight: Maintain tongue weight between 10%-15% of overall gross weight. Hitch height should be adjusted so the trailer is level.
- Travel Trailer Hitching Procedure: Block trailer wheels, raise tongue, open coupler latch, back tow vehicle, lower coupler onto ball, close latch, install weight distributing bars, retract tongue jack, attach breakaway switch cable, attach safety chains, plug in wire harness, verify exterior lights, remove wheel blocks.
- Travel Trailer Weight Distributing System (customer supplied): Provides stability by distributing weight to tow vehicle axles and trailer axle.
- Travel Trailer Sway Control (customer supplied): Devices reduce sway from crosswinds, air displacement, or incorrect weight distribution. In sway situations, ease off accelerator, make minimal steering adjustments, use electric brakes (if equipped), and stop to assess the cause.
- Travel Trailer Safety Chains: Must be attached when towing, crisscrossed under the coupler, and tight enough not to drag but loose enough for turns.
- Wire Harness/Connector Plug: A 7-way plug connects electrical power for brakes, taillights, clearance lights, and turn signals. Wiring for brakes should be 12-gauge. Connections should be taped for moisture protection. The plug should be cleaned periodically.
- Weighing Your Tow Vehicle and RV: Weigh the RV fully loaded to ensure GVWR is not exceeded. Weigh the RV attached to the tow vehicle to determine Gross Combined Weight (GCW) and ensure it's less than or equal to GCWR. Weigh each wheel position separately to prevent tire overload.
Vehicle Operation
- Towing: Allow more stopping distance. Slow down for dips, bumps, and railroad tracks. Avoid cruise control on slippery roads. Be aware of RV height for clearances. Compensate for wider turns. Block RV wheels after parking.
- RV Brake System: Brakes are rated for GVWR, not GCWR. Drive with caution until accustomed to stopping distance. Wet brakes may affect performance.
- Electric Brakes: Work with tow vehicle brakes. Require 1,000 miles/50 stops for "burnish" fit, then adjustment. Powered by tow vehicle battery.
- Brake Controller (customer supplied): Installed in tow vehicle to work with RV electric brakes.
- Travel Trailer Breakaway Switch: Applies trailer brakes if detached from tow vehicle. Lanyard must be attached to a permanent part of the tow vehicle. Requires a customer-supplied battery. Never use as a parking brake.
- Hydraulic Brakes (if so equipped): Operate automatically when tow vehicle brakes are applied. To back up a slope, pull RV forward slightly, move actuator lever to "backup position," then push down to engage locking notch. Master cylinder must be kept full.
- Disc Brakes (if so equipped): Refer to manufacturer's manual.
- Towing Behind Your RV: If no Jayco factory-installed hitch receiver, do not tow anything behind the RV, as it voids warranty and can cause damage or injury.
- Entrance Door Step(s): Must be fully extended when exiting and retracted before towing. Pivot points should be cleaned and lubricated every 30-60 days.
- Entrance Door: Hold onto the door when opening/closing. Damage from not doing so is not covered by warranty. Must be closed and locked during travel.
- Keys: Several keys are provided; record key numbers and keep them safe.
- Rear Backup Camera Prep: RV is pre-wired for a customer-supplied/installed backup camera and ON/OFF switch.
- Campsite Hook-Up: Refer to Electrical, Fuel & LP, and Plumbing sections before connecting power, gas, or water. Connect sewer hose when using full hook-up.
- Stabilizer Jacks: For support only, not for leveling. Must be fully retracted before moving.
- Manual Stabilizer Jacks (if so equipped): Lower by turning crank clockwise, raise by turning counter-clockwise. Place wood pads on soft ground.
- Electric Stabilizer Jacks (if so equipped): Operated by control switches. Manual override available by disconnecting battery and using a crank handle.
- Emergency Stopping: Carry road flares or reflective signs. Pull off roadway, turn on hazard flashers. Place warning indicators 100 feet behind and in front of RV.
- Emergency Towing: Contact road service provider. Never allow anyone under RV while being lifted/towed.
- Wheel Lugs: Check torque periodically (after first trip, winter storage, wheel removal, extensive braking, 10, 25, 50 miles, then periodically). Tighten in a star pattern in two stages.
- Wheel Lug Nut Torque Values: Chart provides specific torque values for 4, 5, 6, and 8 lug nuts based on stud size and rim size/type.
- Torque Wrench Usage: Use a properly calibrated torque wrench.
- Tires: Regular inspection and pressure checks are mandatory. Inflation pressure should follow manufacturer guidelines. Do not bleed air from hot tires. Speed rating for ST tires is 65 MPH (104 km/h).
- Changing A Tire: Keep RV attached to tow vehicle. Block tire on opposite side. Loosen lug nuts before jacking. Place jack under mainframe rail, not axle. Use only RV-rated tires of the same size and specifications.
- Spare Tire Carrier (if so equipped): Mounted under the unit (hoist) or on the rear bumper. Hoist mount has a maximum load capacity of 100 lbs.
- Securing the Spare Tire: Use hoist lift support clips and ensure valve stem points up.
- Bumper Mount: Spare tire bracket can be extended for storage access.
- Raising and Lowering the Hoist: Use crank handle located in a basement compartment.
- Vinyl Tire Cover (if so equipped): Use a separator between tire and cover to prevent "bleeding."
- Setting Up Your Recreation Vehicle: Position and level the RV. Block wheels.
- Travel Trailer Set Up: Unhook connections, install dolly wheel, release weight distributing bars, open coupler, raise tongue, level RV, lower stabilizer jacks, pull tow vehicle away.
- Fifth Wheel Set Up: Drop landing gear, disconnect connections, drop truck tailgate, reverse truck gently, apply parking brake, disengage locking bar, unhitch, drive away, adjust fifth-wheel height.
- Awnings (if so equipped): Must be closed and locked during transit. Retract in windy/rainy conditions or when unattended. Keep fabric clean.
- Power Awnings (if so equipped): Control switches typically in command center.
- Carefree® Longitude Awnings (if so equipped): Scissor style arms, 6-position pitch adjustment, worm gear motor, single switch operation.
- Electric Patio Awning With Remote Control: Some have motion detectors that retract the awning in excessive movement.
- Emergency Operation (Awnings): If power is lost, use a 10-14VDC source (e.g., drill battery) to jump the motor.
- Adjusting the Awning Pitch: Longitude arms have 6 pitch settings. Do not set individual arm pitch more than 3 positions different between arms.
- Carefree® Travel’r Awnings (if so equipped): Direct Response system. Power switch ON for manual controls. EXTEND to open, RETRACT to close.
Slideout Systems
- Electric Slide Room(s) (if so equipped): Gear-driven, with manual override. Requires sufficient power and a level RV with stabilizer jacks extended. Do not place excessive weight in the slideout. Do not over-extend/retract.
- General Slideout Operation: Ensure path is clear of people/objects. Keep away from rails/gear.
- General Slideout Troubleshooting Checklist: Check auxiliary battery, 12-volt fuse/breaker, loose connections. If still not working, refer to specific system override.
- Flush Floor Slideout: Requires full battery current. Actuate monthly to lubricate seals.
- Electric Operation (Flush Floor): Level unit, main power ON, battery charged, remove transit bars, press/hold IN/OUT switch until room stops.
- Manual Operation (Flush Floor): Locate crank extension, rotate clockwise to retract, counter-clockwise to extend. Do not disengage motor.
- Schwintek In-Wall Slideout System: No maintenance/adjustments. Two vertical columns with drive motors synchronized by a circuit board.
- Operating with Wireless Remote (Schwintek): Power on remote, press corresponding button, hold arrow button, power off remote.
- Maintenance (Schwintek): Pre-lubed bearing. Do not spray oil/grease on rails. Disconnect 12V DC and 120V AC before working on system.
- Troubleshooting (Schwintek): Check 30-amp fuse. Check for obstructions. Check voltage (should be >11V). If only one side moves, assist by pushing. Check gear racks for debris.
- Status LEDs (Schwintek): Green LED blinks for motor #1, twice for motor #2. Red LED blinks 2-9 times for error code.
- Manual Override (Schwintek): Locate controller, identify flashing red LED (fault), press "mode button" 6 times quickly, then hold for 5 seconds. Red/green LEDs will flash.
- Manually Pushing in Slideout (Schwintek): Unplug motor connectors to release brakes, push room in, plug connectors back in.
- Disengage Motors, Manually Retract, and Travel Lock (Schwintek): Remove motor retention screw, bend wipe seal, pull motor up, push room in, travel lock.
- Error Codes (Schwintek): Chart lists fault codes (low battery, excessive current, motor short, Hall signal not present, Hall power short) and possible solutions.
- Preventative Maintenance (Power Gear): Inspect slide rail assemblies for dirt/debris, clean. Apply dry lubricant if squeaking.
- Override Modes (Power Gear): Manual override available if system power is lost.
- Emergency Retract Mode (Power Gear): Remove touchpad, record RED/GREEN flashes, press/hold SET STOPS/CLEAR FAULTS button for 5 seconds, press/hold ROOM SLIDEOUT MOTOR buttons 1 and 2.
- Manually Retract Room with Ratchet & Socket (Power Gear): Access vertical channel, remove trim/flange, remove top screw from bulb seal, pull down bulb seal, remove motor cover, remove retaining spring/screw, unplug motor, pull motor up, push room in, secure room with travel lock.
- Power Gear Ram Slideout System: Typically for Class C motorhomes. 3/4" hex override couplers.
- Manual Override Procedure (Power Gear Ram): Locate ABS motor access cover, remove screws, unplug motor leads, depress spring lock lever to release brake, rotate hex override with ratchet/socket.
Electrical System
- The Electrical System: Two independent systems: 12-volt DC and 120-volt 60hz AC. Modifications should only be done by qualified technicians.
- Electrical System Maintenance: Turn off inverter/charger, disconnect shore power, turn off generator, turn off battery disconnect, turn off 120V main breaker, disconnect negative 12VDC battery terminal before working on system.
- In Case Of An Electrical Fire: Evacuate, turn off main circuit breaker, disconnect negative battery cable, disconnect power cord, turn off generator. Do not use water.
- Command Center: Located inside entrance door or living area. Contains switches and controls for electrical functions.
- Command Center Panel or Command Center Panel with Switch Modules: Includes fuel gauge, water heater switches, generator start/stop, tank heater switches, light switches, cargo bed control, slideout control, awning control, systems monitor, auto leveling control, inverter panel, power bunk bed lift control, speaker selector.
- Command Center Modules Mounted to the Wall: Some models have modules mounted directly to the interior wall.
- Touch Dimmer Switch: For ceiling lights. Tap to turn ON/OFF, hold to dim/brighten.
- GFCI Receptacle: Reduces electric shock risk. Test monthly by pressing "TEST" and "RESET" buttons.
- Testing The Campsite Power Connection: Test campsite 120-volt power receptacle for proper functionality before plugging in.
- Connecting The Power Cord: Test external power source with ground monitor. Turn off load center main breaker, extend power cord fully, plug in, turn on breaker.
- Power Converter: Converts 120-volt AC to 12-volt DC. Has thermal breaker. Use deep cycle batteries for RV.
- Converter with Charge Wizard (if so equipped): Three charging modes: NORMAL, BOOST, STORAGE. Green LED indicates mode.
- 12-Volt DC System: Powers lighting, water pump, motors, appliances. Powered by tow vehicle alternator, converter, or auxiliary battery.
- 12-Volt Fuse Panel: Located in load center. Replace fuses with same voltage, amperage, and type.
- 12-Volt DC Outlet: For 12-volt DC appliances up to 60 watts (5 amps). Keep dust cap on when not in use.
- Auxiliary Battery (customer supplied): Group 27 deep cycle battery recommended.
- Dry Camping: Fully charge auxiliary battery. Monitor voltage.
- Replacement and Maintenance: Disconnect negative cable during storage. Check voltage monthly.
- Battery Isolator For Your Tow Vehicle (customer supplied): Prevents RV from discharging tow vehicle battery.
- Battery Disconnect Switch (if so equipped): Shuts off 12VDC power to main fuse panel.
- Load Center: Contains 12VDC fuses and 120VAC circuit breakers.
- 120-Volt Circuit Breakers: Protect 120V wiring. Reset by turning OFF then ON. Replace with same type, voltage, amperage.
- Approximate Electrical Load Ratings: Charts for 12 VOLT and 120 VOLT systems.
- 120-Volt (30 AMP) AC System (if so equipped): Designed for 30 amps. Requires proper wiring and grounding.
- 30-AMP Power Cord (if so equipped): Designed for 30-amp shore power receptacles.
Fuel & Propane System
- Exhaust Gas Fumes: Avoid inhaling. Shut off engines when refueling. Close windows when driving/running generator.
- Propane Gas System: Efficient energy source. Propane is heavier than air. RV has a propane alarm.
- Propane Gas Container: DOT cylinders must be transported upright. Pigtail hose must avoid tension. Shut off gas before refueling.
- LP Gas Container Overfill: Never overfill.
- Maintenance: Inspect cylinder for rust/damage.
- Propane Cylinder Recertification: DOT cylinders require recertification every 5 years after initial 12 years.
- Hoses, Pipes, Tubes and Fittings: Inspect for deterioration.
- Propane Regulator: Reduces pressure. Vent must face downward.
- Propane Use and Safety: Propane is colorless and odorless with an added warning agent. If smell gas, follow procedures on label.
- Propane Leak Test: Use soapy water solution (not ammonia/chlorine).
- Using The Propane System: Close burner valves, open main tank valve slowly, light appliances.
- Cooking With Propane Gas: Ensure proper ventilation. Do not use for comfort heating.
- Calculating Propane Gas Usage: BTU ratings for appliances and BTU availability per gallon (91,500 BTU's).
- Traveling With Propane: Some states prohibit propane appliances during travel.
- Installing Propane Cylinder(s):
- Single Cylinder Mounted On A-Frame: Connect hose, attach regulator, attach cover, place cylinder.
- Double Cylinder Mounted On A-Frame: Use tee check valve, add second pigtail hose.
- Located in a recessed compartment or housing: Connect hose, place cylinder, mount regulator, attach pigtail hose.
- Main Supply Hose – Low Pressure: Attach to brass manifold fitting.
- Refueling Warning Label: Located on RV.
Plumbing System
- Plumbing System: Fresh water system and waste water system.
- Plumbing System Maintenance: Check fittings for leaks, drain unused water, sanitize periodically.
- Monitor Panel: Monitors fresh, grey, black water, and auxiliary battery levels.
- Operation (Monitor Panel): Tact switches illuminate LEDs for tank levels and battery condition.
- Water Pump Switch (if so equipped): Activates water pump. Turn OFF when not in use.
- Water Heater Switch(s) (if so equipped): LP GAS (12V) and ELECTRIC (120V) options.
- DSI FLT (Direct Spark Ignition Fault): Light indicates problem with LP portion of water heater.
- Fresh Water System: Needs periodic sanitization.
- Water Pressure Regulator (customer supplied): Recommended to protect plumbing from high pressure (45 lb / 315 KPa).
- Fresh Water Holding Tank: Fill via gravity fill. Overflow tubes are normal. Do not obstruct overflow.
- 12-Volt Water Pump and Switch: Self-primes. Designed for intermittent use. Clean strainer periodically.
- Fresh Water Connections: City water and gravity fill.
- Using City Water Fill (if so equipped): Connect non-toxic hose to threaded inlet, turn ON water, bleed air from faucets.
- To Disconnect the City Water Fill: Shut OFF water, disconnect hose, reinstall cap.
- Using the Gravity Fill (if so equipped): Insert hose/funnel, pour water until tank is full, open faucets to force out air, remove hose, replace cap.
- Draining the Fresh Water System: Turn off water heater, open all faucets, open fresh tank drain valve, open low point drains, drain sink, turn ON water pump, set bypass valves, operate toilet flush lever, relieve water pressure.
- Sanitizing/Winterizing the Plumbing System (No Utility Center):
- Water Heater Bypass (2 Valves): Diverts water around water heater.
- How To Sanitize: Turn off water heater, set bypass valves, level RV, drain system, close drains, remove water filter, prepare chlorine solution (1/4 cup bleach per gallon water for 50 ppm, 1/2 cup for 100 ppm), put solution in fresh water tank, fill tank, open hot/cold faucets until chlorine smell, close faucets, turn off pump, let solution sit for 4 hours (50 ppm) or 1 hour (100 ppm).
- Rinse the system with fresh water: Drain chlorine solution, fill tank with fresh water, turn on pump, run water through faucets until chlorine smell is gone, drain system again, set bypass to NORMAL, refill tank, turn on water heater.
- Winterizing The Plumbing System: Drain water heater, bypass, remove water filter, drain system, put vinegar solution in tank, fill tank, run water through faucets, drain system again, remove canister, insert filter, refill system, turn on water heater.
- Air Pressure Method: Blow out water with compressed air (30 PSI max).
- Winterize the Black Tank Flush (if so equipped): Connect blowout plug, connect air hose, set compressor to 30 PSI, open drain valve, blow air, disconnect, close drain.
- Winterizing with Antifreeze Method: Use ONLY RV antifreeze. Never use automotive antifreeze.
- Outside Shower (if so equipped): Turn on water heater, open compartment, remove shower, turn on faucets, adjust temperature, activate sprayer. Close faucet knobs to turn off water.
- Faucets: Operate with sufficient water and 12V water pump ON.
- Bathroom Tub / Shower: Keep water heater ON. Do not use water system while someone is showering. Showerhead has a vacuum breaker.
- Black/Grey Water System and Tanks: Waste water from sinks/shower to grey tank, toilet to black tank.
- Drain Pipes with P-Trap (if so equipped): Prevents odors. Water may spill during travel.
- Drain Pipes with Dry Sealing Valve (if so equipped): Prevents odors without P-traps. Remove valve before using mechanical cleanout tool.
- Sewer Hose Storage: In exterior compartment or hollow bumper.
- Vents: Vent pipes and caps on roof must be clear.
- Black/Grey Water Holding Tanks: Dump before travel. Do not leave black tank drain open. Do not add automotive antifreeze.
- Black and Grey Tank Drains: Drain black tank first, then grey tank.
- Sewage (black) tank preparation: Add 1-2 quarts water, toilet chemical, flush with 2 gallons water.
- Waste (grey) holding tank preparation: Add baking soda or RV chemical to reduce odors.
- Cleaning and Maintenance (Toilet): Clean regularly with RV approved chemicals. Use single-ply toilet paper.
- Black Tank Flush (if so equipped): Connect garden hose to inlet, turn on water, flush until clear, disconnect hose, close valve.
Heating & Cooling
- Air Conditioner: Controlled by thermostat. Ensure sufficient power. Do not operate without return air filter.
- Roof Mount (if so equipped): Inspect mounting bolts annually. Do not overtighten.
- Wall Mount (if so equipped): Keep air inlet grill clean.
- Heat Pump Operation (if so equipped): Primary heat source until interior temp drops 5° below set point, then gas furnace activates.
- Power Roof Vent (if so equipped): 12V DC attic fan. Do not leave open when stored. Close vents and open window on shaded side for effective airflow.
- Control pad (if so equipped): UP/DOWN buttons for dome, ARROW buttons for fan speed. Rain sensor closes vent automatically.
- Furnace: 12V DC thermostat. Requires 12V power and propane. Inspect annually for soot.
- Ducting Return Air: Keep clear of obstructions.
Appliances
- Microwave: Refer to manufacturer's user guide. Keep cavity clean.
- General Cleaning Microwave and Convection Microwave: Turn off controls, cool, follow label instructions. Clean grease filters, door/exterior, control panel, stainless steel, turntable, racks.
- Convection Microwave (if so equipped): Requires sufficient 120V power.
- Cooking Safety: Never allow grease to collect.
- In Case Of a Grease Fire: Do not use water.
- Cooktops: Range and Oven (if so equipped): Refer to manufacturer's user guide. Do not touch hot burners. Never leave unattended. Use appropriate cookware. Do not cover oven vents.
- Electric Drop-In Cooktops (if so equipped): Requires 120V power.
- Cooking With Propane (if so equipped): Refer to Propane System section.
- Gas Drop-In Cooktops (if so equipped): 2 or 3 burners. 2-burner: two 6500 BTU/H. 3-burner: one 9000 BTU/H, two 5200 BTU/H.
- Oven (if so equipped): Requires 12V power. Do not use as storage.
- Gas BBQ Grill (if so equipped): Mounted on bumper or rail. Use outside only. Must be securely mounted. Must be completely cooled before storing.
- Attaching the “Quick Coupler” Connection: Place handle OFF, push sleeve back, insert plug, release sleeve, push plug until locked, turn handle ON.
- Exterior Refrigerator: In front storage compartment or outside kitchen. Refer to manufacturer's user guide.
- LP Gas Grill (if so equipped): In pull-out drawer. Attaches to LP tank via quick coupler. Includes drip pan.
- Cleaning The Grill: Cool before cleaning. Use non-abrasive cleaners. Clean cooking grid and drip pan after each use.
- 3-Way Refrigerators (if so equipped): 12VDC, LP GAS, or 120VAC. Converter output not for normal operation in DC mode.
- Cleaning Your Refrigerator: Unplug, hand wash removable parts and interior with mild detergent/baking soda solution. Leave open box of baking soda to prevent odors.
- Water Heater – See Plumbing Section
- Outside Kitchen (if so equipped): Typically 2-burner cooktop, refrigerator, sink. Ensure supports are secure. Do not leave cooktop unattended. Disconnect propane before stowing.
Interior
- Cleaning The Interior: Use proper materials/procedures.
- Décor Glass (if so equipped): Use glass cleaner.
- Furniture Upholstery: Vacuum regularly. Professionally clean if stained.
- Ultraleather™ (if so equipped): Professionally clean if stained.
- Leather (if so equipped): Vacuum, wipe with dry/damp cloth. Avoid oils, waxes, silicones.
- Window Treatments:
- Fabric – Drapes and valances: Dust with vacuum. Professionally clean if stained.
- Window Shades: Vacuum periodically.
- Solar Shields: Use sponge/soft brush with water and mild cleaning solution.
- Day/Night Shades: Clean with mild cleaning solution. Avoid spot remover.
- Mini Blinds: Clean with cold/warm soapy water.
- Roller Shades: Clean with soapy water. Keep in closed position when not in use.
- Cabinetry and Tables: Dust with soft cloth/cleaning polish. Avoid ammonia/silicone.
- Interior Wall Panel: Clean with mild soap and lukewarm water.
- Quik Panel Wall Panels (if so equipped): Clean with soft cloth/mild soap.
- ABS Plastics: Dust/wipe with soft, damp cloth. Avoid gritty/abrasive cleaners.
- Sofa and Dinette:
- Hide-A-Bed Sofa or Sofa Sleeper: Remove cushions, pull sofa back, activate air mattress.
- Jack Knife Sofa: Lift bottom cushion, pull towards you, back drops down.
- Trifold Sofa: Remove pillows, pull sleeping surface up/out, fold out legs, extend, fold headboard down.
- Cube Sofa: Slanted back pillows.
- Booth Dinette (if so equipped): Storage under bench. Convert to bed by removing cushions, lifting tabletop, removing legs, placing tabletop on ledges, laying cushions.
- Free-Standing Table and Chairs (if so equipped): Fasten chairs securely during travel.
- Pantry or Hutch (if so equipped): Secure items. Sliding shelves have locking mechanism.
- Countertops: Use hot pads/trivets. Use cutting board. Avoid harsh chemicals.
- Laminate Countertops (if so equipped): Clean with damp sponge, spray cleaner, lemon juice/baking soda for stubborn stains.
- Solid Surface Countertops (if so equipped): Clean with soapy water/ammonia-based cleaners. Remove stains with Scotch Brite® pad/mild abrasive cleaner. Sand cuts/scratches with fine grit sandpaper.
- Flooring: Test cleaning agents.
- Carpet: Vacuum regularly. Promptly blot spills.
- Vinyl Flooring: Vacuum/sweep. Wipe spills with damp cloth. Do not soak.
- Murphy Bed (if so equipped): Bed stores in wall. Slide out must be fully extended to use bed. Bed must be stored to move slide out.
- Unfolding the Sofa: Grasp seat/back cushions, lift, pull out.
- Lowering the Murphy Bed: Unlatch "D" bolts, grasp handle, pull down. Attach web straps to sofa arms.
- Bed Storage: Lift bed, push back into storage.
- Bunk Beds (if so equipped): Weight ratings vary. Ladder may be steel or wood. Secure ladder before climbing. Do not allow more than one person on top bunk or ladder. Children under 6 should not use upper bunk.
Exterior
- Cleaning the Exterior: Wash often. Wax 60 days after purchase. Rinse anti-freeze, gasoline, washer solvents immediately. Rinse bugs/bird droppings daily.
- Washing: Use cold water, mild liquid soap. Wash in shade. Use separate sponges for walls and wheels.
- Frame: Inspect and repaint for rust.
- E-Z Lube or Super-Lube Axle (if so equipped): Periodically lubricate bearings without removing hubs. Use hand-operated grease gun.
- Exterior Roof and Sidewall Vents: Inspect for cracks, keep clean.
- Windows: Clean with sponge/water.
- Sealants: Inspect every six months. Replace if cracked, peeling, or deteriorated. Use same type of sealant.
- Travel Trailers - Sealant Diagram: Diagram shows locations for trim edges, roof items, slideout roof/floor, windows/doors, storage compartments/access doors/wheel wells, and lights.
Travel/Camping/Storage Checklists
- Travel Checklist:
- Safety: Follow all safety precautions.
- Maintenance: Inspect seals, check propane system, check wheel lug nuts, adjust brakes, sanitize water, test safety alarms.
- Before leaving home (or campsite): Check tow vehicle fluids, RV lights, tires, wheel lug nuts, safety chains, latches/locks, batteries, power cord, water connections, interior lights/outlets, circuit breakers, GFCI, propane system, safety detectors, leveling jacks. Wash exterior, inspect sealants, de-winterize/sanitize water system. Connect tow vehicle, test connections/lights/brakes.
- RV Storage:
- Prior to Storage: Store indoors/under roof/breathable cover. Cover tires. Wash interior/exterior. Do not use stabilizing jacks. Check roof/surfaces for damage. Seal off rodent/bird entry points. Close windows/vents. Cover roof air conditioner.
- During Storage Period: Remove snow/ice from roof.
- Propane System: Close cylinder valves, use cover. Light range burner to consume remaining gas.
- Water Lines: Drain all water lines, winterize RV.
- Holding Tanks: Drain and flush all.
- Generator: Add fuel stabilizer.
- Electrical: Disconnect 120V AC. Remove batteries.
- Interior: Turn cushions on edge. Turn off/defrost/clean refrigerator. Remove perishables. Lubricate locks/hinges.
- Featured Components Quick Reference Chart: Lists components, manufacturers, and websites for Air Conditioner, Awning, Axle, DVD/CD, Entrance Step, Fan, Fire Extinguisher, Furnace, Microwave, Monitor Panel, Outside Shower/Utility Center, Propane Tank, Propane/Carbon Monoxide Alarm, Propane Regulator, Range/Stove/Cooktop, Range Hood, Refrigerator, Smoke Alarm, Tank Sprayer/BLK, Thermostat, Toilet, TV, TV Antenna, Water Heater, Water Pump.
- Vehicle Maintenance Record: Form to track service date, mileage, work performed, and notes.
- Ownership Notification: Form to notify Jayco of change of owner or transfer of limited warranty. Includes sections for Model Information, New Owner Information, and Previous Owner Information.