- 3 -
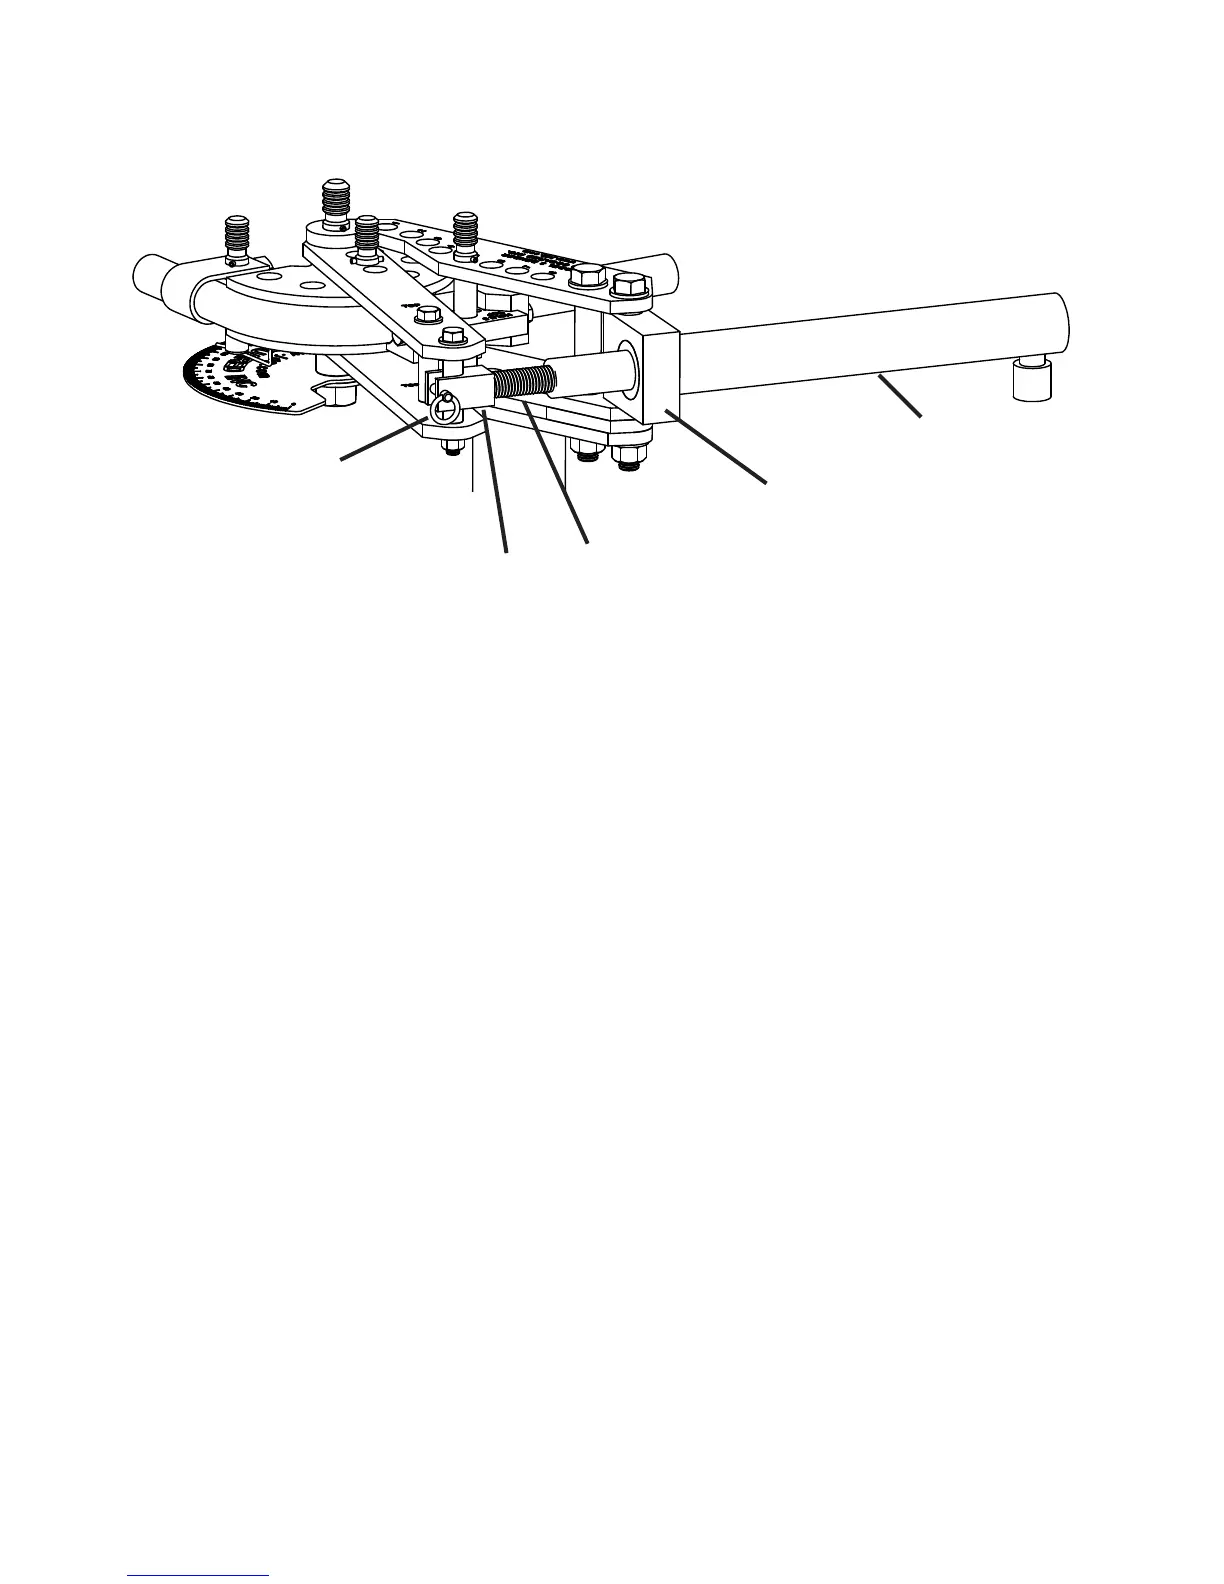
Model 3 Bender Hydraulic Adapter Assembly
Adapter Components: Excludingthehydraulics:
Hydraulic Swivel Block
Yoke
Threaded Extension Rod
Clevis Pin
Recommended Cylinder:
EnerpacRC1014ortheO.T.C.(PowerTeam)Part#C1014Coranequivalentcylinder.Theseporta-powercylindersarerated
at10tonsandhavea14"stroke.Onthefrontofthecylinderisa21/4"x14TPIthread.
Recommended Power Unit:
WeofferseveralhydraulicpumpssuitablefortheModel3Bender.However,anypowerunitmaybeusedthathasanoutput
ofatleast1500-2500PSI.Theaveragebendingpressurewillgenerallybebelow1300PSI.Testedexamples:13/4"x.095"
mildsteel-800PSI,15/8"x.083"4130chromemoly-1300PSI,11/2"solidroundbarstock-3100PSI.Notethattheair-
over-hydraulic10,000PSIpumpsdeliverlessvolumeandthereforebendslowerthantheair-over-hydraulic3,000PSIpumps.
Apressuregaugeishighlyrecommended.Ifthebenderisoperatedatapressurehigherthan2500PSIthefollowbarpinmay
bend. This pin has been designed to be the bender’s weak link and therefore acts as a warning indicator of over loading. In other
words,ifyoubendthefollowbarpin,STOPBENDINGIMMEDIATELY.Forsafereliableoperationdonotoperatethebenderat
pressuresabove2500PSI.
Assembly:
Removetheouter3/4"bolt,sleeveandratchetassemblyfromthebender’sframe.Noticethatthroughthehydraulicswivel
blockismachineda21/4"x14TPIthreadandaslightshoulder.Theshouldershouldfaceawayfromthedrivelinkstowardsthe
rearofthecylinder.Thiswillallowthecylindertobescrewedallthewayushwiththeswivelblock'sfront.Placethepreviously
removed1"ODsleeveintothecylinderswivelblock.Usingthe3/4"bolt,nutandwashers,installtheSwivelblockintothebender
asshownabove.Screwthehydrauliccylinderintotheblockasfarasitwillgooruntilitsfrontsurfaceisushwiththeswivel
block'sfrontsurface.Thequickdisconnectttingontherearofthecylindershouldpointdowntowardsthegroundtorelieve
stressonthehose.Ifitdoesnot,unscrewthecylinderoutoftheswivelblockuntilitdoes,butnofurther.
Ifthecylinderhasastudinstalledintotheendofitsram,itmustberemoved.Thiswillexposeathreadedholeintheendof
theram.ScrewtheThreadedExtensionRodintothecylinder'sramuntilitbottomsout.Now,screwtheYokeontothethreaded
rod until it bottoms out. Rotate the swivel clockwise (to prevent it from unscrewing off the threaded rod) until it may be slid onto
theouter3/4"drivelinksleeveasshownaboveingure5.InstalltheClevisPinthroughtheYoke.
Hookupthepumpandhose.Extendandretractthecylinderseveraltimestopurgeairfromthesystem.
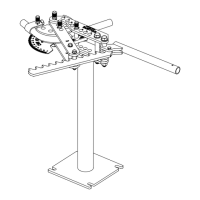
Figure 5 - Bender with hydraulics installed.
10TonHydraulic
Cylinder
HydraulicSwivelBlock
Clevis Pin
Yoke ThreadedExtensionRod
 Loading...