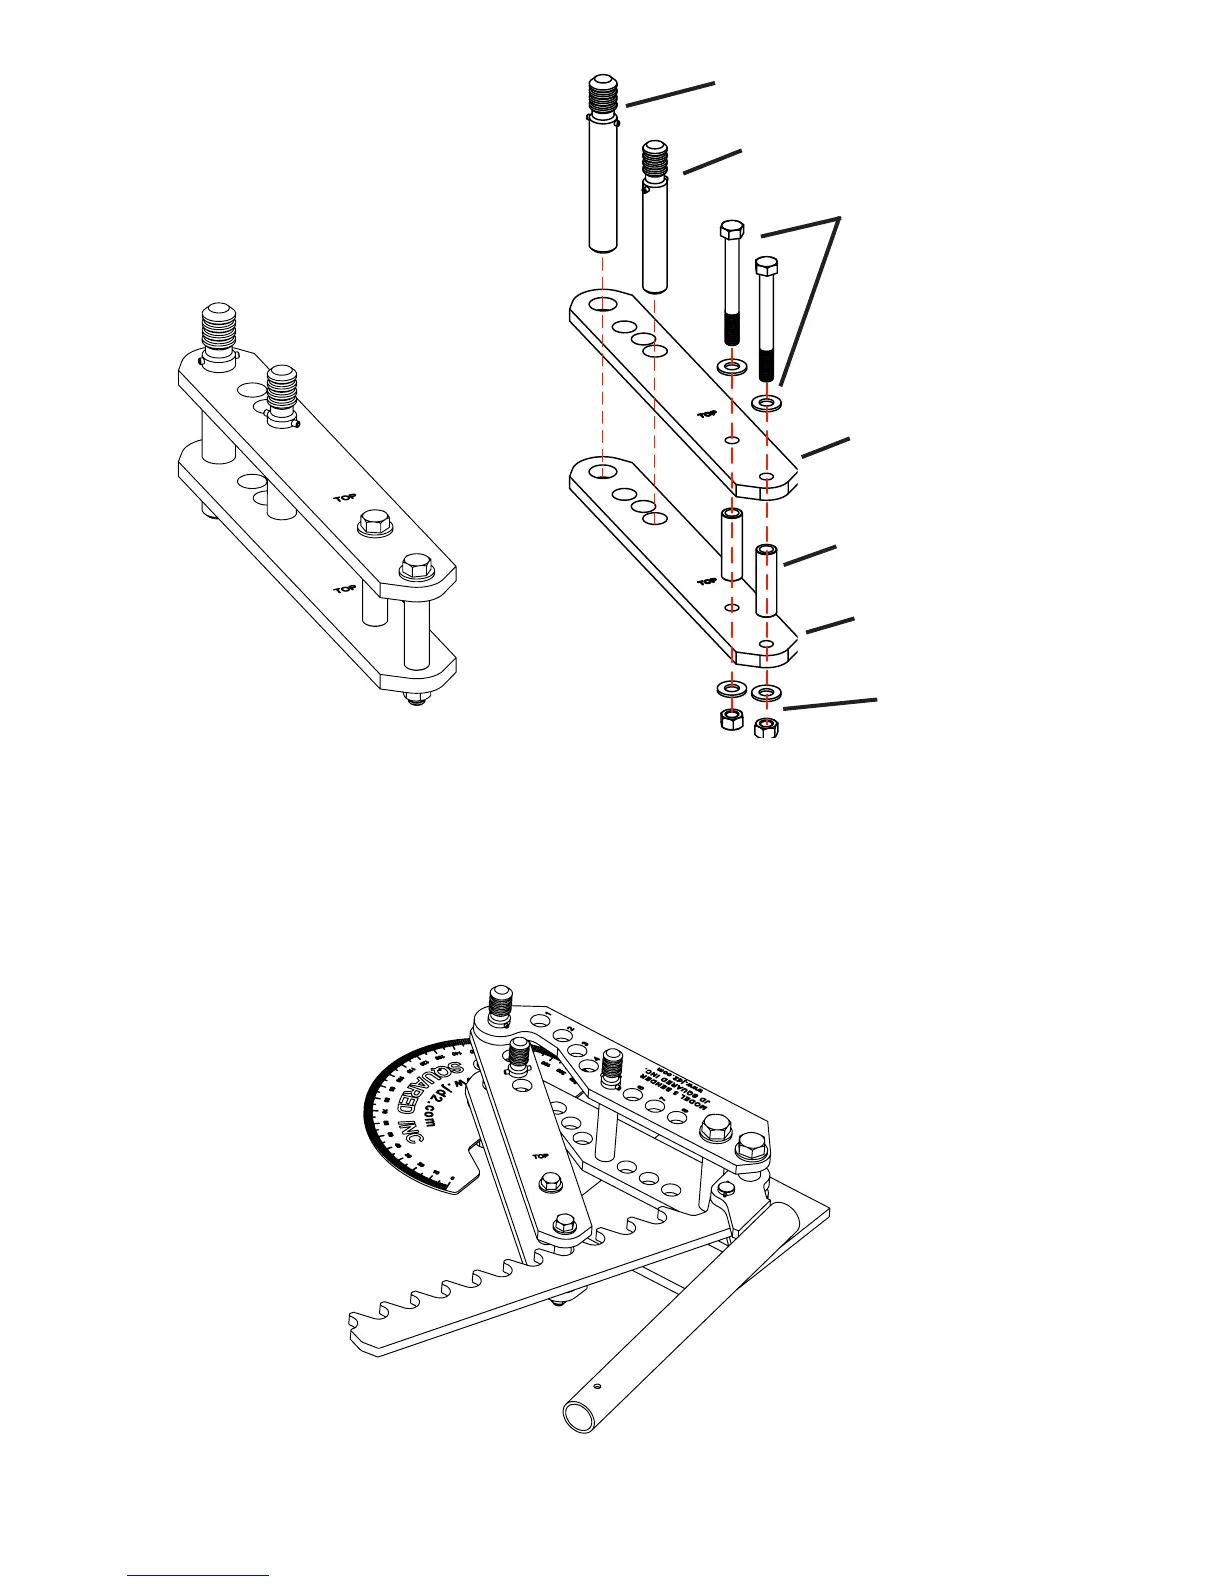
4)RemoveallpinsfromtheDriveLinkassembly.Withtheword'TOP'facingup,InstalltheDriveLinkassemblyintotheFrame
assemblyusingthe1"FramePin.Seegure4.Thebenderisnowassembledandreadyforthediesettobeinstalled.
NOTE:A19"extensionhandleisprovidedwiththebender.Slideitintotheratchetleverandusingthesupplied3/8"pullpin,
secureinplace.Thecombinedhandlewillbeapproximately36"long.Thisshouldallowtheaverageusertobend13/4"x.095"
wallmildsteeltubingusingjustonehand.Ifbendingchromemoly,DOMorlargertubingandndyoudesiremoreleverageto
reducethebendingeffortrequired,simplyobtainalengthof1"pipe(1.315"o.d.)andcutittothedesiredlength.Youalsoneed
todrilla7/16"holenearoneendsothepullpinmaybeinstalled.
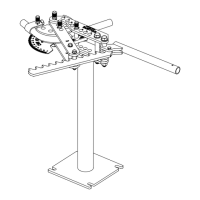
3)ThetwoDriveLinksareassemblednext.Usingthe
two3/4"ODDriveLinkSpacerTubes,two1/2"bolts,
four 1/2" washers and two 1/2" nuts, assemble the
twoDriveLinksasshowningure3.Theword'TOP'
must be face up on both links. This is very important
because the three 7/8" drive holes are offset to the
right.Handtightenonly.Insertthetwopinsintotheir
respective holes to help alignment. Lay the assembly
on its side to further help alignment and wrench tighten
securely.
- 2 -
Figure 3 - Drive Link assembly
1" Frame Pin
7/8" Drive Pin
1/2"Bolts&Washers
3/4" OD Drive Link Spacer Tubes
1/2"NutsandWashers
Drive Link
Drive Link
Figure 4 - Completed bender without die set installed
 Loading...