Assembly Instructions
13
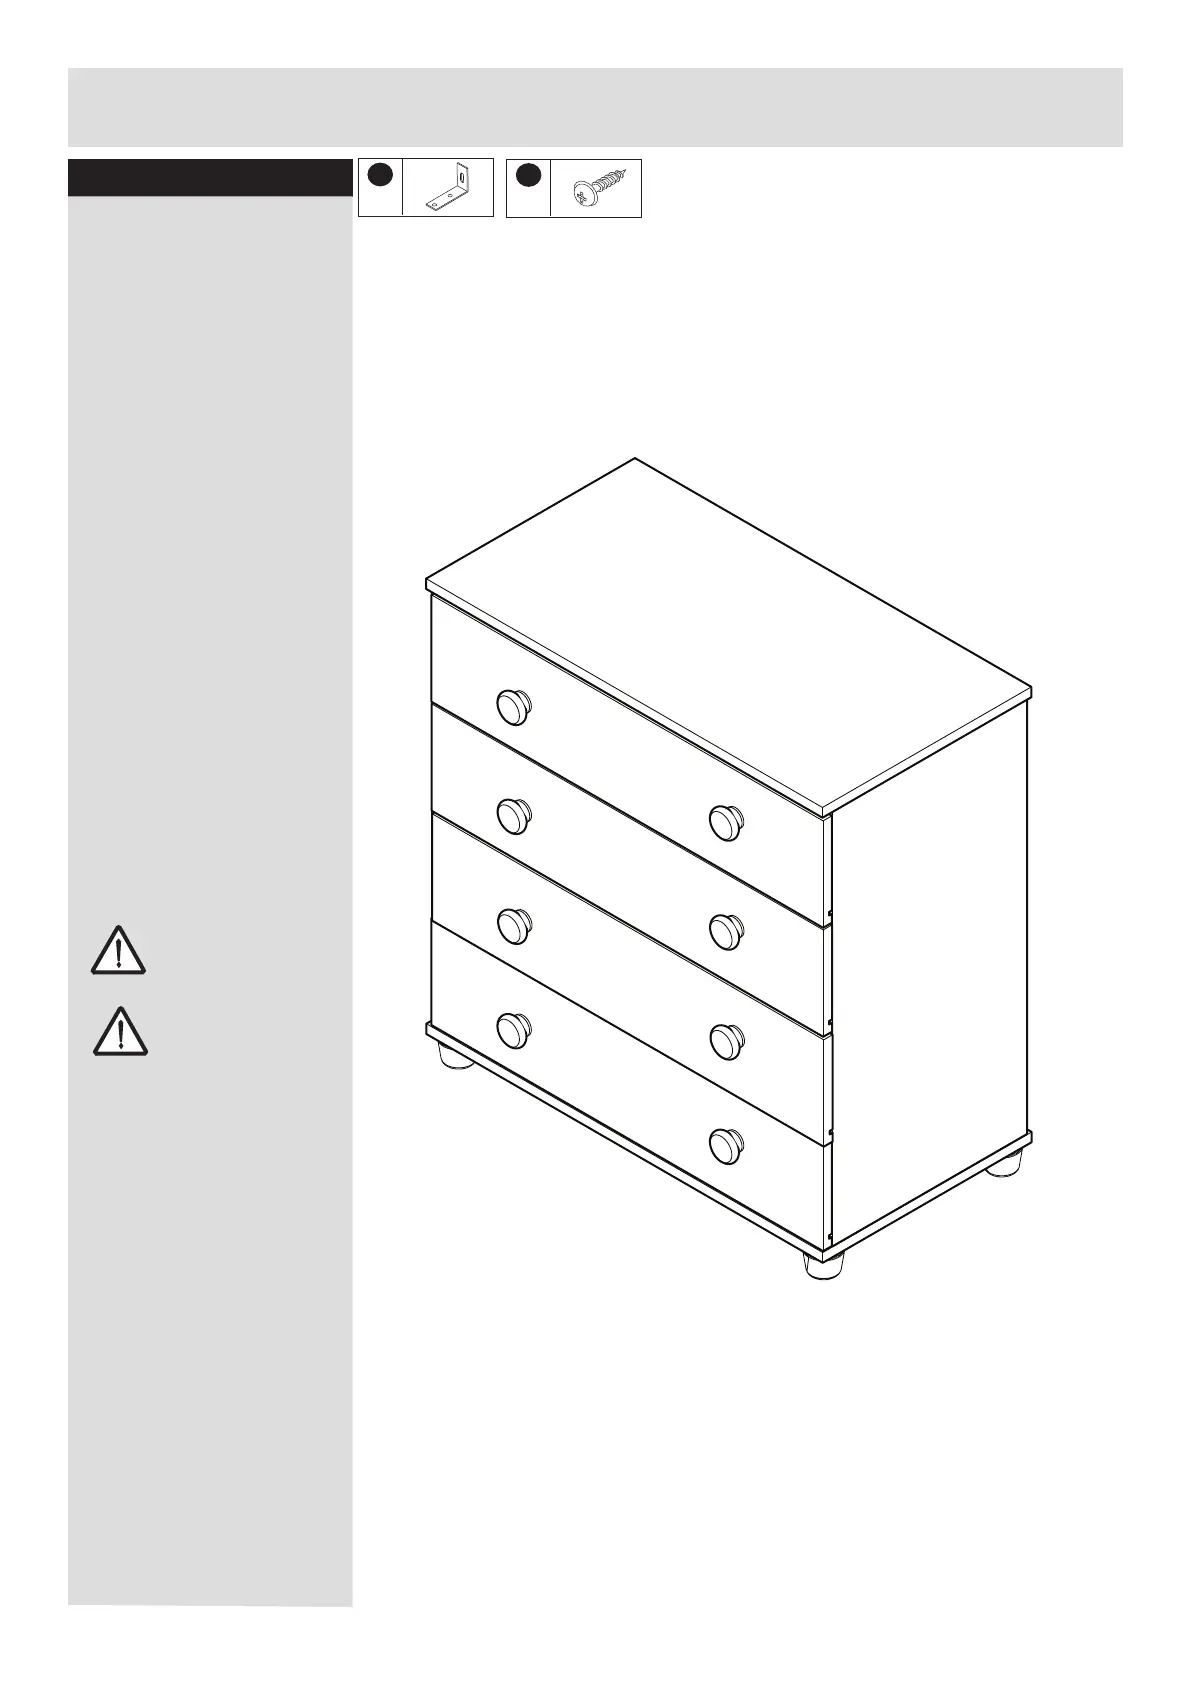
Step 13
We recommend that this
unit is fixed to a suitable
wall to prevent possible
overbalancing. We have
included a fixing bracket
for this. No fixing screws
are provided as they will
need to suit the wall
type, and the length of
screw will depend on
the distance from the
back of the unit to the
wall. Please ensure
fixings used are
appropriate to your wall
type. Locate the bracket
to the top panel or to the
end panel as close to
top as possible. We do
not specify exact
location for the bracket,
this is left to the
customer’s discretion.
Fixing to wall
Please take care when
drilling into the wall,
avoiding any pipes and
wires. Wear safety
goggles when drilling.
The use of residual
current device (RCD) is
recommended when
working with tools.If in
doubt consult a
qualified person.
Warning:
2 people to lift.
Lift with care.
With help move the
unit into position.
Warning:
Q
x1
R
x2
 Loading...