94 GETTING TO KNOW YOUR VEHICLE
To install the Sunrider® soft top, proceed as follows:
1. Remove both front Hard Top Freedom panels
Ú
page 88.
2. With the help of a second person, set the Sunrider®
top onto the top of the vehicle making sure to align
the holes at the front and rear of the side rails.
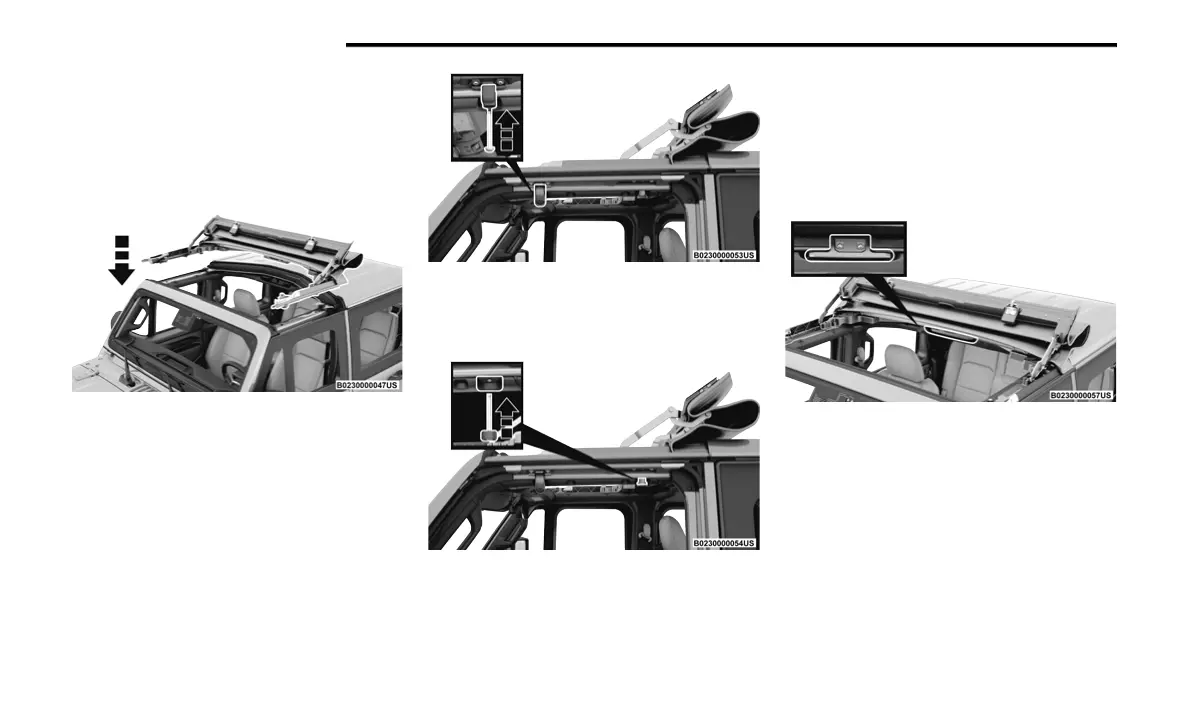
Lower Sunrider® Onto The Vehicle
3. Swing the front frame bracket around the side of the
rail, and insert the door rail attachment bolt (provided
bolt without spacer) from underneath. Tighten with a
#40 Torx head driver until snug.
Attach Front Door Rail Bolt
4. Insert the rear door rail attachment bolt (provided
bolt with spacer) from underneath. Tighten with
#40 Torx head driver until snug.
Attach Rear Door Rail Bolt
5. Repeat steps 3 and 4 on the other side of the vehicle.
NOTE:
The recommended torque specification for the front and
rear door rail attachment bolts is 8.8 ft-lb (12 N·m).
6. Attach the rear clamp at the rear center of the
Sunrider® top using the two provided rear clamp
attachment bolts. Tighten with #40 Torx head driver
until snug.
Rear Clamp Location
NOTE:
The recommended torque specification for the rear clamp
attachment bolts is 3.7 ft-lb (5 N·m).
7. From inside the vehicle, lift and pull the Sunrider®
top forward using the integrated handle on the front
header of the top. Manually guide the top into the
closed position.
23_JT_OM_EN_USC_t.book Page 94











 To Next Page