11
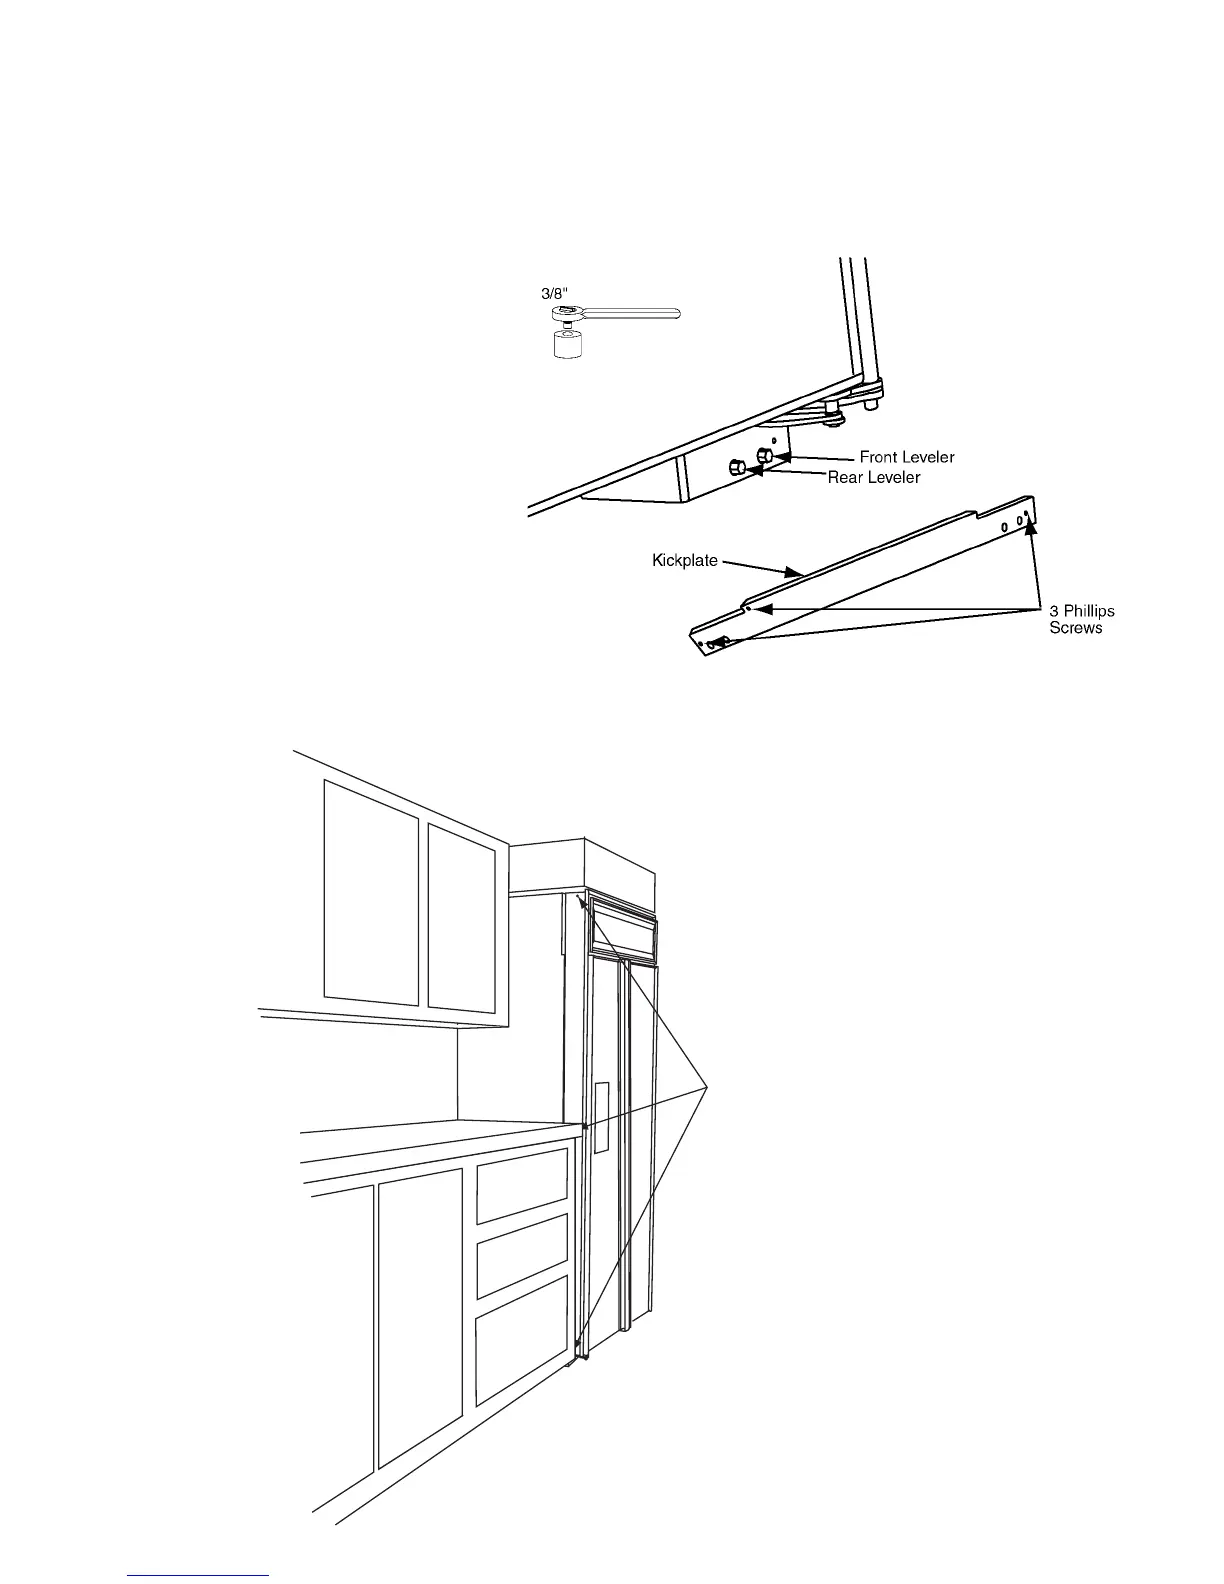
Leveling
Slide the unit in place and raise the front and rear
levelers until the unit touches the brackets. Use a
3
⁄8"
socket for raising and lowering the unit. On each
wheel housing there are two
3
⁄8" hex bolts. On the
left side, the outside bolt will move the rear leveler
and the inside bolt will move the front leveler. On
the right side, the outside bolt adjusts the front lev-
eler and the inside bolt will move the rear leveler
(FIG. 5). The front levelers must be in contact with
the floor. To raise the leveling legs, turn the hex
screw in the counter clockwise direction. Place
level on lower ledge of the machine compartment.
Level the unit front to back and side to side. This is
to prevent tipping of the unit (See FIG. 4). Install
the kickplate. The kickplate must be removable to
allow access to the water valves. In the machine
compartment there is an on/off power switch.
Make sure the switch is in the ON position, and
switch lever is up. Install the upper cover.
FIG. 5
Optional: If you are attaching
the unit to cabinetry, drill three
3
⁄16"
holes through both outer trims. Drill
1
⁄8"
pilot holes into the cabinetry. Install screw.
Additionally: If the depth/height of opening is excessive, use the steel
hanger strap. Double over strap at the anchor points to secure cabinet.