FIG. 3
MOUNTING THE TRACKS TO THE TABLE
IF YOU ARE MOUNTING THE FENCE TO A
JESSEM TABLE TOP PROCEED TO STEP 7A.
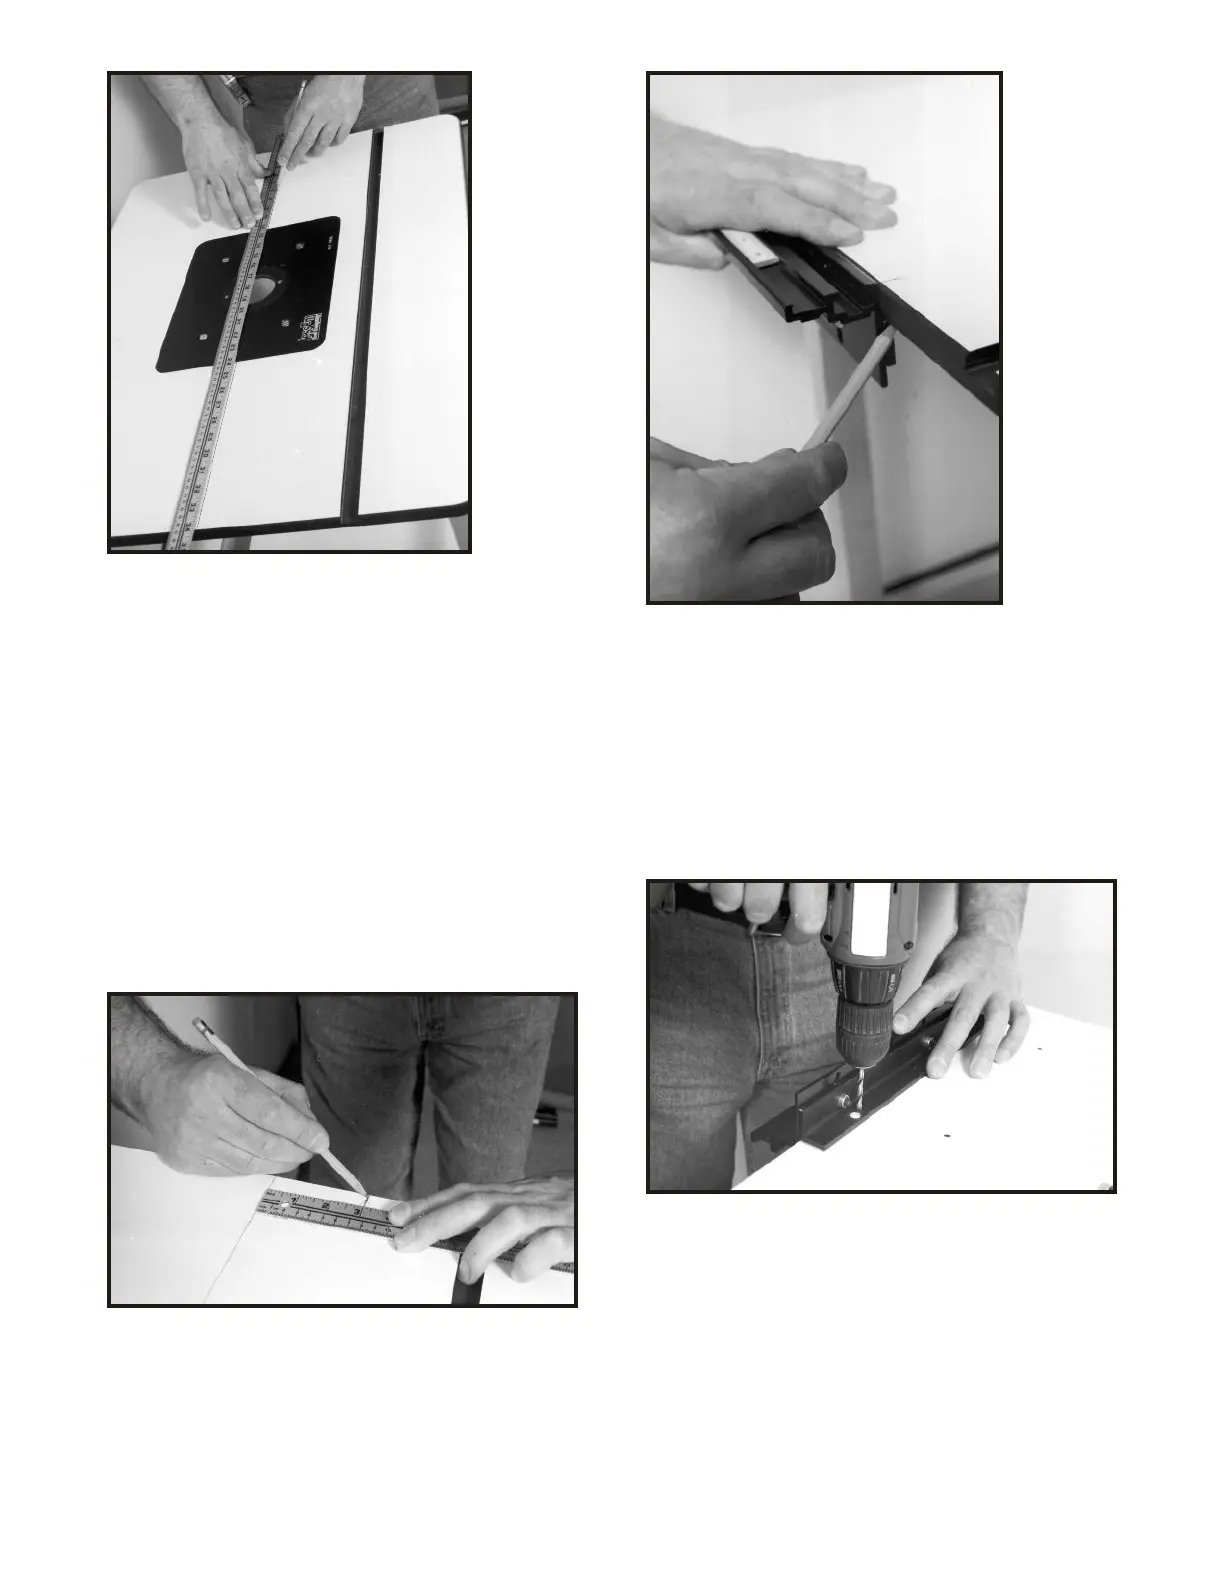
3. Measure the distance from the front edge
of your table to the center of the bit hole in
the table top. Transfer a mark the same
distanced on both the left and right edges of
the table top. Then draw a center line across
the top of the table from one side to the
other (Fig. #3).
4. From the center line you drew, come
three inches toward the front of the table and
mark a small line on both the left and right
sides of the table (Fig. #4).
FIG. 4
5. Take one of the fence track assemblies
and line it up with the mark you made in
step 4. Make a mark on the underside of
the table top to locate the same position on
the bottom of the table (Fig. 5).
6. Flip the table top over and position the
fence bracket upside down and line up the
front edge with the mark you made in step 5.
Using a pencil or a 3/16” diameter drill bit
mark the 4 holes for mounting the fence
bracket. Pre-drill the holes using a 1/16”
diameter drill bit and be sure you don’t drill
through the table top surface (Fig. 6).
FIG. 6
FIG. 5
 Loading...