Installation instructions Jetmaster Mark 2 Gas Coal / Pebble
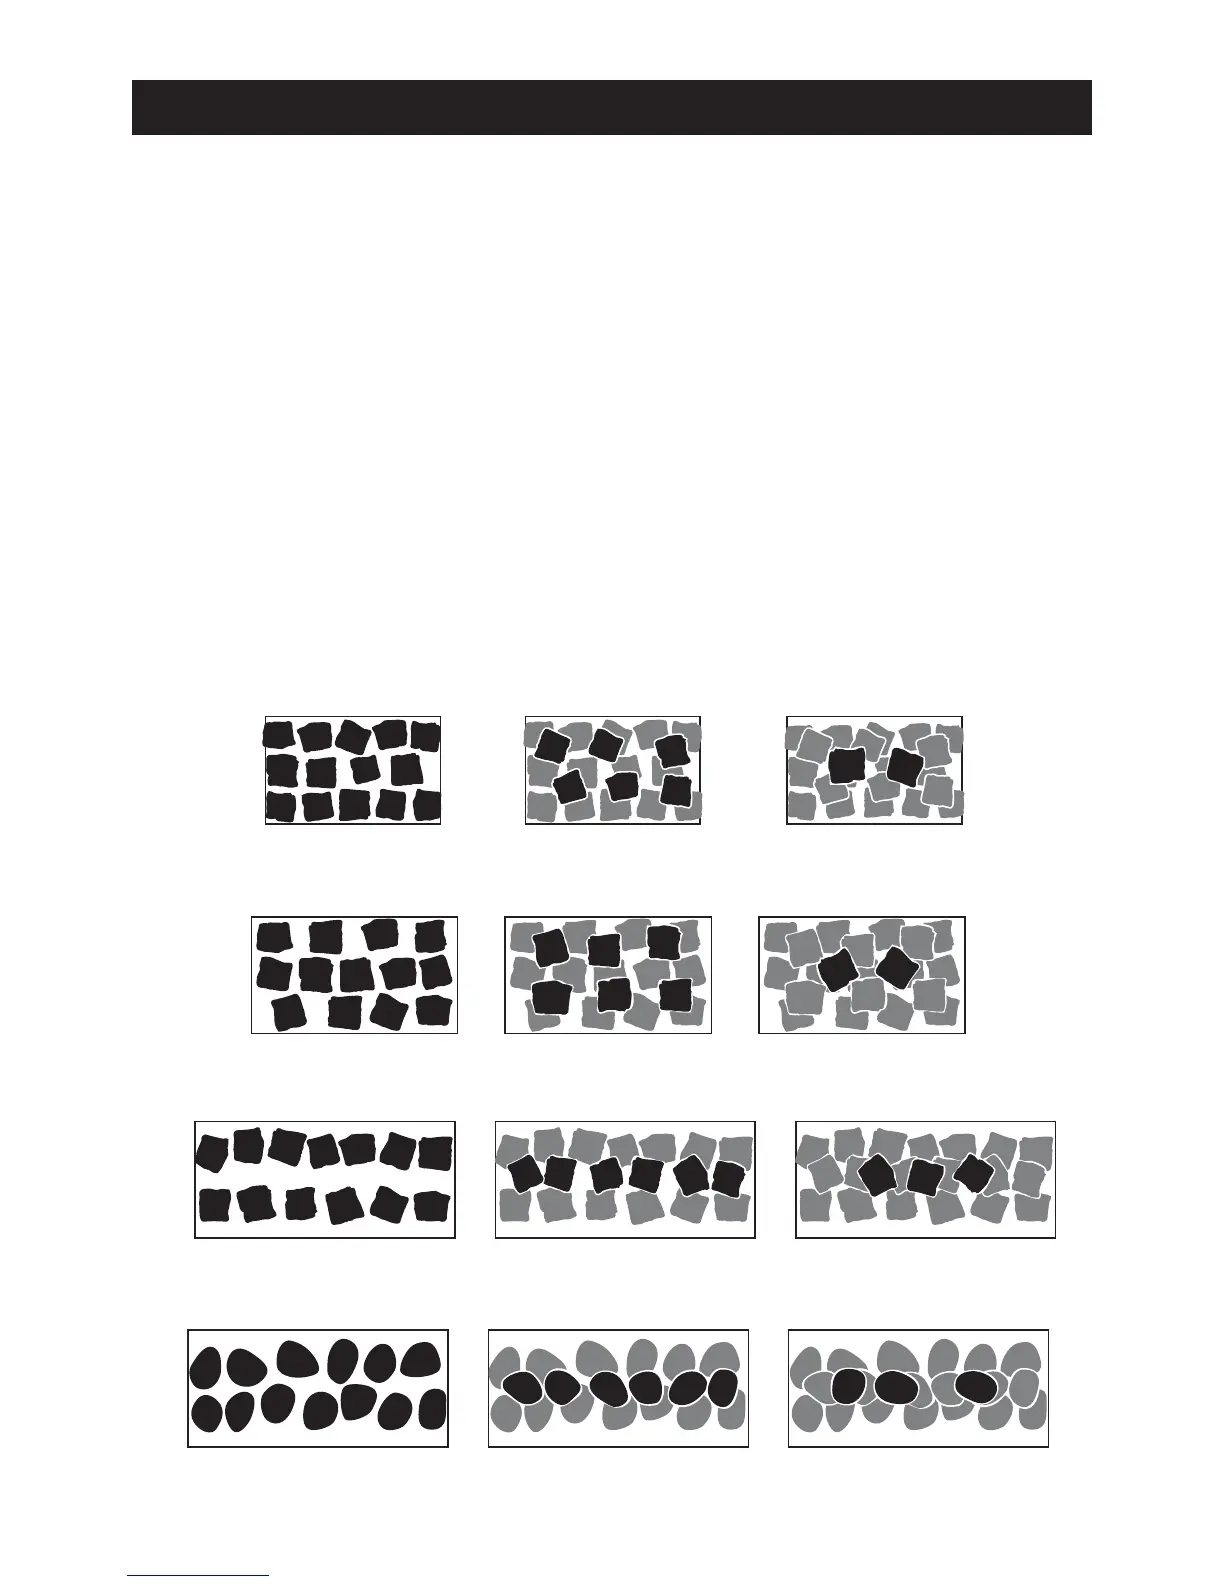
Laying the fire
• Unpack the coals/pebbles contained in a clear
plastic bag and lay a row of coals/pebbles on the
vermiculite along the back of the burner tray leaving
approximately 12-15mm between them.
• Leave spaces at the edges to allow free flow of gas.
• Place a further row of coals/pebbles directly in front
of the first row but staggered so that the second row
of coals are behind the gaps of the first row leaving
approximately 12-15mm between the rows of each
coal/pebble.
• Lay further rows of staggered coals/pebbles
depending on the size of the basket grate.
• Once the bottom layer is completed, build up 2-3
tiers of coals in a honeycomb pattern to form an
elongated pyramid.
• Lay the coals/pebbles so that some irregularity to
the pile through which the flames may lick, is created.
• Your aim is to build “windows” into the fire through
which the radiant effect may show but at the same
time, not leaving such large gaps between the coals/
pebbles that excessive air may enter and “damp down”
the red glow.
• After the fire has been alight for 15 minutes, you
may wish to add the odd coal/pebble or even relay the
fire completely. Allow to cool before touching the
coals/pebbles.
• Experience will enable you to obtain a pleasing
appearance with suitable heat output, but please bear
in mind that it is important to maintain the general
pattern described above and indicated in illustrations.
MARK 2 COALS 440 / 500 - 390 X 240
MARK 2 COALS 600 - 460 X 260
MARK 2 COALS 700 - 580 X 260
MARK 2 PEBBLES 700 - 580 X 260