Do you have a question about the JG A100 and is the answer not in the manual?
Assembly requires at least two people and should be performed sideways.
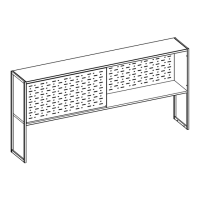
Mount the top panel first, then the bottom panel, following the indicated order.
Add remaining parts and screw them manually to complete the structure.
Refer to page 5 for structure assembly and place with care to avoid scratches.
Attach the divider panel using screws, screwing manually.
Refer to page 5 for structure assembly and place with care to avoid scratches.
Install the divider panel using screws and pressure fit components.
Refer to page 5 for structure assembly and place with care to avoid scratches.
Join the shared panels together, paying attention to the connection details.
Attach components using screws and pressure fit for the shared unit.
Shows different configurations (A, B, C) and their placement.
Mark holes and join the two cabinets together to form the final unit.
Connect the assembled units together using screws manually.
| Brand | JG |
|---|---|
| Model | A100 |
| Category | Indoor Furnishing |
| Language | English |