Do you have a question about the JL Audio 13W7-D1.5 and is the answer not in the manual?
Improves dynamic motor behavior for reduced distortion.
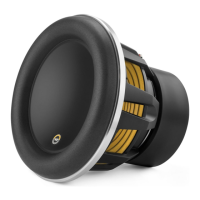
Detailed instructions on removing the clamp-ring.
Instructions for removing the steel O-Ring.
Procedure for removing mounting screws.
Connecting speaker wires and seating the W7 in the enclosure.
Securing the W7 to the enclosure with screws.
Re-attaching the steel O-Ring over the surround.
Securing the clamp-ring back onto the speaker assembly.
Disconnect subwoofer wires from the amplifier.
Disable all head unit and amplifier sound processing.
Adjust amp input voltage and sensitivity controls.
Increase sensitivity until target voltage is delivered.
| Type | Subwoofer |
|---|---|
| Nominal Diameter | 13.5 inches |
| Bolt Hole Circle Diameter (C) | 14.25 inches |
| Voice Coil Configuration | Dual 1.5 ohm |
| Frequency Response | 20 - 200 Hz |
| Mounting Hole Diameter (B) | 12.75 inches |
| Nominal Impedance (Znom) | 1.5 ohms |
| Power Handling (RMS) | 1000W |
| Power Handling (Peak) | 2000 watts |
| Voice Coil Diameter | 3 inches |