Do you have a question about the JL Audio ClenSweep CL441 dsp and is the answer not in the manual?
Record the product's serial number for service or theft.
Advice to operate audio systems responsibly to prevent hearing damage.
Details on compatible vehicle electrical systems and aircraft use.
Guidance on dry environments, avoiding interference with safety equipment, and secure mounting.
Critical installation warnings to prevent damage to vehicle and self.
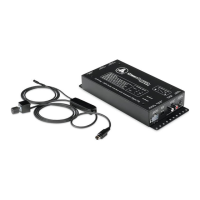
Accepts analog signals from low-voltage to high-power speaker-level inputs.
Utilizes SHARC DSP for 30-band equalization per channel for audio correction.
Simple process using a calibration CD and button press for automatic analysis.
Provides 8V RMS line-level outputs and a master volume control.
Supports signal-sensing or 12-volt trigger for powering on aftermarket equipment.
Details on connecting +12V, GND, IGN, and REM.OUT terminals with wire gauge recommendations.
Specifies the 1 Amp inline fuse for the +12V constant wire.
Describes the four RCA-type jacks for analog audio output.
Requires full-range signals (20 Hz - 20 kHz); crossed-over signals will cause failure.
Instructions for connecting auxiliary sources using RCA cables and level trim.
Details on volume control, source switching, LED indicators, and mounting procedures.
Discusses compromises when using the factory volume control instead of the CL441dsp's.
Alternative method for volume adjustment using OEM controls with potential compromises.
Device turns on with +12V and input signal; enters standby on signal loss or ignition off.
Device turns on with +12V at IGN terminal, regardless of OEM source status.
Steps to set amplifier input sensitivities after calibration.
How to trim AUX input levels to match OEM source levels.
Allows bypassing the CL441dsp's OEM equalization for comparison.
Recommends using the CL441dsp Master Volume Control for all sources.
Indicates successful OEM input engagement and EQ status (active or defeated).
Indicates AUX input engaged with no equalization applied.
Indicates calibration failure due to signal issues or incorrect input range.
Details power supply, voltage, and current draw for the device.
Specifications for OEM input channels, type, range, and level setting.
Specifications for AUX input channels, type, range, and level setting.
Information on the DSP processor, audio resolution, and EQ capabilities.
Specifications for output channels, voltage, impedance, and noise ratio.
Physical dimensions of the CL441dsp processor in inches and millimeters.
Details the 90-day/2-year warranty, transferability, and exclusions.
Contact details and procedures for obtaining service for JL AUDIO products.
Clarifies that international products are covered by local distributors.
| Brand | JL Audio |
|---|---|
| Model | ClenSweep CL441 dsp |
| Category | Computer Hardware |
| Language | English |