81900523 Rev. A
©2021 JMA Wireless. All rights reserved. This document contains proprietary information. All products, company names, brands, and logos are trademarks™ or
registered® trademarks of their respective holders. All specifications are subject to change without notice. Revised: November 12, 2021
+1 315.431.7100 customerservice@jmawireless.com
Installation Guide
MX/MC Model Brackets
Instructions for extension kit for MX08FIT265-01
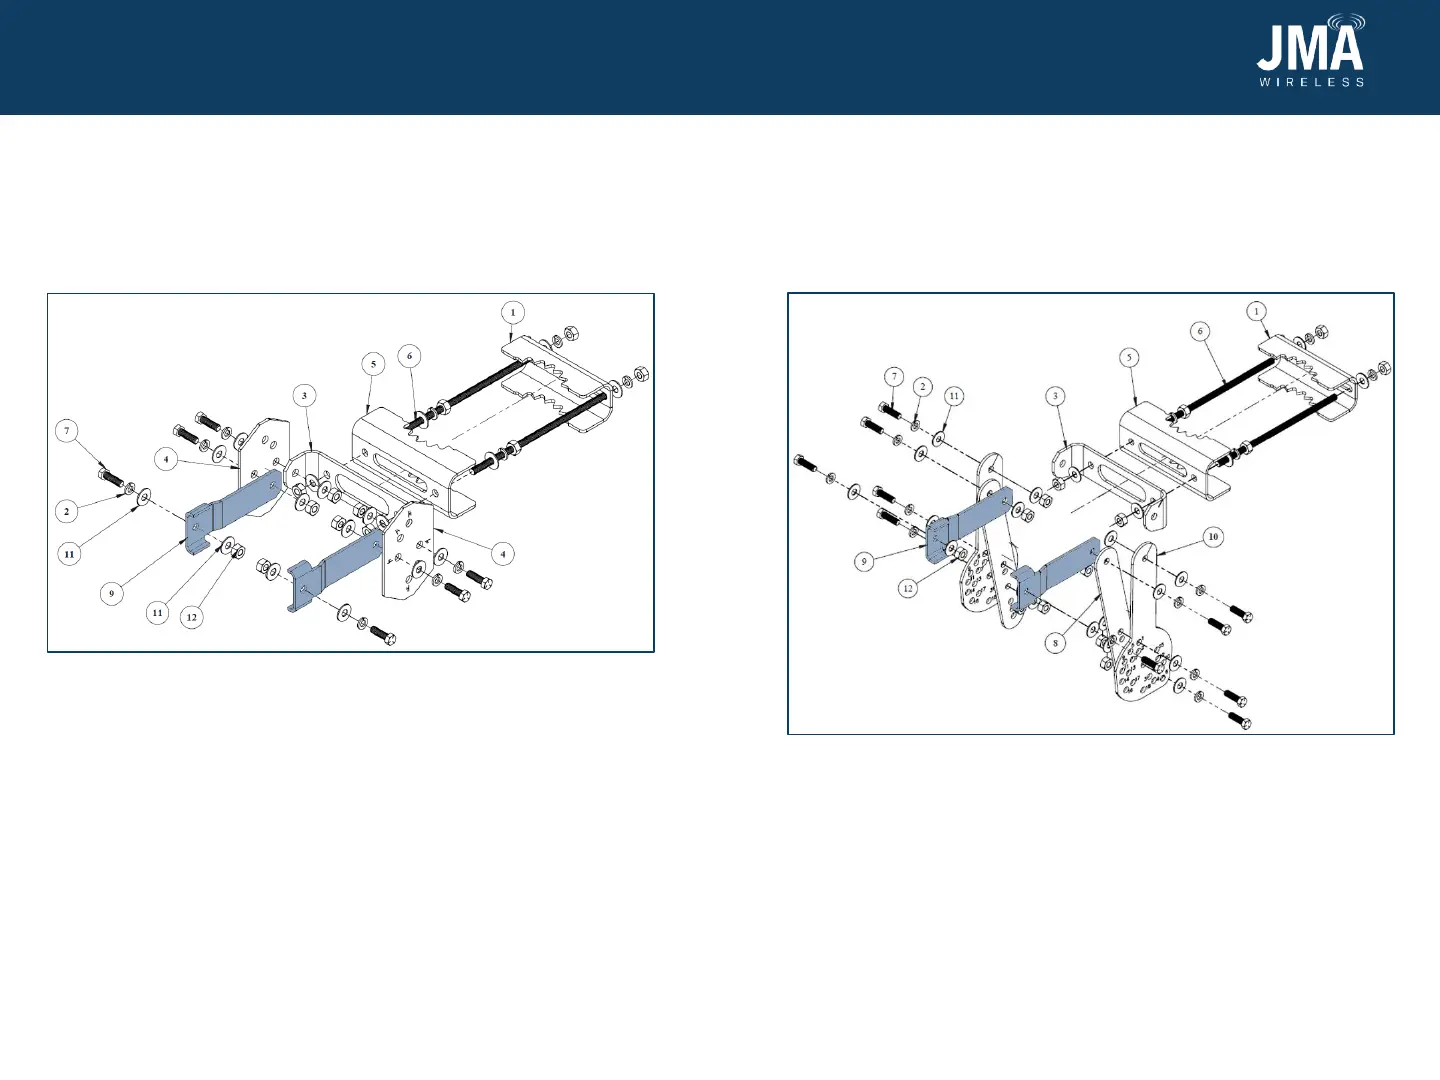
Attach bottom bracket to antenna
1. Install bottom mount pieces—back grip bracket 1, anti-rotation
bracket 5, single mount adapter 3, bottom bracket 4, and MX08
extension bracket 9 (highlighted blue)—onto antenna as shown in
Figure 4 using threaded rods 6 and the following 3/8” hardware: 2,
7, 11, and 12.
6 7
Figure 4: Bottom mount
2. Connect the single mount adapter 3 and bottom bracket 4 using the
hole labelled “0.” If you need to do a -1
o
or -2
o
tilt, use the labeled
holes on the bottom bracket plate. Leave the fasteners associated
with tilt and pole loose enough to allow free rotation of the parts.
Make sure the threaded rods do not extend past the nut closest to
the antenna.
Figure 5: Top mount
Attach top bracket to antenna
3. Install top mount pieces—back grip bracket 1, anti-rotation bracket
5, single mount adapter 3, antenna linkage arm 8, tilt select arm
10, and MX08 extension bracket 9 (highlighted blue)—onto antenna
as shown in Figure 5 using threaded rods 6 and the following 3/8”
hardware: 2, 7, 11, and 12.
4. Fasten antenna linkage arm 8 and tilt select arm 10 together using
holes “C” and “1” for default tilt. Leave all fasteners associated with
tilt and pole loose enough to allow free rotation of the parts. Make
sure the threaded rods do not extend past the nut closest to the
antenna.
 Loading...