Cot assembly - step 1
Cot assembly - step 2
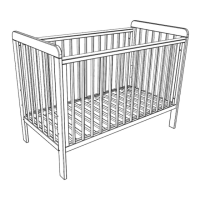
(Do not fully tighten bolts at this stage)
Part A
Part C
Fixing 1
3 positions
Part A
Part B
Fixing 3
Fixing 2
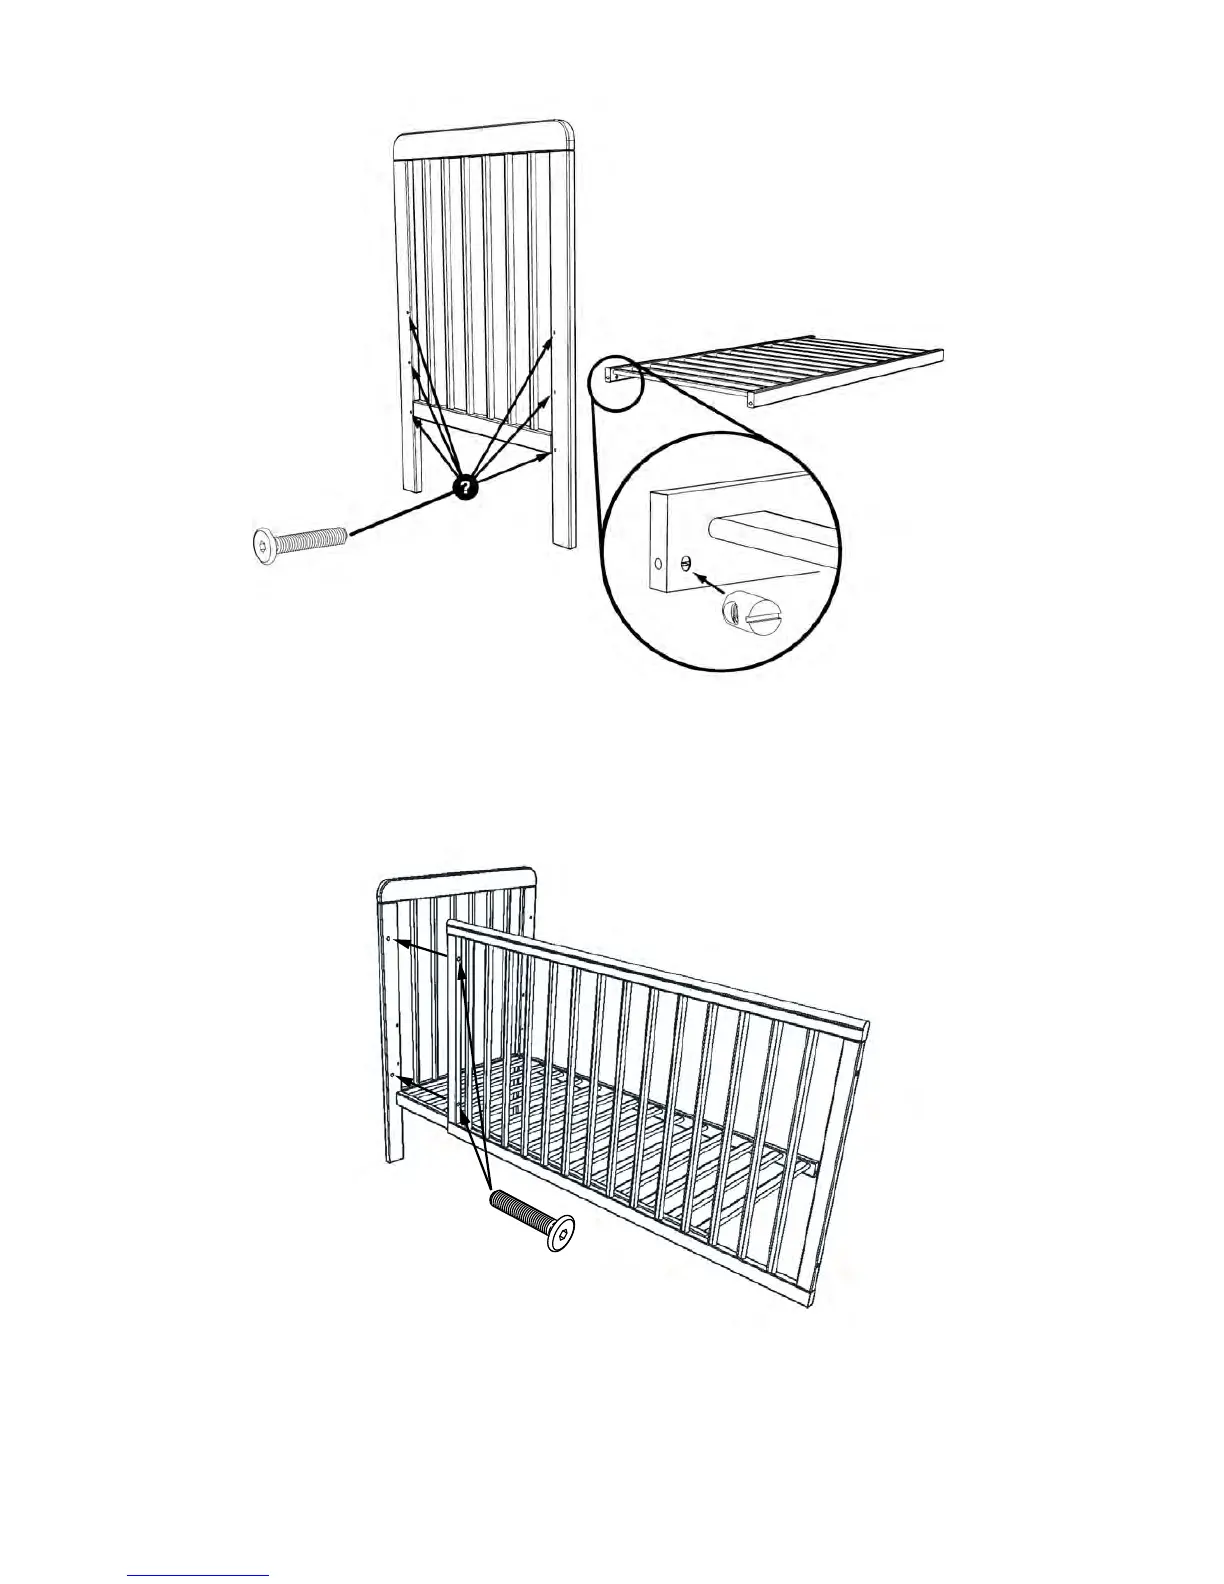
Attach a cot side (part B) using two 45mm bolts (fixing 2) passed through the holes in the cot side,
then into the threads in the cot end (part A). Repeat step 2 for other side.
Attach the second cot end (part A) to the base (part C) using the remaining bolts (fixing 1) and barrel
nuts (fixing 3).
Finally attach the second side (part B) using the remaining bolts (fixing 2).
Once all parts are in place, ensure all bolts are fully tightened. Your cot is now ready for use.
Push two barrel nuts (fixing 3) into the holes at one end of the base (part C) as shown above.
Make sure that the slots are visible and, if necessary, use a flat-headed screwdriver to ensure that the
slots point towards the holes in the ends as shown. Select one of the 3 base heights and attach an end
(part A) using two 65mm bolts (fixing 1). Do not fully tighten the bolts at this stage.
3