Assembly
Refer to assembly drawing opposite. Carefully unpack the carton, making sure all the parts are
present before assembly.
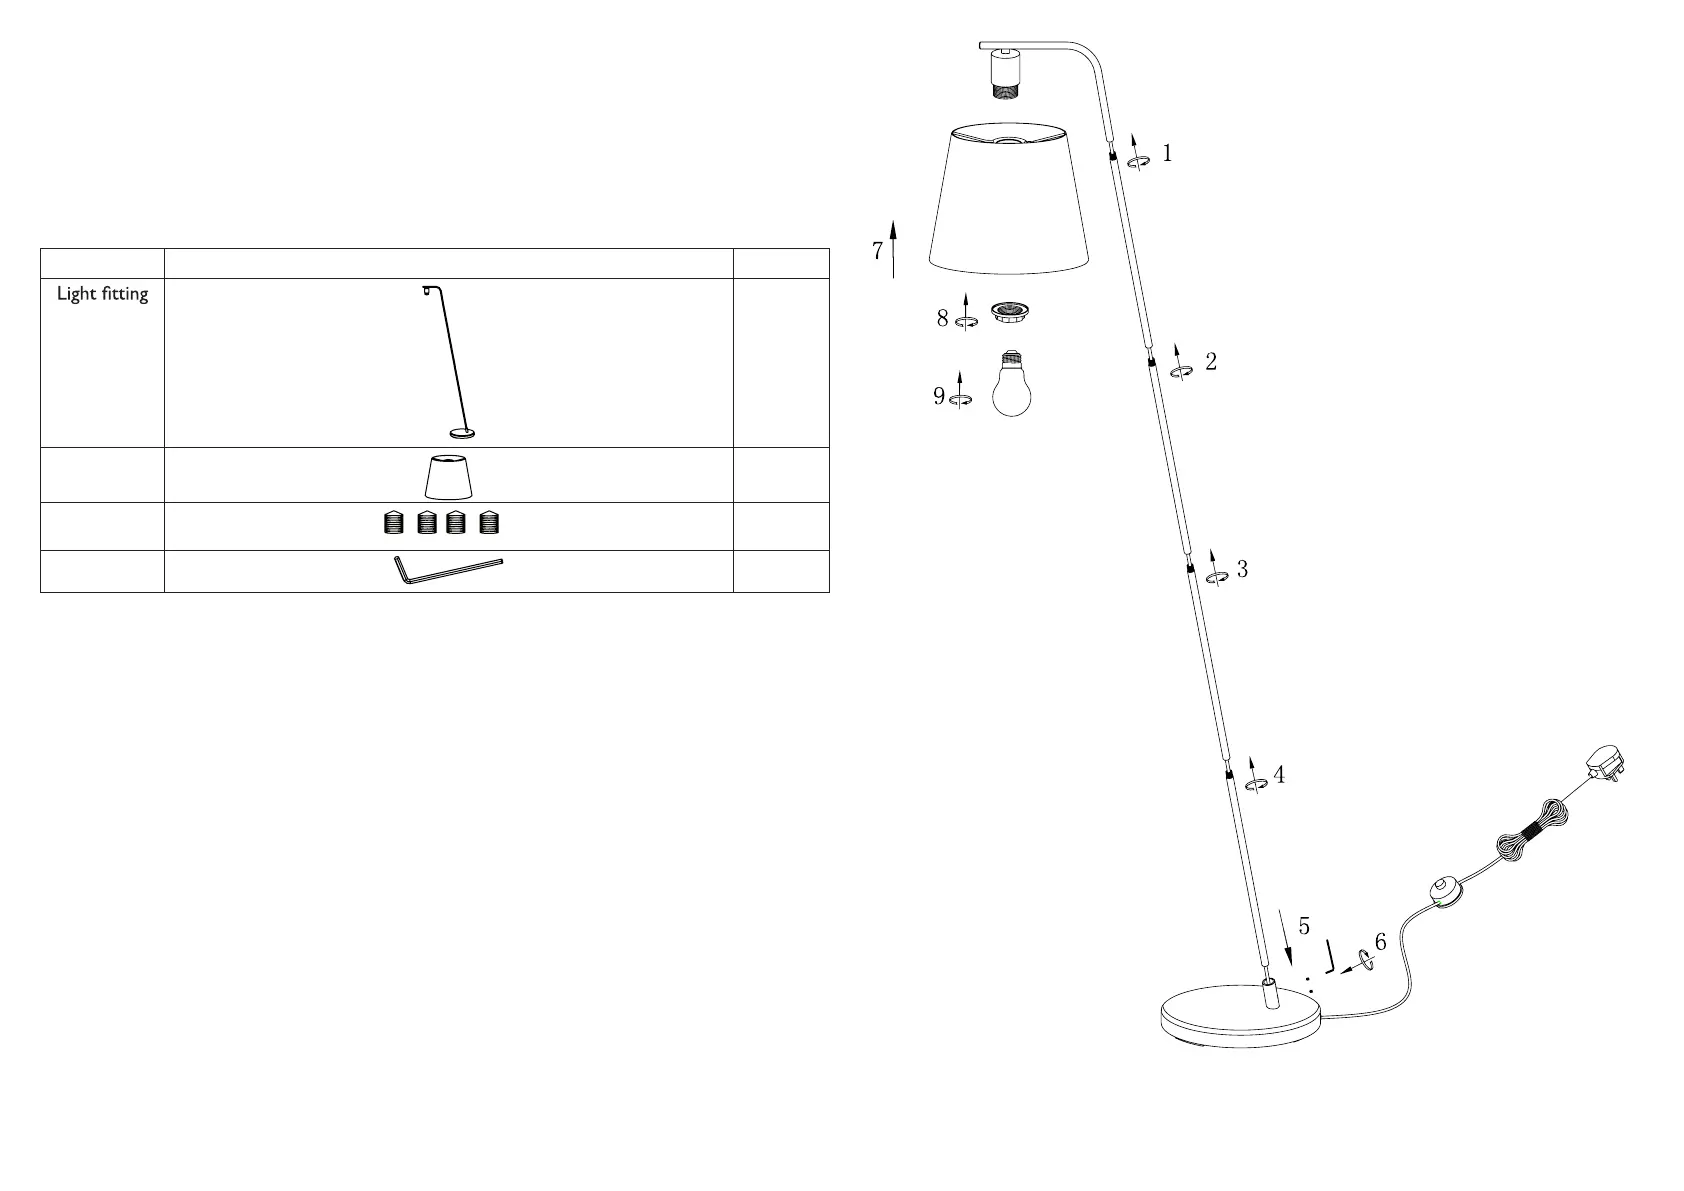
Step 1
Taking care not to trap any cables, and to avoid cross-threading, screw together the sections of
stem (1-4).
Step 2
Gently pull any excess cable through the base and slide the stem into the base (5), and secure using
the grub screws and Allen key (6)
Step 3
Remove the shade ring (8) from the lampholder, place the shade (7) over the lampholder and refit
the shade ring. Tighten to secure the shade in place.
Step 4
Fit the bulb (9) as recommended over-leaf. Do not exceed the recommended rated power as this
may cause damage to the light fitting.
Step 5
Unbundle the cable from the cable tie. Your floor lamp is now ready to use. Switch on using the
floor switch.
Thank you for purchasing this Harry Floor Light. Please read the instructions carefully before use
to ensure safe and satisfactory operation of this product.
Care instructions
We recommend cleaning with a soft dry cloth. Do not use abrasive materials as these will
damage the finish.
Warnings!
This is a Class 1I product and must NOT be earthed.
Please read these instructions carefully before commencing any work.
For your safety, always switch off the supply before cleaning or removing the shade.
Your standard lamp has been packaged as separate parts to prevent damage during transit.
If you are in any doubt, please consult a qualified electrician.
Parts list ImageQ ty
(5 sections +
base)
1
Shade
1
Grub screws
2 (in situ)
2 (spare)
Allen Key
1
 Loading...