Thank you for purchasing this product. Please read the instructions and
warnings carefully before use to ensure safe and satisfactory operation of
this product. It is recommended that this blind should only be installed by
persons competent in DIY.
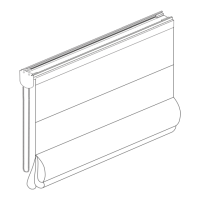
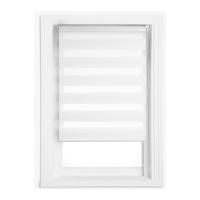
Roman blind
Please check the contents
60cm & 90cm blinds
1. 2 x Fixing brackets
2. 4 x Screws and wall plugs
3. 1 x Safety cleat
120cm, 150cm, &180cm blinds
1. 3 x Fixing brackets
2. 5 x Screws and wall plugs
3. 1 x Safety cleat
Please note: Additional fasteners other than those sent with your blind
may be required depending on the mounting surface. Wallboard and
plaster require the use of anchors such as expansion or toggle bolts. Brick,
tile or stone need special plugs and drill bits. Remember to always pre-drill
holes in wood to avoid splitting.
1. Positioning the blind
1. A Inside the recess
Decide the position of the blind so that it will be clear of any
latches and fixtures.
I. B. If you need to reduce the width of the blind to fit the recess,
this should be done before assembling.
1. C. Outside the recess
Decide the position of the blind so that the overlaps on both
sides are equal. It is advisable to allow a minimum of 5cm
overlap on each side.
2. Fixing the brackets
2. A. Please ensure that the head rail for this blind is installed at least
1.5m from the floor.
2. B. The brackets are designed for face or top fixing to the window
frame, wall, or ceiling.
2. C. Attach the brackets to the headrail by inserting into the
channel on the reverse.
2. D. Having decided the positioning of the blind, present it to the
desired position, making sure it is centred and level.
2. E. Mark the location of each bracket with a pencil.
2. F. Remove each bracket from the headrail by pressing the locking
tab at the bottom of the bracket.
2. G. Place each bracket on its location markings and mark through
the desired screw hole positions.
2. H. Use the screws provided to fix the brackets to wood. For
masonary, use masonary plugs.
3. Installing the blind
3. A. Make sure that the downward folds are facing outwards.
Present the headrail to its brackets, resting it on top of them.
3. B. Press the headrail down firmly onto each bracket until the
locking mechanism clicks.
3. C. Allow the blind to unroll to its full extent and check that the
cord lengths on each side are even.
4. Operating the blind
4. A. Lowering
4. B. Hold the cord at eye level, move it to the left and pull gently
until the cord lock releases.
4. C. Let the cord slide through the fingers until the blind is lowered
to the desired position. Move the cord to the right and release
it. The blind will automatically lock.
4. D. Raising
4. E. Pull the cord down until the blind is raised to the desired
position. Move the cord to the right and release it. The blind
will automatically lock.
5. How to fix the safety cleat
5. A. The safety cleat is designed for fitting onto an adjacent surface
as close to the headrail as possible and not less than 1.5mts
from the floor.
5. B. Place cleat onto an adjacent wall or where the cleat is to be
fixed so that the cords can’t be easily reached.
5. C. Make sure the cord is pulled tight.
5. D. Screw the cleat in place.
6. Position safety cord stops
6. A. When the safety cord stops is released, please refer to below
instruction to reset. WARNING: Reduce the risk of inner
cord strangulation to infants and toddlers. Make sure safety
cord-stops are in position before using blinds.
6. B. Install blind as directed, making sure headrail is tightly fastened.
Lower blind to maximum desired length and lock into place.
6. C. Measure the distance below the headrail about 1-2 inches
6. D. Make a loop in the cord
6. E. Make a second loop (B) on the cord
6. F. Push loop (B) into loop (A)
6. G. Put the cord-stop inside loop (B)
6. H. Hold the cord-stop in place and pull firmly on to the cord to
tighten the knot
6. I. Repeat step D - I for each cord-stop
6. J. The safety devices i.e. Safety cleat & Cord stops are provided
to ensure that operating cords cannot form a hazardous loop.
These safety devices must be attached and adjusted correctly
as per the instructions to ensure that the blind can be
operated and maintained safely.
7. Safety breakaway device for 120, 150, & 180cm blinds ONLY
7. A.120cm, 150cm, & 180cm roman blinds are fitted with an
additional safety breakaway device in the pullcord.
7. B. If a child becomes entagled in the pull cords the device will
release all the cords to prevent a hazardous loop forming.
7. C. To reset the device, please see diagram
8. Care and maintenance
8. A. The headrail may be removed by pressing the locking tabs at
the bottom of the brackets.
8. B. The fabric is attached to the headrail with a velcro strip. Blind
fabric can be removed for professional dry cleaning only.
8. C. When reattaching the blind, first introduce all cords in the cord
lock behind the interior metallic piece.
8. D. Then introduce the other end of both cords through the first
cord guide, and finally only the longest cord through the next
cord lock.
1.
2.
Cord stops are attached to keep the blind in the locked position to
prevent the risk of strangulation prior to fitting. Please remove the cord
stops before fitting the blind and then reattach following the cord stop
instructions once your blind has been fitted.
1/3