4.
FOR SERVICE ASSISTANCE, CALL 800-433-0708 OR VISIT JOHNDOW.COM
Generating the Vacuum:
Extracting Oil from Vehicle:
Emptying the Drain:
Maintenance & Storage:
1. Close all ball valves as shown including:
A. Air shut off valve [A]
B. Below venturi [B] to tank
C. Probe coupler connection [C]
D. Air into tank (with safety valve) [D], used to empty tank
E. Discharge hose [E] at base of tank
2. Connect air supply to the venturi port (quick connect air tting
not included) [3]. Supply air pressure should be
between 100 and 120 PSI to achieve optimum vacuum.
3. To generate the vacuum inside the tank, open air supply [A]
and venturi valves [B]. Monitor the vacuum gauge and turn off
the air when the gauge is in the green zone by closing the ball
valves [A & B]. Disconnect the air supply. The tank is ready to
extract oil.
1. Select the appropriate size probe [10-15] and insert into the
engine oil dip stick tube or gear case port.
2. Remove protective cap from suction hose [4] and connect to
the probe connector.
3. To begin the extraction of oil from the vehicle / gear case,
open the probe coupler ball valve [C].
4. When complete, close valve [C] and remove probe.
1. Place hook end of Evacuation Hose [7] in the used oil
collection tank.
2. Close all ball valves except the ball valve below the evacua-
tion hose connector [E].
3. Connect shop air to the tank connector [D] (with safety valve).
Do not exceed 10 PSI supply pressure.
4. To evacuate the used oil from the drain, open the tank ball
valve [D].
5. When drain is empty, close tank ball valve [D] and disconnect
air supply.
1. Periodically check ttings for visible leaks. Service as necessary.
2. Keep cap on end of suction hose and keep all ball valves closed when not in use.
E
D
C
A
B
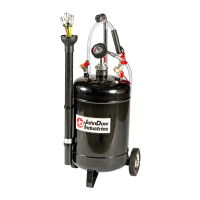
ASSEMBLY INSTRUCTIONS FOR JDI-6EV
ASSEMBLY INSTRUCTIONS FOR JDI-20EV
1. Place Probe Tube [5] in rings on side of Tank [1].
2. Place Flexible Probes [10, 11, 12, 15] and Metal Probes [13, 14] in Probe Tube [5].
3. Secure handle [6] to Tank using 4mm Hex Wrench.
4. Screw on Vacuum Gauge Kit Assembly [2] and hand tighten.
5. Connect 1” diameter Evacuation Hose [7], tighten with 1-1/16” Wrench.
JDI-6EV: 4mm Hex Wench JDI-20EV: 3/4” Wrench, 1/2” Wrench, Phillips Head Screwdriver
1. Assemble Front Casters [8], Washers, Lock Washers and Cap Nuts using 3/4” Wrench.
2. Assemble Rear Fixed Wheels [9], Washers and Screws using 1/2” Wrench.
3. Place Probe Tube [5] in rings on side of Tank [1].
4. Place Flexible Probes [10, 11, 12, 15] and Metal Probes [13, 14] in Probe Tube.
5. Secure Handle [6] to Tank using Phillips Head Screwdriver.
6. Screw on Vacuum Gauge Assembly [2] and hand tighten.
TOOLS & SUPPLIES NEEDED (not included)

 Loading...