18
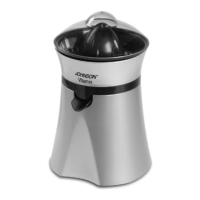
COMPONENTS
A. Dust cover
B. Small squeezer cone
B1. Large squeezer cone
C. Support with filter ring
D. Cup
E. Engine body
F. Faucet
G. Spout
Remove the parts of the appliance from
the packaging and dispose of the packa-
ging components according to the provi-
sions of the law. Check that the product
is intact and that all components are pre-
sent. In the event of obvious anomalies or
transport damage, do not use the applian-
ce, but contact the dealer or an authorized
technical assistance centre.
FIRST USE
Before using the appliance for the first
time, it is advisable to wash all the parts
that will come into contact with food,
using warm water and dishwashing deter-
gent. Dry well before putting the applian-
ce back together.
USE
Position the bowl (D) on the motor body
(E) making the tap (F) of the bowl (D) coin-
cide with the seat of the motor body (E).
Choose a squeezing cone (B or B1) and
join it with a slight pressure to the support
with filter ring (C).
The small cone (B) is ideal for lemons, li-
mes and other small fruits. The large cone
(B1) is perfect for oranges, grapefruit and
other large fruits.
N.B.: when using the large cone (B1),
always place the small cone (B) inside
the large one (B1). The small cone (B)
can be used alone.
Position the support with filter ring nut
(C) with the squeezing cone (B or B+B1)
previously chosen and assembled on the
cup (D).
Close the tap (F) by moving its spout (G)
upwards.
Place a suitable container (e.g. a glass) in
the recess under the tap (F) (Fig. 1).
Insert the plug into a socket suitable for
receiving it.
Cut the citrus fruit to be squeezed into 2
parts and place one half on the squeezer
cone (B or B+B1). Pressing it downwards
automatically activates the rotation of the
appliance and starts squeezing.
Keeping the spout (G) facing upwards, the
juice deposits in the cup (D), (Fig. 2) by lo-
wering it, the juice comes out of the tap (F)
depositing itself in the previously positio-
ned container (Fig. 3). By interrupting the
pressure, the motor stops and the next
time it is pressed, the direction of rotation
reverses automatically.
N.B.: the squeezing cone (B or B+B1) chan-
ges direction of rotation every time the
pressure on the fruit is interrupted. This
ensures that the fruit is squeezed down to
the last drop.
After squeezing and/or filling the cup (D),
(if you have chosen not to deposit the jui-
ce directly into the previously positioned
container), lower the spout (G) and tran-
sfer the juice into the container (Fig. 4).
When the work is completed, disconnect
the plug from the electrical socket, remo-
ve the support with the filter ring nut (C)
and the squeezing cone (B or B+B1) and
lift the cup (D) from the motor body (E).
Rinse holder with filter ring (C), cup (D)
and squeezing cone (B or B+B1) immedia-
tely after use. Use a soft bristle brush, if
necessary, to remove any remaining pulp.
N.B.: do not leave food residues in con-
tact with the appliance for longer than
the necessary preparation time.
To prevent the appliance from overhe-
ating, do not press excessively on the
cone and do not operate it for more
than 20 continuous seconds, and wait
at least 30 seconds before restarting it.
 Loading...