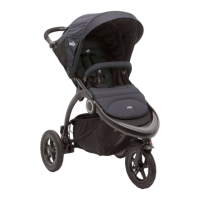
Stroller Assembly
Please read all the instructions in this manual before assembling and using this product.
Open Stroller
see images
1
-
2
Press the handle adjustment buttons on left and right of the handle
1
- 1, Rotate handle upward until it is
upright.
1
- 2
Push secondary lock
2
- 1 and squeeze one-hand-fold button.
2
- 2
Meanwhile, pull the stroller backward to open. Latches should click into place.
!
Check that the stroller is completely open before continuing.
Assemble Front Wheels
see images
3
Assemble front wheels to front legs. Check that wheels are securely attached by pulling on wheel
assemblies.
3
The front wheels can be disassembled by pressing the snap buttons.
Assemble Rear Wheels
see images
4
Assemble rear wheels to rear legs. Check that wheels are securely attached by pulling on wheel assemblies.
4
Wrap the storage basket around frame and brake axle, and then snap into place.
4
- 1
The rear wheels can be disassembled by pressing the snap buttons.
Assemble Canopy
see images
5
The completely assembled stroller is shown as
6
Stroller Operation
Adjust Backrest Angle
see images
7
-
8
Recline Backrest
Pull tab to recline backrest.
7
!
Hold the backrest with the other hand if a child is already seated in the stroller.
Raise Backrest
Hold both left and right strings and push up the angle adjuster to raise backrest.
8
!
Make sure the backrest angle is set properly for use.
Use Armbar
see images
9
The armbar can be pulled up on both left and right sides.
Press armbar release button
9
- 1, and then pull up the armbar.
9
- 2
Align the armbar end with matching component, and then push down to lock.
Tip
Armbar can be removable or pivot open for stroller entry.
Use Buckle
see images
10
-
11
Release Buckle
Press the center button to release the buckle.
10
Lock Buckle
Match the waist belt buckle with the shoulder buckle
11
- 1, and click into the center buckle.
11
- 2
A click sound means the buckle is locked completely.
11
- 3
!
To avoid serious injury from falling or sliding out, always secure your child with harness.
!
Make sure your child is snugly secured, the space between the child and the shoulder harness is about the
thickness of one hand.
!
Do not cross the shoulder belts. This will cause pressure on child’s neck.
Use Shoulder & Waist Harnesses
see images
12
-
15
!
In order to protect your child from falling out, after your child is placed into the seat, check whether the
shoulder and waist harnesses are at proper height and length.
12
- 1 Shoulder harness anchor A
12
- 2 Shoulder harness anchor B
12
- 3 Slide adjuster
For larger child, use shoulder harness anchor A and the highest shoulder slots. For smaller child, use shoulder
harness anchor B and the lowest shoulder slots.
To adjust the position of the shoulder harness anchor, turn the anchor to be level with the side facing forward.
Thread it through the shoulder harness slot from back to front.
13
Rethread it through the slot that is closest to
child's shoulder height.
14
Use slide adjuster to change the harness length.
15
- 1
Press the button
15
- 2, while pulling the waist harness to proper length.
15
- 3