Do you have a question about the Joie i-Gemm I1404C and is the answer not in the manual?
Key safety precautions for using the child restraint, including proper fitting, maintenance, and avoiding hazardous situations.
Information on using the restraint with specific seat types, dimensions, and avoiding front airbags for enhanced safety.
Identifies and labels all parts of the child restraint system for user reference.
Guidance on choosing the correct vehicle seat and ensuring a level surface for proper installation.
Steps for adjusting the recline foot and using padding for correct base positioning and security.
Instructions on using vehicle belt path labels for correct belt placement during installation.
Step-by-step guide to threading, buckling, and tightening the vehicle belt through the base.
Checklist to ensure the vehicle belt is correctly installed, tight, and the level indicator is accurate.
Information on locating and using ISOFIX low anchorage points, including LATCH system compatibility.
Detailed steps for releasing, positioning, and attaching ISOFIX connectors to vehicle anchorages.
Checklist to confirm correct ISOFIX installation, including level indicator, belt tightness, and strap tension.
Instructions for securely attaching the child restraint to the base and releasing it using the latch.
Guidance on correctly attaching the tether strap to the vehicle anchorage and storing the excess.
Steps for connecting the snap hook, adjusting tension, and releasing the webbing on the tether strap.
Verification steps for tether strap security, tension, twists, and proper storage of the loose end.
Instructions for finding and using pre-existing threaded holes for tether anchorages.
Procedure for drilling holes and installing anchor fittings for vehicles without existing anchor points.
Information on attaching the child restraint to Joie strollers using separately sold adapters.
Instructions for cleaning the seat cover, plastic parts, harness buckle, and straps.
Advice on storing the child restraint when not in use to ensure safety and preservation.
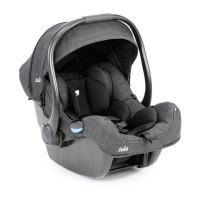
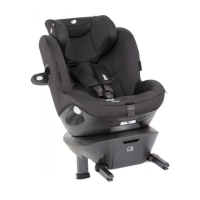
This document provides installation instructions and usage guidelines for the Joie i-Gemm child restraint, model I1404C. It is designed for children up to approximately 12 months of age and is a rear-facing child restraint. It is crucial to read and understand this user guide and your vehicle's owner's manual before using the child restraint.
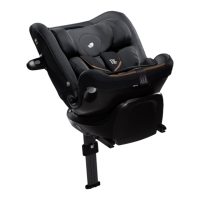
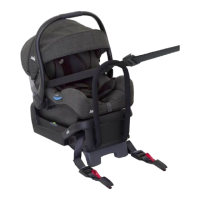
The Joie i-Gemm is a rear-facing child restraint system designed to provide safety for infants in a vehicle. It consists of a car seat and a base, which can be installed using either the vehicle's seat belts or ISOFIX low anchorages. A tether strap is also an essential component for securing the restraint. The restraint features a recline adjustment foot on the base to achieve the correct installation angle, and a bubble level indicator helps ensure proper positioning. The car seat securely latches into the base, indicated by an audible "CLICK." The restraint also includes a carry handle for portability and a rebound bar for added safety.
General Installation: The child restraint must always be installed in a forward-facing vehicle seat, but the restraint itself is rear-facing. It should never be installed in a seat that faces the rear or the side of the vehicle. The safest place for installation is typically the center of the rear seat. The base can be installed using a lap belt, a lap/sash belt, or ISOFIX anchorages. For correct installation, the vehicle must be on a level surface. The base has a recline adjustment foot that snaps into position to achieve the correct angle, and a bubble level indicator helps verify proper recline. If the recline adjustment foot doesn't provide sufficient recline, a folded towel or similar firm padding can be added under the base. Any extra padding must be firmly folded to ensure the base remains secure when the vehicle belts are pulled tight. The base should always be secured with a vehicle belt, even when the restraint is not fitted to it, as an unsecured base can be dangerous in an accident or sudden stop.
Vehicle Belt Installation: To install using vehicle belts, first place the base on the vehicle seat in line with a top tether anchorage point. Open the belt lock-off, pass the vehicle belt through the openings in the base labeled 'BELT PATH,' and buckle the vehicle belt. Ensure the belts are not twisted. Push the base firmly into the vehicle seat and pull the vehicle belts tight. Finally, hold the vehicle belts tight and engage the belt lock-off. Loose belts are dangerous, so it's important to pull them tight. A checklist for vehicle belt installation includes verifying that the vehicle buckle is engaged, the vehicle belt is tight, the vehicle belt is not twisted, and the level indicator bubble is fully in the clear area.
ISOFIX Compatible Connectors Installation: For vehicles equipped with ISOFIX low anchorage points (also known as LATCH in some regions), the ISOFIX straps can be used. These anchorages are found at the bottom of the back seat backrest. If not clearly visible, vehicle seats may have labels indicating their location. To install, turn the base over, bring the recline foot to the open position, and release each ISOFIX compatible connector from the steel rod. Position the ISOFIX compatible connectors at either side of the base. Place the base on the vehicle seat and check the bubble level indicator to determine if the recline foot needs to be out or folded away. Attach each connector to the vehicle ISOFIX anchorages, ensuring straps are not twisted. Pull each adjustment strap equally until the tension indicators show green, indicating proper tension. Reposition any spare webbing to outside the base. In some vehicles, the seat cushion's shape or softness might prevent indicators from showing fully green, but strap tension is usually adequate. If in doubt, consult a licensed child restraint fitter. A checklist for ISOFIX installation includes verifying that the level indicator bubble is fully in the clear area, the belt is tight, there are no twists in belts, and the belts are tensioned with the indicator showing green. It's crucial not to attach the lower attachment connectors of two separate child restraints to the same ISOFIX low anchorage.
Fitting Restraint to Base: Before fitting the car seat to the base, ensure there is nothing in or on the base (like blankets or toys) that could prevent secure latching. Lower the restraint down into the base and listen for a "CLICK" from the latches. Pull up on the restraint to ensure it is securely latched. To release, lift the restraint with one hand while pulling up on the release latch at the back of the base.
Tether Strap Usage: The tether strap must always be used and attached to a child restraint upper anchorage point in the car. Refer to your car's owner's handbook for anchorage point locations, or consult a child restraint fitting station if no points are found. The tether strap is not suitable for use where it may fall into a split in the seat back or off the side of the seat. The loose end of the tether strap should always be secured in the provided bag to prevent it from hanging out of the car or being accessible by the child. The tether strap wraps around the sides of the restraint, not over the top. If a canopy is fitted, the tether passes outside it. Always attach the snap hook securely to the anchorage fitting and remove slack. Do not adjust the tether strap so tightly that it lifts the child restraint off the vehicle seat. To increase webbing tension, pull the upper strap through the adjustor. To release tension, press the adjustor button and pull the lower strap. Straps must not be twisted. In some vehicles without a fixed parcel shelf, an extension tether strap may be required, available from child restraint retail outlets. A checklist for the tether strap includes verifying that the snap hook is securely attached, the tether strap is correctly tensioned, it is not twisted, and the loose end is stored in the bag.
Tether Anchorage Installation: Most cars have threaded holes for tether anchorage. Refer to your vehicle's owner's handbook for locations. Attach the anchor fitting using the provided bolt to the mounting point behind where the child restraint is to be installed. The anchor fitting must be aligned as shown in the manual unless otherwise stated in the vehicle's handbook. If drilling a new hole is necessary (for sedans without a pre-existing anchorage point), select a position on the center line of the seating position, no closer than 100 mm from the front edge of the parcel shelf. Drill a 9 mm hole and install the anchor bolt as shown. It is recommended that this installation be carried out by a child restraint fitting station or a licensed motor mechanic. Child restraints must not be attached to unsound metal, wood, or synthetic structures. When drilling, avoid fuel lines, fuel tanks, electrical wiring, or radio speakers. Webbing straps must be protected from sharp corners and edges. The anchor fitting must only be used as described and not hooked onto any other object.
Use with Strollers: This Joie child restraint can attach to Joie strollers using adapters. Instructions for these adapters are included with the adapters, which are sold separately.
Seat Cover: The seat cover should be washed with cold water and mild detergent. Do not iron, bleach, or dry clean. Avoid twisting the soft goods forcefully to dry, as this may cause wrinkles. Hang the seat cover to dry in the shade.
Plastic and Metal Parts: Clean plastic and metal parts using only mild detergent, water, and a soft cloth. Air dry them. Do not use undiluted detergent or other solvents, as these may cause damage.
Harness Buckle: To clean the buckle, rinse it with warm water. Do not use any soaps, solvents, or lubricants, as anything other than water can cause the buckle to malfunction. Air dry the buckle. When operating correctly, the buckle tongues will push in easily and "CLICK" when they latch into place. If the buckle is not working correctly, have it checked or replaced by contacting the retailer from whom it was purchased.
Harness Straps: Spot clean the harness straps. If they are damaged, contact the retailer from whom the restraint was purchased to have them replaced.
Storage: If the child restraint is not in use for a long period, remove it from the vehicle seat. Store it in a cool, dry place where your child cannot access it.
| Safety Standard | i-Size |
|---|---|
| Harness System | 5-Point Harness |
| Headrest | Adjustable |
| Side Impact Protection | Yes |
| Removable Cover | Yes |
| Product Size | 66 x 43.5 x 58.5 cm |
| Installation | Isofix or Vehicle Belt |
| Group | 0+ |
| Installation Direction | Rearward Facing |
| Dimensions | 66 x 43.5 x 58.5 cm |
| Recline Positions | Multi-position |
| Isofix | Compatible |