13
14
• Pull the folding webbing.
31
! Do not unlock rails yet. Center of floor must be halfway up before unlocking the rails..
• Unlock all four rails by following these steps.
1) Slightly lift the center of the rails.
32
-1
2) Push the button
32
-2
3) Push down the rails
32
-3
! Do not force fold
! If unit will not fold, look for a partially latched rail. Squeeze the latch button to release the rail.
• To pack and cover the travel cot
34
-
35
Accessories (May not be included in purchase)
Use toy bar
see images
36
-
42
Use mosquito net
see images
43
• Please cover the mosquito net on the rails as
43
! Using the mosquito net:
1) please fold the changer.
2) please remove the toys and toy bar.
Care and Maintenance
1. The covering material is not removable.
2. Your travel cot can be spot cleaned with a sponge and soapy water.
3. Do not use undiluted neutral detergent, gasoline or other organic solvent to wash the travel cot.
It may cause damage to the travel cot.
4. To wash carry bag, machine wash in lukewarm water and drip-dry. Do not use bleach.
5. At the beach or in the garden, clean sand and grit off your travel cot. Sand in the long rail locks
may cause damage.
6. From time to time, check your travel cot for worn parts, torn material or stitching. Replace or repair
the parts as needed.
7. If the travel cot is not in use for a long period of time, please put it in the shade where your child
cannot access it.
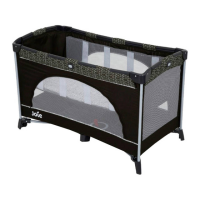
Set Up Travel Cot
see images
1
-
6
Lock the rails
• Pull the short rails up until both become rigid. If not rigid, pull up again until they are rigid.
2
• Latch the long rails.
3
• Push the center of floor down.
4
! Be sure all rails have locked before lowering center.
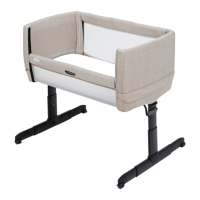
Set Up Bassinet
see images
7
-
10
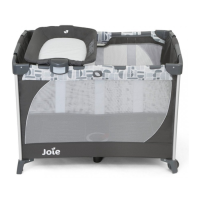
Set Up Storage shelf and changer
see images
11
-
18
• Unfold short Changer Rail to be level status.
12
• Rotate support plastic as
13
-1, and move it along short Changer Rail as
13
-2
! Please clip the plastic to changer and rotate the plastic
18
if the plastic drop from the changer
To use changer
see images
19
-
22
• Lift changer upwards and then put it down before using it. Please make sure the changer mount is completely
locked onto the rail by hearing ”Click” sound.
20
• Press the release button and lift changer upwards, then slide down to store.
22
Fold travel cot
see images
23
-
35
• Press two release buttons on mount tubes at the same time to lift changer
23
• Press the tab of support plastic as
24
-1, and then the storage shelf can pull apart from changer as
24
-2
• Move support plastic along short changer rail as
25
, and then rotate it as
26
-1
• Fold short changer rails inwards as
27
-1
Please read all the instructions in this manual
before setting up and using this product.