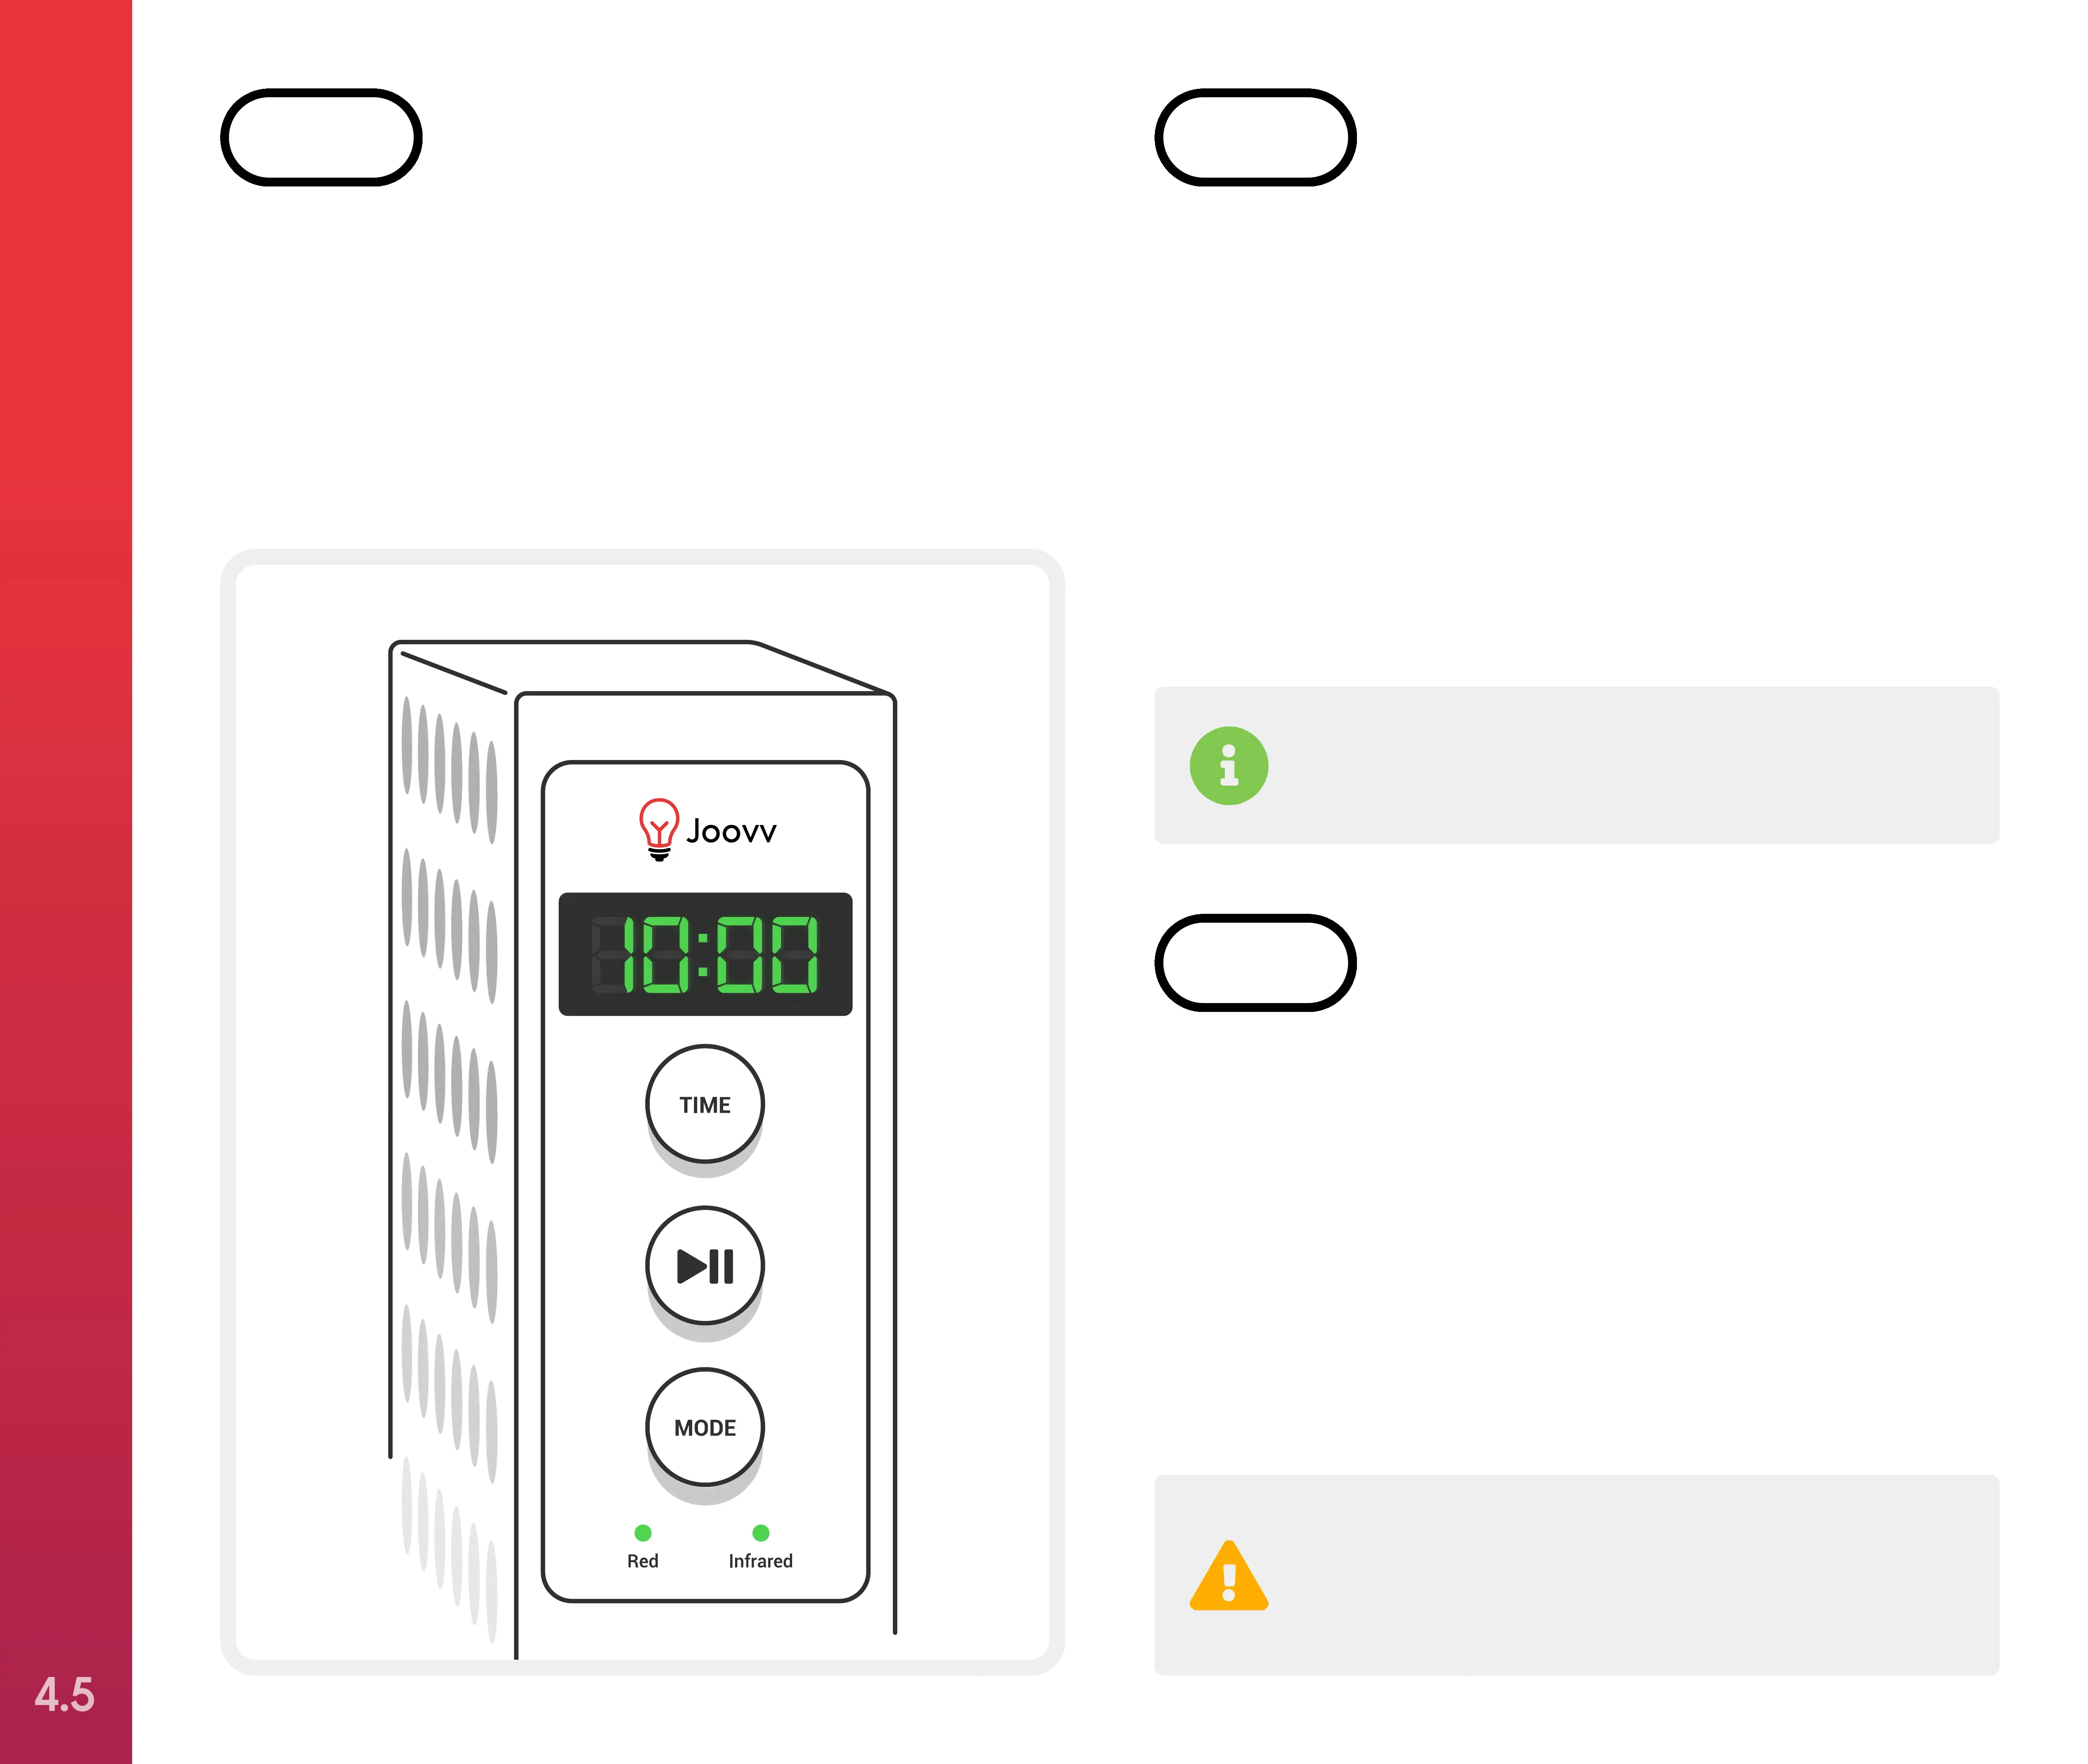
To adjust the treatment time, press the “Time”
button on the control panel. This will add time
in one-minute increments up to 20 minutes.
The timer will cycle back to 1 minute after the
time exceeds 20 minutes on the display.
STEP 7
Remember that near infrared LEDs emit light
that is NOT visible to the naked eye.
The default wavelength mode utilizes both red
and near infrared wavelengths. After pausing
your treatment session, you can change the
mode to use only the red or near infrared LEDs
by selecting the “Mode” button on the control
panel. The green indicator light will illuminate
indicating which wavelength configuration is
selected.
STEP 8
Your Joovv’s cooling fans will run for
5 minutes after the treatment session is
complete to cool the LEDs.
To start your treatment session, press the
“Play/Pause” button once. You can pause your
treatment at any time by pressing the “Play/
Pause” button a second time. Resume your
treatment by pressing the “Play/Pause” button
again.
That’s it—you’re ready to start Joovvin’!
STEP 9
SETTING UP YOUR JOOVV SOLO OR MINI
4.5