6
Assembly and Usage
Unpacking the Product
• Carefully remove walker and all parts from the box and plastic bag.
• Remove the cardboard packing materials.
• Identify the parts: walker frame, tray insert, seat, two front wheels and documents (not shown).
• Discard all packaging materials properly. Do not allow children to play with them.
Installing the Front Wheels
• Insert the post of one of the front wheels into the hole in one of the front corners. Push rmly until
the post is fully engaged. (1)
• Repeat this for the other front wheel.
• Pull on each wheel to ensure it is secured in place.
IMPORTANT: Be sure the post is inserted fully into the base. The top lip of the post should be
ush with the base hole. Nothing below this lip should be visible.
Unfolding (Erecting) the Walker
• Set the walker upright with its wheels on the oor. Pull up on the tray and frame until you hear a
click. (2)
IWARNING: Adult assembly is required for this
product. No tools required.
Installing the Seat
• Identify the front of the seat and the three plastic posts.
• Starting with the center plastic post, insert this post into the front center hole of the walker and
push down to lock in place. (3)
• Repeat these steps for the other two plastic posts.
• Next, on the rear of the seat there are ve plastic clips. Starting with one of the two plastic clips
on the outside, feed the plastic clip through the slot in the back of the walker. (4)
• From the underside of the tray, pull the plastic clip completely through the slot until it snaps
securely into place. (5)
• Repeat these steps for the remaining four plastic clips.
• Push down on the inside of the seat to ensure that ALL posts and clips are secure.
Adjusting the Height of the Walker
• The walker has three adjustable height positions depending on the height of your child. Pull up on
the tray and click it into any of the three positions.
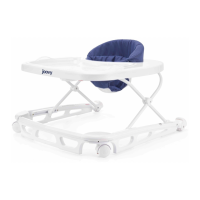
• To adjust the walker’s height, locate the rectangular button under the front of the tray. (6)
• Rotate the rectangular button counterclockwise 90º and then push it in. Lower the walker to the
desired height and then release the button. (7)
• After adjusting the height, place your child in the seat and be sure child’s feet touch the oor.
• Repeat the adjustment process until your child’s feet touch the oor
• DO NOT adjust the height of the walker with the child in the seat.
IWARNING: PINCHING HAZARD Keep children away
from walker while making any adjustments to the walker height.