27
ENGLISH
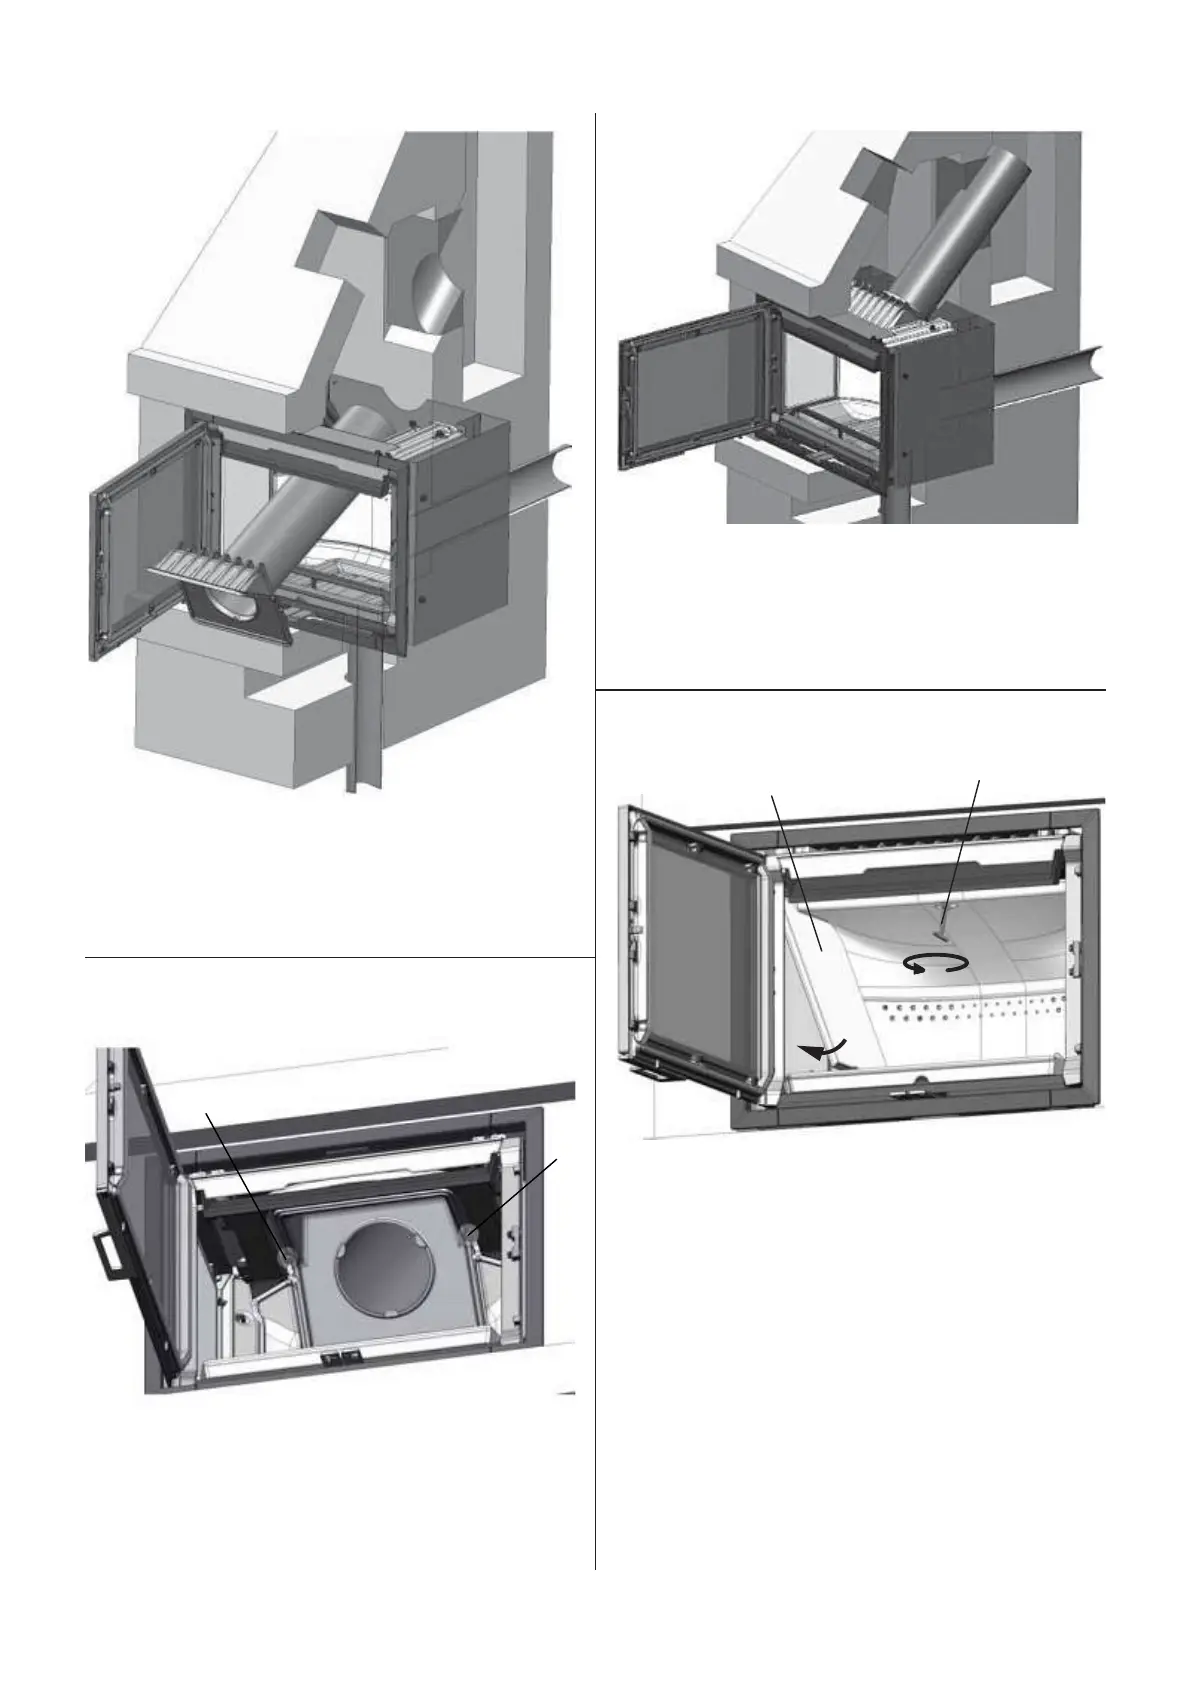
Fig. 35
5. Attach the smoke bell (A) to the end of the flue pipe where
the gasket is fitted.
6. Attach the flue pipe with the smoke bell on from the inside
of the burn chamber.
Fig. 36
A
A
7. Then attach the smoke bell using the screws (A) that had
previously been removed when it was taken off the top outlet.
Fig. 37
8. If installing as shown in example 3, we recommend threading
the flue pipe in through the door opening of the burn
chamber. Push the flue pipe with the smoke bell on in through
the door opening and the opening for the smoke bell and any
insulation material and up inside the chimney.
Fig. 38
A
B
9. Push the key (A) up through the opening in the baffle, turn
it and secure it.
10. Insert the side burn plates (B) into place.
 Loading...