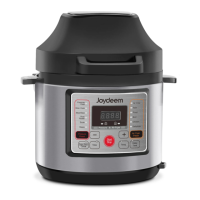
This document is a user manual for the Joydeem Model: YBW609H, which appears to be a multi-functional kitchen appliance, specifically an air fryer and pressure cooker combination.
Function Description
The Joydeem Model: YBW609H is a versatile kitchen appliance designed to perform multiple cooking functions, primarily as an air fryer and a pressure cooker. It allows users to prepare a wide variety of meals with different cooking methods.
Air Fryer Mode:
In air fryer mode, the device is capable of:
- Air crisping: For achieving crispy textures on food.
- Baking/Roasting: Suitable for baking and roasting various items.
- Dehydrating: For drying fruits, vegetables, and other foods.
- Broiling: For cooking food with direct heat from above.
- Chicken cooking: A dedicated setting for preparing chicken.
The air fryer lid is placed on the back side of the product and secured by turning it. The frying basket is used for air frying, and it should not exceed the edge of the basket. The fry basket should have a gap around the liner to ensure even cooking. The power cord is inserted into the socket on the back side of the product, and the display shows "----". The electric pressure cooker indicator lights up, indicating that it switches to the air fryer mode. The device cycles through "Air fry air blow", "Bake/Roast baking/roasting", "Broil grilling", "chicken" and "Dehydrate dehydration". Users can adjust the cooking time and temperature using the "+" and "-" keys. The start button buzzes and the screen displays the working state.
Pressure Cooker Mode:
In pressure cooker mode, the device functions as an electric pressure cooker, offering:
- Pressure cooking: For fast cooking under pressure.
- Sautéing: For browning or pre-cooking ingredients.
- Slow cooking: For extended cooking at lower temperatures.
- Steaming: For gentle cooking with steam.
- Meat/Stew: A specific setting for cooking meats and stews.
- Rice/Risotto: Dedicated settings for preparing rice and risotto.
To use the pressure cooker mode, the air fryer lid is opened and the handle is pulled up. The air fryer lid should be removed to avoid burns. The electric pressure cooker indicator lights up, indicating that it switches to the pressure cooker mode. The device cycles through "Pressure" "Pressure cook" "saute ", "Meat/Stew", "Rice/Risotto", "slow cook" "steam steam". Users can adjust the cooking time using the "+" and "-" keys. The start button buzzes and the screen displays the working state.
The device also features a "Keep Warm" function and a "Reservation" function, which are available in air fryer mode without affecting the temperature display.
Important Technical Specifications
The manual provides a table with adjustable time and temperature ranges for various functions in air fryer mode:
| Function |
Time (min) |
Adjustable time |
Temperature (°F) |
Adjustable temperature (°F) |
| Air crisp |
20mins |
1-60mins |
390°F |
300/315/325/330/345/350/360/375/390/400 |
| Bake /Roast |
15mins |
1min- 4hrs |
375°F |
250/260/275/290/300/315/325/330/345/350/360/375/390/400 |
| Dehydrate |
6hrs |
1-12hrs (30mins) |
160°F |
120/130/140/150/160/165/175/185/195 |
| Broil |
15mins |
1-30mins |
400°F |
|
| Chicken |
30mins |
1min- 4hrs |
360°F |
250/260/275/290/300/315/325/330/345/350/360/375/390/400 |
For pressure cooker mode, the table shows:
| Function |
Time (min) |
Adjust time |
Max appointment time |
Maximum holding time |
| Pressure cook |
10min |
1min- 4hrs |
24hrs |
24hrs |
| Saute |
20min |
1-30min |
// |
// |
| Slow cook |
2min |
1- 2hrs |
24hrs |
24hrs |
| Steam |
8min |
1-30min |
24hrs |
24hrs |
| Meat/Stew |
20min |
10-30mins (1min) |
24hrs |
24hrs |
| Rice/Risotto |
12min |
6-25mins (1min) |
24hrs |
24hrs |
The temperature range for the device is between 5 °C to 40 °C. The product must be allowed to cool for around 30 minutes before cleaning.
Usage Features
The manual emphasizes several usage features and safety precautions:
General Usage:
- Always place the foods in the frying basket to prevent contact with heating elements.
- Do not pour oil into the air frying mode, as it may result in a fire hazard.
- Do not touch the lid after the product has been worked.
- Do not open the cover when the float valve is raised.
- Do not touch or near the surface of the pressure limiting valve and the area above it to avoid scalding steam.
- Do not immerse the product in water or other liquids, or rinse under the tap.
- Ensure the voltage marked on the product matches the local power supply.
- Do not use this product if the plug, power cord, or product is damaged.
- Keep the power cord away from hot surfaces.
- The product can only be connected to a wall outlet with a grounding wire.
- Always place and use this product on a dry, stable, level, and clean surface.
- This product cannot be operated with an external timer or a separate remote control system.
- Do not place the product against a wall or against other products. Maintain at least 10 cm of space on both sides and above.
- Do not place anything on this product.
- Do not use this product for any purpose other than as described in this user manual.
- During working, the air outlet behind the air fryer lid will release high temperature steam. Keep your hands and face at a safe distance from the steam and air outlets.
- During working, the surface will be hot.
- When the supplied accessories are used in the air fryer, the accessories will also be heated.
- This product is limited to households. It should not be used in staff canteens in shops, offices, farms, or other work environments.
- It must not be used by hotels, car hotels, places that provide accommodation and breakfast, and other accommodations.
- Always unplug the product after use.
- Do not overfill the fry basket.
- Make sure that the foods cooked in this product are finally golden yellow, not black or brown. The charred part should be discarded.
- When taking out the fry basket, please bring special insulating gloves for cooking to avoid burns.
- Be careful when cleaning the area above the cooking chamber (hot heating elements, metal parts edges).
- Do not use this product for any purpose other than those described in the user manual, and be sure to use original accessories.
- Do not touch hot surfaces of pressure cooker. Use side handles for carrying.
- Do not place the pressure cooker on or near a hot gas or electric burner, or in a heated oven.
- Intended for countertop use only. DO NOT operate this appliance on an unstable surface.
- DO NOT use pressure cooker for anything other than intended use.
- Never deep fry or pressure fry in the cooker with oil.
- DO NOT let cord hang over edge of table or counter, or touch hot surfaces.
- DO NOT use cooker in electrical systems other than 110-120V~/60Hz.
- DO NOT operate cooker with damaged cord or plug, or after the cooker malfunctions or has been damaged in any manner.
- DO NOT open the cooker until the cooker has cooled and all internal pressure has been released. If the float valve is still up or the lid is difficult to turn, it is an indication that the cooker is still pressurized - DO NOT force it open.
- For all pressure cooking programs, the total amount of pre-cooked food and liquid in the inner pot should not pass the 4/5 line. When cooking food that expands during cooking such as rice, beans or vegetables, the inner pot should not pass the 16CUP line. Over filling may risk clogging the steam release and developing excess pressure. This may also cause leakage, personal injuries, or damage to the cooker. These fill level warnings do not apply to non-pressure cooking programs.
- Make sure the pressure valve handle is in the Sealed position for all the pressure cooking programs.
- This appliance should not be used by or near children or by individuals with disabilities or limited knowledge in using pressure cookers.
- DO NOT immerse the cooker base in water. To protect against electrical shock, do not immerse the cord, power plug, or cooker in any liquid.
- Always attach plug to the cooker first, then plug cord into the wall outlet. To disconnect, turn controls OFF, then remove plug from the wall outlet. Unplug from power outlet when not in use and before cleaning. Allow the cooker to cool before putting on or taking off parts, and before cleaning.
- For Household use only. Not intended for outdoor use.
- Extreme caution must be used when moving a pressure cooker containing hot liquids.
- This appliance cooks under pressure. Improper use may result in scalding injuries.
- Make certain the lid is properly closed before operating. Caution: To reduce the risk of electric shock, cook only in removable containers (inner pot).
- Use of accessories and parts that are not recommended or supplied by the manufacturer may cause the cooker to malfunction or serious hazardous situations including personal injury. Cook only in Aluminum inner. Other brands may not have the correct curvature to match the heating element.
- Be aware that certain foods, such as applesauce, cranberries, pearl barley, oatmeal and other cereals, split peas, noodles, macaroni, rhubarb, and spaghetti can foam, froth, sputter, and clog the steam release. These foods should not be cooked under pressure cooking settings unless as directed in cooker recipes.
- Always check the pressure valve, float valve and anti-block shield for clogging before use.
- If this appliance begins to malfunction during use, immediately unplug the cord.
- DO NOT use or attempt to repair a malfunctioning appliance!
- CAUTION HOT SURFACES. This appliance generates heat and escaping steam during use. Proper precautions must be taken to prevent the risk of personal injury, fires, and damage to property.
- Do not pressure relief during heating.
- DO NOT use the pressure cooker without inner pot.
Components:
The manual includes an exploded diagram of the device, identifying its components:
- Vents
- Grill
- Inner pot
- Control Panel
- Handle
- Metal shell
- Base
- Handle
- Outer shell
- Inlet
- Outlet
- Connecting seat
- Water box
- Bottom socket
- Vent
- Float valve
- Lock button
- Vent
- Handle
- Exhaust button
- Fried basket
- Steam rack
- Rice Paddle
- Measuring Cup
- Power Cord
Maintenance Features
The manual provides troubleshooting steps and general maintenance guidelines:
Troubleshooting:
The troubleshooting section lists common problems, probable causes, and solutions:
- Difficulty with closing the lid:
- Probable Cause: Silicon gasket is not properly installed.
- Solution: Position the silicon gasket well.
- Probable Cause: Float valve in the popped-up position.
- Solution: Slightly press the float valve downward.
- Difficulty with opening the lid:
- Probable Cause: Pressure exists inside the cooker.
- Solution: Position the steam release valve to the venting position to reduce the internal pressure. Open the lid after the pressure is completely released.
- Steam leaks from the rim of the lid:
- Probable Cause: No silicon gasket (sealing ring).
- Solution: Install the silicon gasket.
- Probable Cause: Food debris attached to the silicon gasket.
- Solution: Clean the silicon gasket.
- Probable Cause: Silicon gasket damaged.
- Solution: Replace the silicon gasket.
- Probable Cause: Lid not closed properly.
- Solution: Open then close the lid again.
- Steam leaks from the float valve:
- Probable Cause: Food debris on the float valve silicone seal.
- Solution: Clean the float valve silicone seal.
- Probable Cause: Float valve silicone ring worn-out.
- Solution: Replace the float valve silicone ring.
- Steam comes out from the pressure valve non-stop:
- Probable Cause: Pressure valve not in sealing position.
- Solution: Turn the pressure valve handle to the sealing position.
- Probable Cause: Pressure control fails.
- Solution: Contact customer service.
- Difficulty with opening the lid (after cooking cycle):
- Probable Cause: Too little water.
- Solution: Adjust dry rice and water ratio according to recipe.
- Probable Cause: Lid opened too early.
- Solution: After cooking cycle completes, leave the lid on for 5 more minutes.
- Rice is too soft:
- Probable Cause: Too much water.
- Solution: Adjust dry rice and water ratio according to recipe.
- Display remains blank after connecting the power cord:
- Probable Cause: Bad power connection or no power.
- Solution: Inspect the power cord to ensure a good connection, check if the power outlet is active.
- Probable Cause: Cooker’s electrical fuse has blew.
- Solution: Contact customer service.
- Occasional ticking or light cracking sound:
- Probable Cause: The sound of power switching and expanding pressure board when changing temperature.
- Solution: This is normal.
- Probable Cause: Bottom of the inner pot is wet.
- Solution: Wipe bottom of the inner pot dry before cooking.
- Displays "E03" error code:
- Probable Cause: Food debris on the float valve silicone seal.
- Solution: Clean the sticky or burned food off the inner pot.
- Probable Cause: Overheating, power board is malfunctioning.
- Solution: Contact customer service.
- Displays "E01" "E02" or "E04" error code:
- Probable Cause: The cooker is malfunctioning.
- Solution: Contact customer service.
Cleaning:
- Allow the product to cool for about 30 minutes before cleaning.
- Be careful when cleaning the area above the cooking chamber (hot heating elements, metal parts edges).
- Wipe the bottom of the inner pot dry before cooking if it is wet.
- Clean the silicon gasket and float valve silicone seal if food debris is present.
- Replace the silicon gasket or float valve silicone ring if damaged or worn out.
For further assistance, users can contact service@ltmate.com or visit https://www.ltmate.com/.