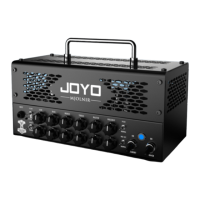
Setting up your new MJOLNIR for the first time is pretty simple and should only take you a few
minutes:
1.Remove all packing materials (save them in case of need of future service) and decide where MJOLNIR
should be placed. Typically this will be on top of a cabinet. To avoid potential overheating problems, make
sure that the rear panel is unobstructed and that there is good ventilation around the entire unit
TIP: If you are setting it up on a stage of your bands practice room, remember that mid and high
frequencies are directional. This means that standing right in front of your speaker sounds really good to
your knees, but you will want to make it extremely loud so that your ears can also hear everything.
Usually you will hear the other guitar player on the other side of the room a lot louder than yourself and he
will hear you much louder. We guitar players are not the smartest people on the planet sometimes… so
let’s change that. Rather than standing right in front of your speaker, take a few steps away from it and
you will find that you don’ t have to make it loud at all. Or, just switch positions with the other guitar
player. You stand in front of his amp and he in front of yours and you will hear yourself a lot better.
2.Connect your cabinet to the speaker output with a speaker cable, make sure the impedance is
matched.
24.FX Loop RETURN: Here you can connect the output from your effects back into the power amp of the
MJOLNIR. This input uses a 1/4“unbalanced connector.
25. Send Level: This mini knob can help you adjust the level going to your effects.
26. BYPASS LOOP switch: This switch will take the loop out of the signal path in case you are not using
it. This helps to keep the signal path clean and improves overall sound. If you don’t have any effects in the
FX Loop, keep it in the ON position. Obviously, turn it OFF when you use effects… pretty self explanatory.
Be careful, if you have it OFF without any effects connected, the connection between preamp and power
amp will be broken and no sound will get to the power amp.
27. Footswitch: The front panel’s channel switch is not active when the footswitch is connected; you can
use stereo 1/4” audio cable to connect.
28. 4Ω speaker output socket: Well, I guess you know what to do. Just make sure you are using a 4Ω
cabinet with this output. Also, make sure you are using a SPEAKER CABLE, not an instrument cable. Yes,
there is a difference. It usually says on the cable itself. Speaker cables are often thicker than instrument
cables and can carry much more electricity.
29. 8Ωspeaker output socket: please refer to the 8Ω description.
30. 16Ωspeaker output socket: please refer to the 16Ω description.
31.Voltage switch between 115V and 230V: Make sure this is set to the voltage used in your country.
109
SETTING UP GUIDE… in case you are new to this!
3.Plug in the power cable while making sure the power switch on the amplifier is not in the ON position.
4.Use a standard music instrument cable to connect your amplifier or effect pedals to the input jack on the
front panel.
5.If you are using pedals or effects that should be in the FX Loop (e.g. time based effects), connect those
to the loop and turn the switch OFF.
6.On the front panel, make sure the Master Volume is set to minimum or a low setting so you don’t get
blown away when you turn on the amp.
7.Flip the power switch to the ON position. Nothing happens. Well, that is normal. After all, you bought a
vacuum tube amplifier and those thing need to warm up before they can do their job. So, wait 20-30
seconds until the tubes have reached their operating temperature. Now you can also flip the STANDBY
switch and get close to your breaking metal sound.
8.Slowly increase the volume and gain to the desired levels.
9.Adjust the Bass, Middle and Treble controls to taste. When you get a great setting that complements
your instrument and playing style, it’s a good idea to write it down for future use.
10.Do the same for the other channel. (steps 8 and 9).
11.Remember to switch the amp into standby when changing guitars or effects to avoid undesirable pops.
Now that it’s all setup you are ready to blast your audience straight to Asgard. We think you are
now worthy to wield the awesome power of MJOLNIR.
If you encounter difficulty with any aspect of setting up or using your Joyo MJOLNIR Amplifier,
you can call JOYO (+86-755-29765393) between 9 a.m. and 5 p.m. (Time zone is Hong Kong), or
contact your local dealer for technical help.
1. Output power: (1 kHz, 8 ohm,)
2. Nominal input level: (1 kHz)
3. S/N ratio: (1 Wrms @ 1 kHz)
4. Dynamic range: (Rated output @ 1 kHz)
5. Signal gain
Send output level:
Return input level:
6. Fuse type:
7. Fuse rating:
AC100-120V~60Hz
AC220-240V~50Hz
8. Weight:
9. Measurement:
15W
-20 dBu
Clean channel 49db;Distortion channel 48 dB
58 dB
+4 dB
+4 dB
slow fuse
T2AL
T1AL
7.1 kg
334.2mm(L ) x 160mm (W) x192mm (H)
SPECIFICATIONS
Foot Switch Port
Channel Switch

 Loading...