EasyManua.ls Logo

JUKI DU-1181N User Manual

JUKI DU-1181N
46 pages
To Next Page IconTo Next Page
Page #1 background imageLoading...
Page #1 background image
rJl.fKl'
DU-l191
N
flilT=H[E=
INSTRUCTIoN
MANUAL
,fF,Hi,f,HE+
r#i
c0)k(.}l*.
Ett0)#fft'DHuttttutlclitt
t,<.
6 Dh\X
jCdurel
Ufc"
ae
l-
{EE
t-,
c
L
r
lc li
(
tc
D t-.,fFHtf
t-
fr s c
oryfi
#EE=E 8Ffr
a
< ti d u
r.
t lc.
t,\?T
b
g
<'
lr-#e)
6 A
) t-.
-
o)ryfi#EE=t{*€
t_,
<
(
tit
Lr"
Read
safety
instructions
carefully
and
understand
them
before
using.
Retain
this Instruction
Manual
for future
reference.
h-r E+N|FE, iH/*#.{FHZEfr
-Em
i**.{EEii,Hn
+
"
E
rl',
iE 1f;
E.c.*tR
€6,fE,E iil
F;
+, U
{E
FE
H.J
tH
.
No.00
40102784

Other manuals for JUKI DU-1181N

Question and Answer IconNeed help?

Do you have a question about the JUKI DU-1181N and is the answer not in the manual?

JUKI DU-1181N Specifications

General IconGeneral
Machine TypeIndustrial Sewing Machine
Max Stitch Length9 mm
LubricationAutomatic
HookFull rotary hook
ApplicationGarment, Bag, Shoe, Upholstery
Max Sewing Speed2000 spm

Summary

To Ensure Safe Use of Your Sewing Machine

Explanation of Risk Levels

Details the different danger, warning, and caution levels for machine operation.

Explanation of Pictorial Warning Indications and Warning Labels

Explains various warning symbols and their meanings for safe operation.

Safety Precautions

DANGER and CAUTION Warnings

Highlights severe risks and potential injuries associated with machine operation.

Basic Safety Guidelines

Covers manual reference, safety devices, application, and training requirements.

Power Off Procedures

Lists critical operations requiring the machine's power to be switched off.

Precautions During Operation Stages

Unpacking and Installation

Safe steps for unpacking, installing table, stand, cables, and motor.

Before and During Operation

Checks before powering on and safety guidelines while the machine is running.

Precautions During Operation Stages (Continued)

Lubrication and Maintenance

Proper lubrication methods and safety procedures for machine repair and adjustment.

Operating Environment

Guidelines for optimal and safe operating conditions, including temperature and humidity.

Further Safety Precautions

Electrical and General Operation Warnings

Critical warnings about electrical hazards and general machine operation safety.

Precautions Before Operating the Sewing Machine

Pre-Operation Checks

Essential checks for correct voltage, connections, and rotation direction.

TO ENSURE SAFE USE OF YOUR SEWING MACHINE

Explanation of Risk Levels

Details the three categories of risk: Danger, Warning, and Caution.

Explanation of Pictorial Warning Indications and Warning Labels

Explains various warning symbols and their meanings for safe operation.

SAFETY PRECAUTIONS

Basic Safety and Device Checks

Covers manual reference, safety devices, application, and training requirements.

Operation Stage Precautions

Safety measures for transportation, unpacking, installation, and operation stages.

Operation Stage Precautions (Continued)

Installation Details

Guidance on installing table, stand, cables, grounding, and motor.

Operation Readiness

Checks before starting and safety advice during machine operation.

Operation Stage Precautions (Continued)

Lubrication and Maintenance

Proper lubrication methods and safety procedures for machine repair and adjustment.

Operating Environment

Recommendations for optimal operating conditions and environmental factors.

FOR SAFE OPERATION

BEFORE OPERATION

1. SPECIFICATIONS

2. INSTALLATION

Installing the Under Cover

Detailed steps for installing the machine's under cover.

3. INSTALLING THE BELT COVER AND THE BOBBIN WINDER

4. INSTALLING THE THREAD STAND

5. LUBRICATION

Information on Lubrication

Specific points for lubrication and checks after lubrication.

Adjusting the Amount of Oil Supplied to the Face Plate Parts

Adjusting the Amount of Oil in the Hook

6. ATTACHING THE NEEDLE

7. WINDING A BOBBIN

8. THREADING THE BOBBIN CASE

Removing the Bobbin Case

Steps to detach the bobbin case from the hook.

Threading the Bobbin Case

How to thread the bobbin case correctly.

9. ADJUST THE PEDAL

Installing the Link Rod

How to connect and align the link rod for the pedal.

Pedal Angle

Adjusting the pedal angle by modifying the link rod length.

10. THREADING THE MACHINE HEAD

11. THREAD TENSION

Adjusting the Needle Thread Tension

Procedure for increasing or decreasing needle thread tension.

Adjusting the Bobbin Thread Tension

Procedure for increasing or decreasing bobbin thread tension.

12. THREAD TAKE-UP SPRING

Changing the Stroke of Thread Take-Up Spring

How to adjust the travel distance of the thread take-up spring.

Changing the Pressure of Thread Take-Up Spring

How to adjust the tension applied by the thread take-up spring.

13. PRESSER FOOT PRESSURE

14. HEIGHT OF THE FEED DOG

15. TILT OF THE FEED DOG

16. ADJUSTING THE STITCH LENGTH

Reverse Feed Stitching

Instructions for engaging and disengaging reverse feed stitching.

17. NEEDLE-TO-HOOK RELATIONSHIP

Positioning the Needle Bar

Adjusting the needle bar height for optimal needle-to-hook alignment.

Position the Needle and the Hook

Setting the correct position and clearance between needle and hook.

18. ADJUSTING THE WALKING FOOT AND THE PRESSER FOOT

Adjusting the Longitudinal Position of the Walking Foot

How to adjust the forward/backward position of the walking foot.
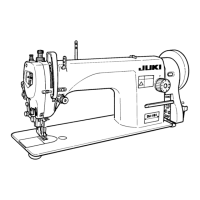
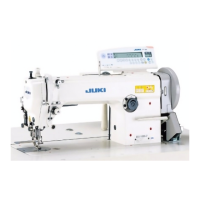
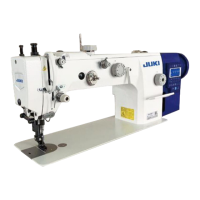
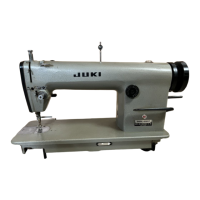
Adjusting the Presser Foot and Walking Foot Alternating Motion Ratio

Adjusting Alternate Vertical Motions of the Walking Foot and Presser Foot

Adjusting the Feeding Amount of the Walking Foot

19. RELATIONSHIP BETWEEN THE FEED TIMING AND THE NEEDLE POSITION

20. RELATIONSHIP BETWEEN THE PRESSER FOOT AND THE NEEDLE

21. ADJUSTING THE THREAD TAKE-UP STROKE

22. REVERSE FEED LEVER

23. MOTOR PULLEY AND V-BELT

24. TROUBLES IN SEWING AND CORRECTIVE MEASURES

24. TROUBLES IN SEWING AND CORRECTIVE MEASURES

24. Troubles in Sewing and Corrective Measures

Related product manuals