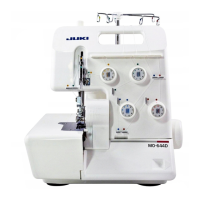
Do you have a question about the JUKI MO-644 and is the answer not in the manual?
Critical warnings regarding immediate hazards like electric shock, fire, or severe injury.
General safety precautions for operation, use by children, and handling of the appliance.
Guidelines for safely maintaining double-insulated appliances, emphasizing qualified personnel.
Instruction to retain the manual for future reference, indicating its ongoing importance.
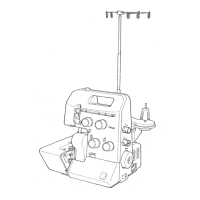
Illustrates the machine's components and threading paths when the looper cover is accessed.
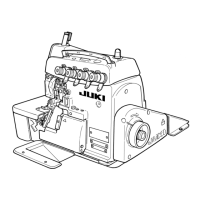
Shows machine parts and access points when the cloth plate is removed for maintenance or adjustment.
Instructions for extending the thread stand rod to its maximum height before use.
Guidance on connecting the spool holders to the main thread stand unit.
Steps for connecting the foot controller to the machine and power outlet for operation.
Explanation of the machine's power switch functions and how to turn it on/off with or without light.
Describes the function and direction of the handwheel for manual operation and needle positioning.
Instructions for accessing the looper mechanism for threading and maintenance.
Guidance on how to open and close the cloth plate for fabric access and adjustments.
Details on how to raise the presser foot to different heights for fabric placement and removal.
Step-by-step instructions on how to safely remove and attach different presser feet.
Procedure for lifting the upper knife, essential for certain operations like threading.
How to adjust the lower knife position to control stitch width and prevent fabric issues.
Instructions for setting the stitch length for various fabric types and desired results.
Guidance on adjusting differential feed to prevent fabric puckering or stretching during sewing.
How to select the overlock stitch width for different seam finishes and roll hemming.
Instructions for adjusting the presser foot pressure for different fabric weights.
Detailed steps for safely replacing sewing machine needles, including correct insertion.
Initial steps required before starting the thread guide setup and machine threading process.
The correct order of threading each thread path for optimal stitch formation.
How to correctly guide threads through the tension discs for proper tension control.
Instructions for using the accessory needle threader to simplify needle threading.
Step-by-step guide for threading the upper looper with blue thread, including spool placement.
Detailed instructions for threading the lower looper with red thread, including specific steps for MO-654.
Threading guide for the right-hand needle using green thread, covering all path points.
Threading instructions for the left-hand needle with yellow thread, including final steps.
Specific threading and setup for 4mm wide 3-thread overlock seams using the right-hand needle.
Threading and setup instructions for 6mm wide 3-thread overlock seams using the left-hand needle.
Instructions for attaching and using the 2/3 thread converter for special stitch types.
Essential steps for performing a test stitch to check tension and seam quality before actual sewing.
Guidance on setting thread tension dials for different threads and fabrics to achieve proper stitches.
Explanation of the built-in roll hemmer feature for creating fine, narrow edge finishes.
Steps required to prepare the machine for performing roll hemming stitches.
Recommended thread tension settings for roll hemming and narrow overlock stitches based on fabric and thread type.
How to use the tape guide on the presser foot to reinforce seams on stretchy fabrics.
Explains how differential feed prevents fabric puckering or stretching, with adjustment guidelines.
Instructions for using differential feed to gather or create ruffles on fabric edges.
Method for safely removing overlock stitches by cutting threads and pulling them loose.
Troubleshooting steps to take when threads break during the sewing process, including re-threading.
Techniques for reinforcing the beginning and end of seams to prevent unraveling.
Procedure for replacing the upper knife blade, typically only when damaged.
Step-by-step guide for replacing the lower knife blade for maintenance or repair.
Instructions for safely removing and installing a new light bulb for the sewing machine.
Routine maintenance steps for cleaning debris and applying oil to key machine parts.
Addresses problems like fabric not feeding, skipped stitches, puckering, or waves.
Covers common problems related to needle breakage, thread breakage, and incorrect threading.
Troubleshooting steps for problems concerning the sewing machine's motor operation.
Details thread count, needle types, stitch widths, feed settings, and sewing speed.
Provides the machine's physical dimensions and weight for reference.
Describes various presser feet for blind stitches, gathering, piping, cording, and beading.
Covers attachments like elasticators and the 2/3 thread converter for specialized sewing.
| Type | Overlock |
|---|---|
| Number of Threads | 4 |
| Stitch Length | 1 - 4 mm |
| Maximum Sewing Speed | 1, 500 stitches per minute |
| Differential Feed Ratio | 0.7 - 2.0 |
| Presser Foot Lift | 5 mm |
| Stitch Type | Overlock |