Do you have a question about the JUKI MO-6804S and is the answer not in the manual?
Defines DANGER, WARNING, and CAUTION categories for safety.
Details pictorial warnings and their meanings for safety.
Immediate danger of death or serious injury.
Danger of medium to minor injury.
General precautions for reading manuals and wearing safety goggles.
Importance of safety devices and visible warning labels.
Prohibits unauthorized applications or modifications.
Emphasizes trained operators for safe machine use.
Lists operations requiring power to be turned off for safety.
Safe procedures for moving and transporting the sewing machine.
Safe unpacking procedures to prevent injury or damage.
Guidelines for selecting and securing tables and stands.
Precautions for cable handling and connections to prevent shock.
Importance of proper grounding for electrical safety.
Using specified motors and pulley covers for safety.
Checks before turning on power to prevent accidents.
Safety measures during machine operation to prevent entanglement.
Procedures for adding lubricating oil to the machine.
Procedures for draining and refilling the machine's oil.
Covers electrical shock, personal injury from moving parts, and proper handling.
Precautions for handling the machine and initial speed settings.
Importance of periodic maintenance for longevity.
Emphasizes understanding manual, parts, warnings, and operator status.
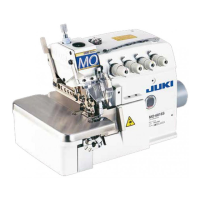
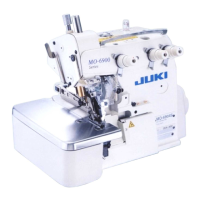
Specifies machine model, description, function, and applied standards.
Provides the manufacturer's name and address.
Specifies the maximum sewing speed of the machine.
Indicates the range of stitch lengths the machine can produce.
Specifies the needle gauge used by the machine.
Defines the overedge width capabilities.
Details the differential feed ratio settings.
Specifies the type of needle required for the machine.
Indicates the range of presser foot lift.
Specifies the type of lubricating oil to be used.
States the net weight of the sewing machine.
Provides noise level specifications for the machine.
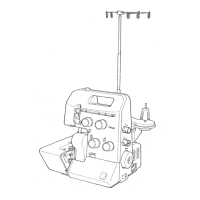
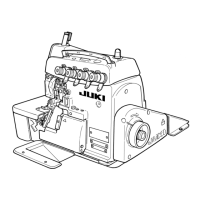
Identifies the lever for lifting the presser foot.
Identifies the presser foot assembly.
Identifies the stand for holding thread cones.
Identifies the gauge for checking the oil level.
Identifies the machine's pulley.
Identifies the cover for the cloth plate area.
Safety warnings for machine installation.
Installing the air-blower case and rubber cushion to the frame support plate.
Procedures for adding lubricating oil to the machine.
Procedures for draining and refilling the machine's oil.
Diagram and instructions for threading the MO-6804S model.
Diagram and instructions for threading the MO-6814S model.
Diagram and instructions for threading MO-6814S-AAA-44H.
Diagram and instructions for threading the MO-6816S model.
Diagram and instructions for threading MO-6816S-AAA-50H.
Diagram and instructions for threading MO-6816S-AAA-60H.
Explains how to adjust thread tension using numbered nuts.
Details how to adjust the needle thread length.
Explains adjustment of the looper thread cam thread guide.
Safety warning before replacing the needle.
Steps for removing the old needle and inserting a new one.
Safety warning before adjusting stitch length.
Method for adjusting stitch length using pulley and button.
Safety warning before adjusting differential feed ratio.
Steps to adjust differential feed for stretching or shirring.
Safety warning before replacing knives.
Procedure for replacing the upper knife.
Procedure for replacing the lower knife.
Safety warning before adjusting overedge width.
Steps to adjust the overedge width by moving knives.
Safety warning before adjusting needle height.
Steps to adjust needle height and check needle-looper relation.
Steps to adjust the position and pressure of the presser foot.
Procedures to adjust the lift amount of the presser foot for different models.
Steps to adjust the height of the main and differential feed dogs.
Procedure to adjust the inclination of the feed dog.
Steps to adjust the height of the auxiliary feed dog.
Dimensions for needle and upper looper clearance.
Dimensions for needle and lower looper clearance.
Clearance between upper and lower loopers during crossing.
Clearance between needle and double chainstitch looper.
Clearance between needle and needle guard.
Safety warning before adjusting looper travel.
Steps to adjust the front/rear travel of the double chainstitch looper.
Safety warnings for maintenance procedures.
Lists daily, weekly, and periodic maintenance tasks.
Safety warnings for adjustment procedures.
Table of dimensions for looper and needle guard adjustments.
| Type | Overlock |
|---|---|
| Number of Threads | 4 |
| Number of Needles | 1 |
| Needle | DB x 1 |
| Differential Feed Ratio | 0.7 - 2.0 |
| Motor Power | 550 W |
| Stitch Types | Flatlock, Roll Hem, Overlock |
| Maximum Stitch Width | 7 mm |
| Stitch Length | 1-4 mm |
| Presser Foot Lift | 7 mm |
| Thread Tension | Manual |
| Max. Sewing Speed | 7000 SPM |