Press: Press the button for less than 0.5 seconds.
Hold: Press the button for more than 0.5 seconds.
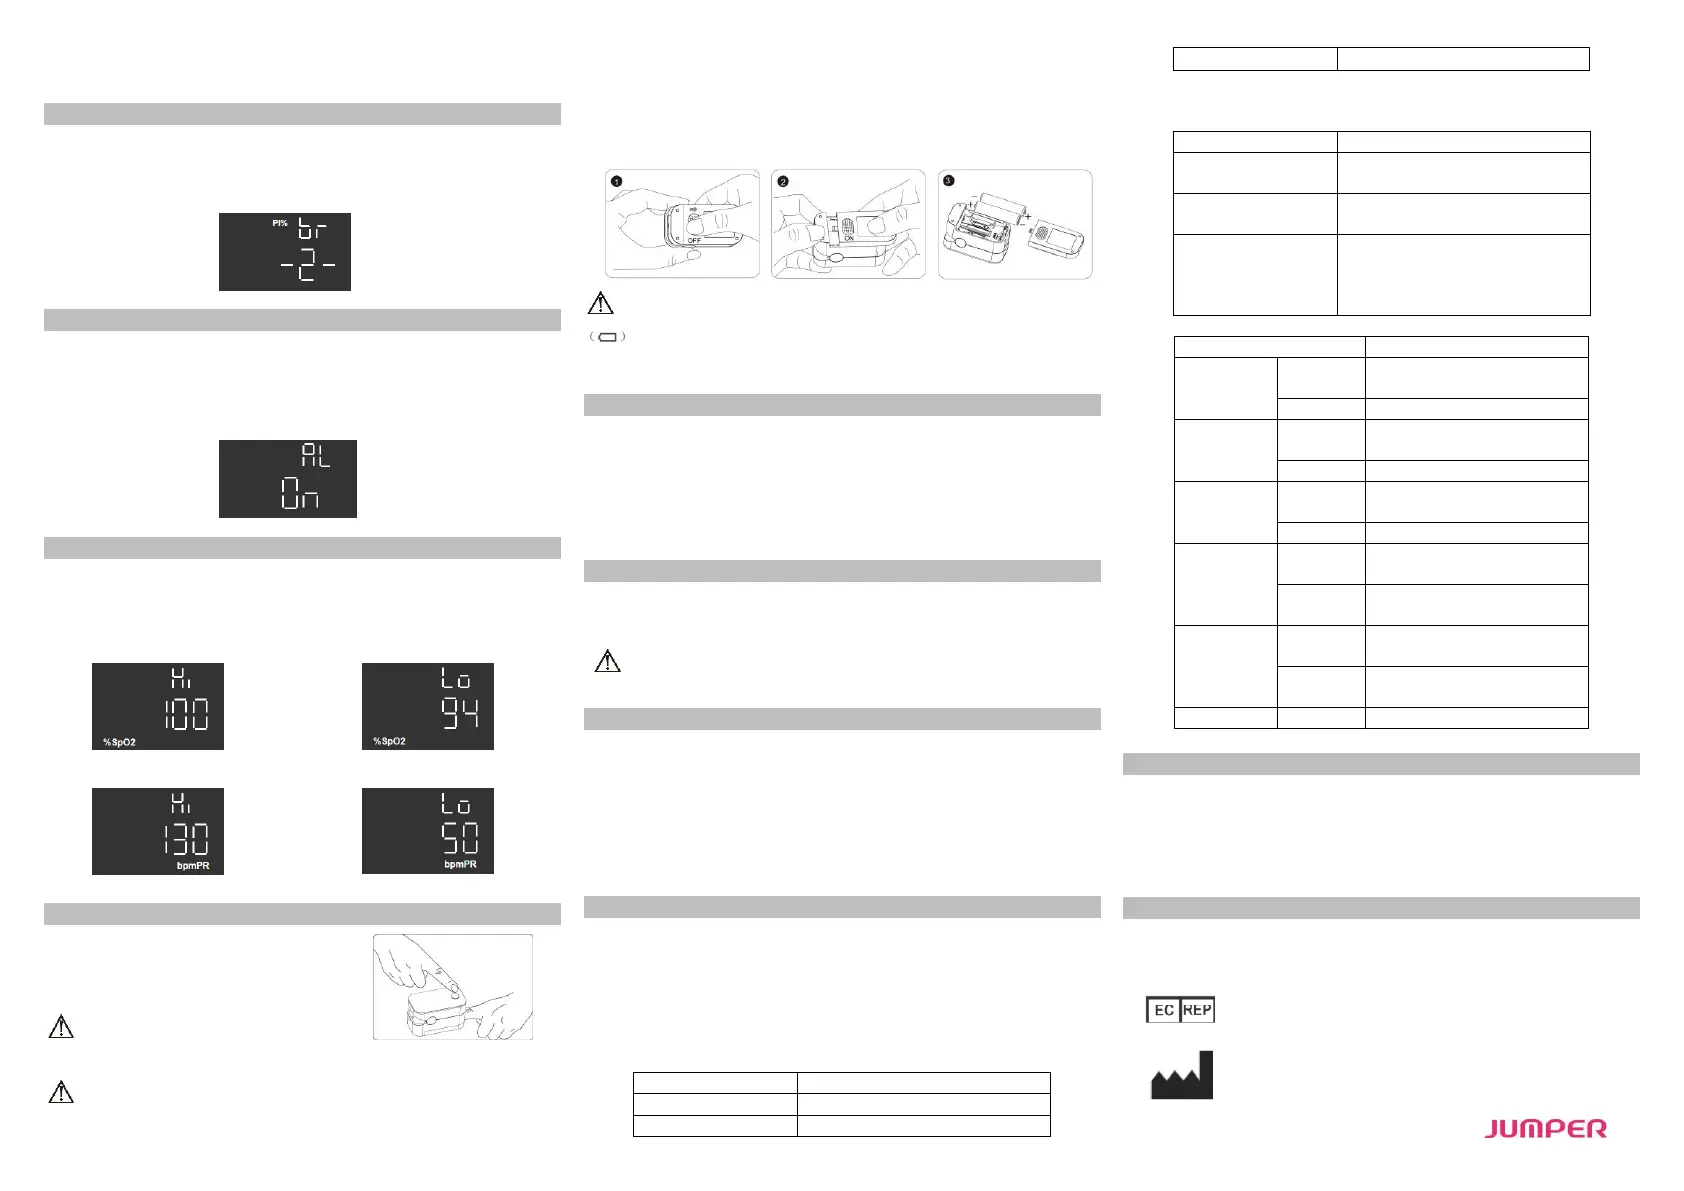
Brightness Setting
Hold the power-on button while the oximeter is in powered-on state,then the
oximeter shows a brightness setting interface(as "Interface 1" below shows, "br"
represents brightness).Hold the button to adjust brightness. There 3 brightness
settings(1,2,3). 3 is the brightest.
Interface1
Alarm Setting
After setting the brightness,press the power-on button to enter the alarm setting
interface(as "interface 2" below shows, "AL" represents alarm).Then hold the
button to set "AL" to on or off.When "AL" is set to on and the measured values of
the blood oxygen saturation and pulse rate go beyond the upper limit or lower
limit,the oximeter will beep to alarm.
Interface 2
Alert Range Setting
When "AL" is set to on, you can set the upper limit and lower limit of SpO2 Alert
and PR Alert. Press it to switch an option(SpO2 upper limit, SpO2 lower limit, PR
upper limit and PR lower limit).Hold the power-on button to adjust the limits.(as
"Interface 3,4,5,6" below show, "Hi" represents upper limit, "Lo" represents lower
limit) .
Interface 3 Interface 4
Interface 5 Interface 6
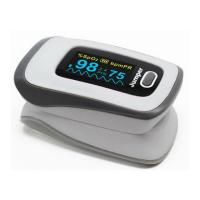
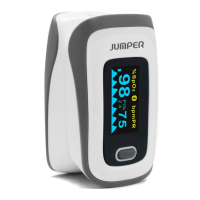
Operation Guide
Stick one finger completely into the finger
chamber of the oximeter. The fingernail should be
facing upward. Release the clip and press the
power-on button to power on the pulse oximeter.
If you do not insert your finger completely
into the chamber, measurement will be inaccurate.
To keep your finger still during measurement. It is also not advisable to use this
instrument during sports activities as movement may lead to inaccuracies. Once the
reading stabilizes, read the measured values of oxygen saturation and pulse rate on
the screen.
NOTE:The oximeter will automatically shut down 10 seconds after you remove your
finger.
Replace the batteries when the batteries run out of power and the symbol
flickers on the screen.
Install the two AAA dry batteries into the battery slot according to polarity
indication, and mount the battery cover.
Cleaning
Power off the instrument and remove the batteries before cleaning. Ensure that
the appearance of the instrument is neat, dust-free, and dirt-free. Clean the outer
surface of the instrument (including the LED screen) using a piece of dry soft cloth
dipped with 75% medical alcohol
Caution: Avoid liquid flowing into the instrument during cleaning.
Caution: Do not immerse any part of the instrument into any liquid.
Disinfection
Before measurement with the instrument, wipe the rubber finger pad using a piece
of dry soft cloth dipped with 75% medical alcohol. Clean the finger to be measured
using the medical alcohol for disinfection purposes before and after use.
Do not disinfect the instrument by means of high-temperature/high-
pressure or gas disinfection.
Maintenance
Remove the batteries from the battery slot and properly store them if you do
not plan to use the Oximeter for a long period of time.
Avoid using the Oximeter in an environment with inflammable gases or using it
in an environment where the temperature or humidity is excessively high or
low.
Check the accuracy of the oxygen saturation and pulse rate readings by using
an appropriate calibration apparatus.
Technical Specifications
1. Dimensions: 58.0 mm (Width) × 32.0 mm (Depth) × 32.9 mm (Height)
Weight: 50.4 g (including two AAA dry batteries)
2. Peak wavelength range of the light emitted from the probe: red light 663 nm ±
3; infrared light 900 nm ± 7.
3. Maximum optical output power of the probe: 60 mW for infrared light (905
nm).
4. Normal working condition
5C to 40C (41F to 104F)
15% to 80%, non-condensing
5. Default values and conditions of alert
Upper limit: 99
Lower limit: 94
Upper limit: 130
Lower limit: 50
When the alert switch is on and the
actual measured value goes beyond
the preset alert parameter range, the
Oximeter gives an alert sound.
6. Technical parameters
±2% (70% to 99%)
No requirement (≤ 69%)
Upper limit: 50% to 100%
Lower limit: 50% to 100%
Upper limit: 35 bpm to 250 bpm
Lower limit: 35 bpm to 250 bpm
The greater of ±10% of the
preset value and ±5 bpm
Safety Type
Anti-electric-shock type: internal power supply device
Anti-electric-shock degree: Type BF applied part
Running mode: continuous working
Waterproof grade: IP22
Storage and Transportation
Temperature : –10C - 50C(14℉-122℉)
Relative humidity : 10%-93% (no condensation)
Atmospheric pressure : 50kPa–106 kPa.
Wellkang Ltd
Suite B, 29Harley Street, LONDON, W1G9QR,U.K.
Shenzhen Jumper Medical Equipment Co., Ltd
Address: D Building, No. 71, Xintian Road, Fuyong Street,
Baoan,Shenzhen, Guangdong,China
E-mail: info@jumper-medical.com
Tel: +86-755-26692192,26696279
Web:www.jumper-medical.com
 Loading...