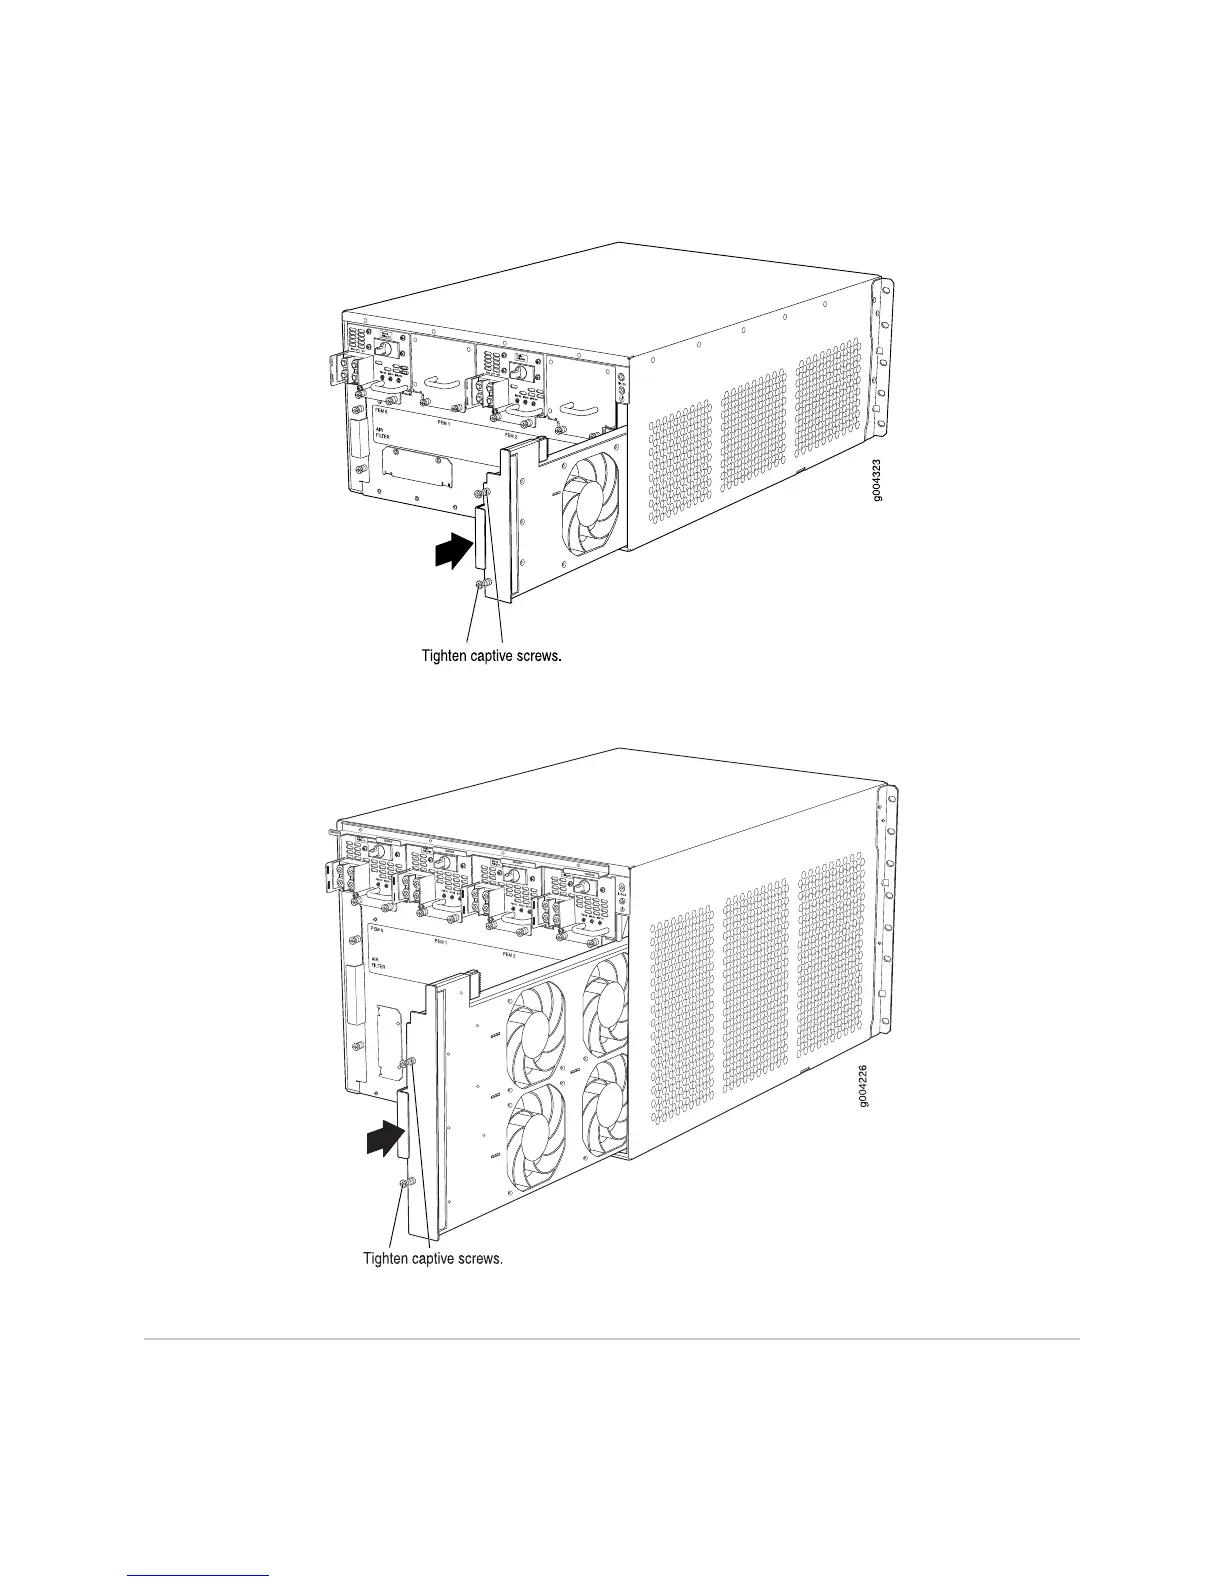
Figure 9: Installing the Fan Tray in an MX240 Router
Figure 10: Installing the Fan Tray in an MX480 Router
Electrostatic Discharge Point
Figure 11 on page 8 and Figure 12 on page 8 show the location of the ESD point
on the rear of the chassis. The illustration shows a DC-powered router, but the location
is the same in AC-powered routers.
Electrostatic Discharge Point ■ 7
Electrostatic Discharge Point