EasyManua.ls Logo

Juro-Pro Eco II 16L - User Manual

Juro-Pro Eco II 16L
25 pages
Print Icon
To Next Page IconTo Next Page
Loading...
Dehumidifier Instruction Manual
Please keep this instruction manual for future potential usage.
Question and Answer IconNeed help?

Do you have a question about the Juro-Pro Eco II 16L and is the answer not in the manual?

Summary

Warnings

Child Safety and Appliance Usage

Guidelines for safe use by children and persons with reduced capabilities.

Power Cord Safety

Instructions regarding replacement of a damaged power cord by qualified personnel.

Electrical Appliance Disposal

Information on proper disposal of electrical appliances and the meaning of the crossed-out dustbin symbol.

Working Principle

Dehumidification Process Explanation

Details the cycle of damp air condensation into water and dry air recirculation.

Working Environment

Recommended Usage Locations

Describes ideal environments and applications for the dehumidifier.

Important Safety Measures

Machine Handling and Placement

Covers upright placement, post-transport waiting, spacing, and keeping inlets/outlets clear.

Electrical and Water Safety

Advises on power supply, avoiding water contact, and proper operation.

Maintenance and Fault Handling

Guidance on filter cleaning, using appropriate cleaners, and unplugging during faults.

Machine Components

Control Panel and Airflow

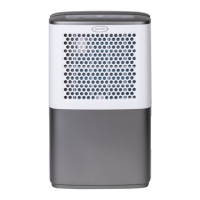
Identifies the control panel, air inlet, and air outlet parts of the machine.

Water Tank and Drainage

Details the water tank and continuous drainage outlet components.

Handles and Mobility Features

Describes the water tank handle, machine handle, and castors for movement.

Operation Method

Control Panel Icons and ON;OFF

Explains the basic functions of turning the machine on/off and the associated indicators.

Timing and Humidity Settings

Details how to set the auto-shutting timer and adjust humidity levels.

Temperature and Airflow Speed

How to display temperature and select airflow speed settings.

Frost Removal and Water Detection

Information on the frost removal function and how the machine indicates a full water tank.

Anion and Air Purification Modes

Explanation of the anion function for air purification and switching modes.

Drainage Methods

Emptying the Water Tank

Step-by-step guide on how to remove and empty the collected water tank.

Continuous Drainage Setup

Instructions for connecting a hose for continuous water drainage.

Maintenance and Cleaning

General Cleaning Procedures

How to clean the machine using a soft cloth and avoiding chemicals.

Air Filter Care

Instructions for cleaning the outer dust filter and inner carbon filter.

Storage Instructions

Long-Term Storage Procedure

Steps to follow when the machine is not used for an extended period.

Troubleshooting Common Issues

Machine Not Working or Removing Moisture

Addresses issues like the machine not starting or failing to dehumidify.

Dehumidification Effectiveness and Noise

Troubleshooting poor dehumidification and excessive noise.

Normal Operational Symptoms

Explains common symptoms that are not indicative of a fault.

Safety Instructions and Warnings

General Operation and Storage Safety

Covers safe operation, storage, ventilation, and handling of refrigerants.

Servicing and Personnel

Guidelines for qualified personnel performing maintenance and repairs.

Flammable Refrigerant Precautions

Specific warnings related to the flammable refrigerant (R290) used in the appliance.

Usage Notes and Prohibitions

Additional notes on placement, power, obstructions, and actions to avoid.

Child Safety and Cord Care

Reiterates safety for children and procedures for damaged power cords.

Transportation and Disposal

Compliance requirements for transporting, marking, and disposing of equipment with flammable refrigerants.

Technical Specifications

Fuse, Refrigerant, and Repair Information

Details on fuse specifications, refrigerant type, and authorized repair contacts.

Servicing Information

Area Checks and Work Procedures

Precautions for servicing, including area safety, general work procedures, and flammable material control.

Refrigerant Checks and Fire Safety

Ensuring refrigerant presence is checked, using appropriate detectors, and having fire extinguishers.

Ignition Source Control

Prohibiting ignition sources in areas where flammable refrigerants are present.

Ventilation and Equipment Checks

Ensuring adequate ventilation and performing checks on refrigeration equipment and markings.

Electrical Device Safety Checks

Procedures for initial safety checks and inspection of electrical components during repair.

Component Repair and Cabling

Guidelines for repairing sealed and intrinsically safe components, and checking cabling.

Leak Detection and Refrigerant Removal

Methods for detecting leaks and procedures for removing refrigerant from the system.

Charging and Decommissioning

Requirements for charging the system with refrigerant and decommissioning procedures.

Refrigerant Recovery and Labeling

Procedures for recovering refrigerant, labeling equipment, and handling cylinders.

Correct Product Disposal

Instructions for the environmentally safe disposal of the dehumidifier at the end of its life.

Overview

This document serves as an instruction manual for the Juro-Pro ECOII16L Dehumidifier. It provides essential information for the safe and effective operation, maintenance, and storage of the appliance.

Function Description

The Juro-Pro ECOII16L is a multifunctional dehumidifier designed to control room humidity levels and create a healthy and comfortable environment. It operates by drawing damp air through an evaporator, where moisture condenses into water and is collected in a water tank. The now dry air then flows through a radiator, warming up before being returned to the room. This cyclical process effectively reduces room humidity. Beyond dehumidification, the appliance also features an air purification mode with an anion function, which helps to purify the air.

Important Technical Specifications

  • Refrigerant: The appliance uses R290 (Propane) as a flammable refrigerant.
  • Maximum Refrigerant Charge: 60g.
  • GWP Value of R290: 3.
  • Fuse Mode/Specification: 4T or 4F or 334 or L3CT, AC250V, 3.15A.
  • Operating Ambient Temperature: The best operating ambient temperature is 5-35 °C.
  • Room Size Requirement: The appliance shall be installed, operated, and stored in a room with a floor area larger than 12.5 m².

Usage Features

Control Panel and Operation: The dehumidifier features a control panel with various buttons for operation:

  • ON/OFF: Powers the machine on or off. When turned on, power indicator lights illuminate, and the display shows fault settings and corresponding indicators.
  • TIMER: Allows setting an auto shut-down time (0-24 hours) when the machine is on, or an auto turn-on time (0-24 hours) when off.
  • HUM (Humidity Setting): The default humidity setting is RH50%. Pressing this button allows adjustment of humidity levels from RH40% to 80% (in 5% increments). A "CO" setting indicates continuous operation.
  • SPEED: Used to select between high and low airflow speeds. The default setting is low airflow speed.
  • Temperature Display: Pressing "SPEED" and the mode button simultaneously displays the ambient temperature, then reverts to ambient humidity.
  • Anion Function: Long-pressing the mode button activates or deactivates the anion function for air purification.
  • Air Purification Mode: Pressing the mode button switches between dehumidification and air purification modes. In air purification mode, a specific indicator light illuminates, and the compressor stops working.

Drainage: The dehumidifier offers two drainage methods:

  1. Water Tank Drainage: When the water tank is full, an alarm sounds, an indicator light turns red, and the machine stops. The user must gently pull out the tank, pour out the water, and return it to its original position for the machine to resume operation.
  2. Continuous Drainage: For extended use, a continuous drainage option is available. This involves removing rubber caps from the continuous drainage outlet, attaching a long hose, and ensuring it is downward to allow proper drainage. A drainage plug, removed from the outlet, is then inserted into a specific hole in the tank.

Safety Measures:

  • Keep the machine upright and maintain a minimum 25cm distance around it.
  • Ensure the water tank is empty and the machine is unplugged before moving.
  • Do not pour or splash water onto the machine.
  • The power supply must match the rating label.
  • Do not use the plug to turn the machine on/off; use the control panel.
  • If the supply cord is damaged, it must be replaced by the manufacturer or a qualified person.
  • The appliance is suitable for use by children aged 8 and above, and persons with reduced physical, sensory, or mental capabilities, provided they are supervised or instructed on safe use and understand the hazards. Children should not play with the appliance or perform cleaning/maintenance without supervision.
  • Do not put objects into the air inlet or outlet.
  • Keep the machine away from flammable substances, gasoline, stoves, and other heat sources.
  • Do not disassemble, overhaul, or modify the machine. Contact professionals for repairs.
  • Do not place cups or other objects on the body to prevent spills.
  • Avoid using insecticide sprays or other flammable substances near the dehumidifier.

Maintenance Features

General Cleaning:

  • Always unplug the machine before cleaning.
  • Clean the machine with a soft cloth.
  • Avoid using volatile chemicals, gasoline, detergent-processed cloths, or other harmful cleaning solutions.
  • For thorough cleaning, disconnect the power supply and use a half-wet soft cloth. For stubborn dirt, a mild detergent can be used.

Air Filter Cleaning: The machine is equipped with at least one filter (activated carbon filter is optional).

  1. Outer Dust Filter: Remove the grid, then take off the filter from the back of the machine. Use a vacuum cleaner or brush to remove dust. If very dusty, clean with warm water. Ensure the filter is completely dry before re-inserting. Do not expose to direct sunlight.
  2. Inner Carbon Filter: Take off the carbon filter from the inlet grid. Remove dust with a vacuum cleaner or brush. Do not wash with water or expose to sunlight. The carbon filter should be changed semi-annually.

Storage: For long periods of inactivity:

  1. Turn off the machine and unplug it.
  2. Empty and wipe the water tank.
  3. Clean the filter.
  4. Cover the machine and store it in a position not exposed to direct sunlight.

Problem Shooting: The manual includes a troubleshooting guide for common issues such as the machine not working, not removing moisture, poor dehumidification, unusual noise, or water spots in the tank. It advises users not to repair or disassemble the product themselves and to contact professional services for breakdowns. It also clarifies that certain symptoms, like increased noise during compressor start-up or a musty smell during initial use, are not indicative of a failure.

Juro-Pro Eco II 16L Specifications

General IconGeneral
BrandJuro-Pro
ModelEco II 16L
CategoryDehumidifier
LanguageEnglish