Do you have a question about the JVC HA-EC25T and is the answer not in the manual?
Troubleshoot Bluetooth pairing by checking distance, device status, and re-pairing.
Resolve earphone connection problems by checking Bluetooth status, charging, and earphone proximity.
Fix single-earphone sound issues by ensuring proper charging, connection, and earphone placement.
Address choppy or noisy sound by resetting, checking other devices, optimizing orientation, and reducing apps.
Troubleshoot delayed Bluetooth device functionality after connection by waiting and retrying.
Resolve touch sensor issues by ensuring proper charging, clean fingers, no gloves, and correct touch area.
Improve sound quality by increasing volume and ensuring secure earphone fit with correct ear piece size.
Fix track skipping issues by performing correct triple-tap for previous and double-tap for next track.
Ensure earphones stay securely by adjusting the size of the ear pieces for a better fit.
Correct distorted sound by adjusting volume on both the connected device and the system, and charging.
Ensure ring tones are audible by checking silent mode and adjusting volume on the connected Bluetooth device.
Address general system malfunction by recharging the system and switching it on again.
Troubleshoot power issues by charging the charging case and the main unit.
Resolve earphone charging/power off problems by re-inserting, checking contacts, and charging the case.
Fix charging case issues by verifying USB connection and charging within the specified temperature range.
This section appears to be a symptom without a clear action, possibly implying a normal state or referring elsewhere.
Refer to the indicator status list for information on flashing and lighting up of the indicators.
Resolve no audio issues by deleting Bluetooth pairings and re-pairing the device.
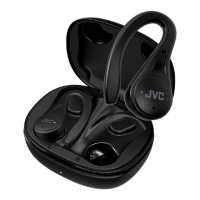
This document outlines troubleshooting steps and operational guidance for the JVC HA-EC25T Wireless Headphones. It covers a range of common issues users might encounter, from initial setup and connection problems to sound quality, touch sensor functionality, and charging.
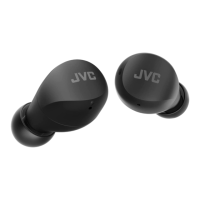
The JVC HA-EC25T are wireless headphones designed for audio playback and communication. They connect to a BLUETOOTH device, allowing users to listen to music, make voice calls, and control playback through integrated touch sensors. The system includes a charging case that not only stores the earphones but also recharges them, ensuring portability and extended usage. The earphones are designed to be worn in the ears, and proper fit is crucial for both sound quality and secure placement.
To use the headphones, they must first be paired with a BLUETOOTH device. If pairing fails, ensure both earphones are in the charging case, then taken out simultaneously. The BLUETOOTH device should be within 1 meter of the headphones during pairing. If issues persist, try operating the BLUETOOTH device to connect, turning its BLUETOOTH function off and on again, or deleting existing pairing information and re-pairing. If the earphones flash and connection cannot be established, ensure the BLUETOOTH device's function is enabled and the correct system is selected from the device list. If the earphones are connected to another device, turn off other BLUETOOTH settings to enable pairing with the desired device.
For optimal sound, ensure the earphones are securely inserted and the correct ear tip size is used. If sound is only heard from one earphone, place both earphones in the charging case, wait for the indicator light to change, then take them out simultaneously. After removal, move the L and R earphones close to each other to re-establish stereo connection. If the sound is choppy or noisy, try using the connected device in a position that allows for stable communication, as covering the system with hands can interrupt the sound. Reducing the number of apps running on the BLUETOOTH device can also help. If the volume is low or sound is unpleasant, increase the volume on both the system and the BLUETOOTH device, and ensure the ear pieces are securely inserted. If the sound is distorted, adjust the volume on the BLUETOOTH device first to eliminate distortion, then adjust the system volume.
If music or voice calls cannot be heard, delete the pairing information from the BLUETOOTH device list and re-pair after turning the connected device off and on again (or rebooting). If the ring tone is soft or unheard, check if the silent mode on the BLUETOOTH device is enabled; turn it off or adjust the ring tone volume.
The earphones feature touch sensors for controlling playback. To skip back to the previous track, tap the touch sensor area on the R earphone three times quickly during playback. To skip to the next track, tap the touch sensor area on the R earphone two times quickly during playback. If the touch sensor is unresponsive, ensure you are touching it directly with the ball of your finger, not with a pen or fingernail. The sensor may not work if it or your finger is wet, or if you are wearing gloves. Ensure there is no hair on the sensor and touch the center of the touch sensor area.
If the system does not work correctly or cannot be turned on, re-charge the system and switch power on. If the earphones cannot be turned on, charge the charging case first, then the main unit. If the earphones cannot be turned off, ensure they are fully inserted into the charging case.
The earphones and charging case require regular charging. If the main unit needs charging, refer to the "Charging" section of the manual. If the charging case needs charging, ensure the USB cable is plugged in all the way. Charging should occur within a temperature range of 5 °C (41 °F) to 35 °C (95 °F). If the earphones turn on during charging, this is normal behavior and the charging case should be charged.
To ensure proper contact and charging, use a cotton swab to remove any dirt from the contacts of the earphones and the charging case.
If the earphones fall off easily or the sound is unpleasant, try changing the size of the ear pieces to find a more secure and comfortable fit. Refer to the "Wearing" section of the manual for guidance on proper ear tip selection and insertion.
If troubleshooting steps do not resolve issues, or if no sound is heard or connection cannot be established, resetting the settings to factory default may solve the problem. Refer to the "Restoring the settings to the initial state" section of the manual for instructions.
If you are unsure what the flashing and lighting up of the indicators mean, refer to the "Indicator status list" in the manual for detailed explanations.
| Type | In-ear |
|---|---|
| Connectivity | Wireless |
| Bluetooth Version | 5.0 |
| Bluetooth Profiles | A2DP, AVRCP, HFP, HSP |
| Frequency Response | 20 Hz - 20 kHz |
| Impedance | 16 ohms |
| Water Resistance | IPX5 |
| Microphone | Yes |
| Driver Size | 6 mm |
| Battery Life | 6 hours |
| Charging Case Battery Life | 9 hours |
| Charging Time | 2 hours |