(No.MA254)1-35
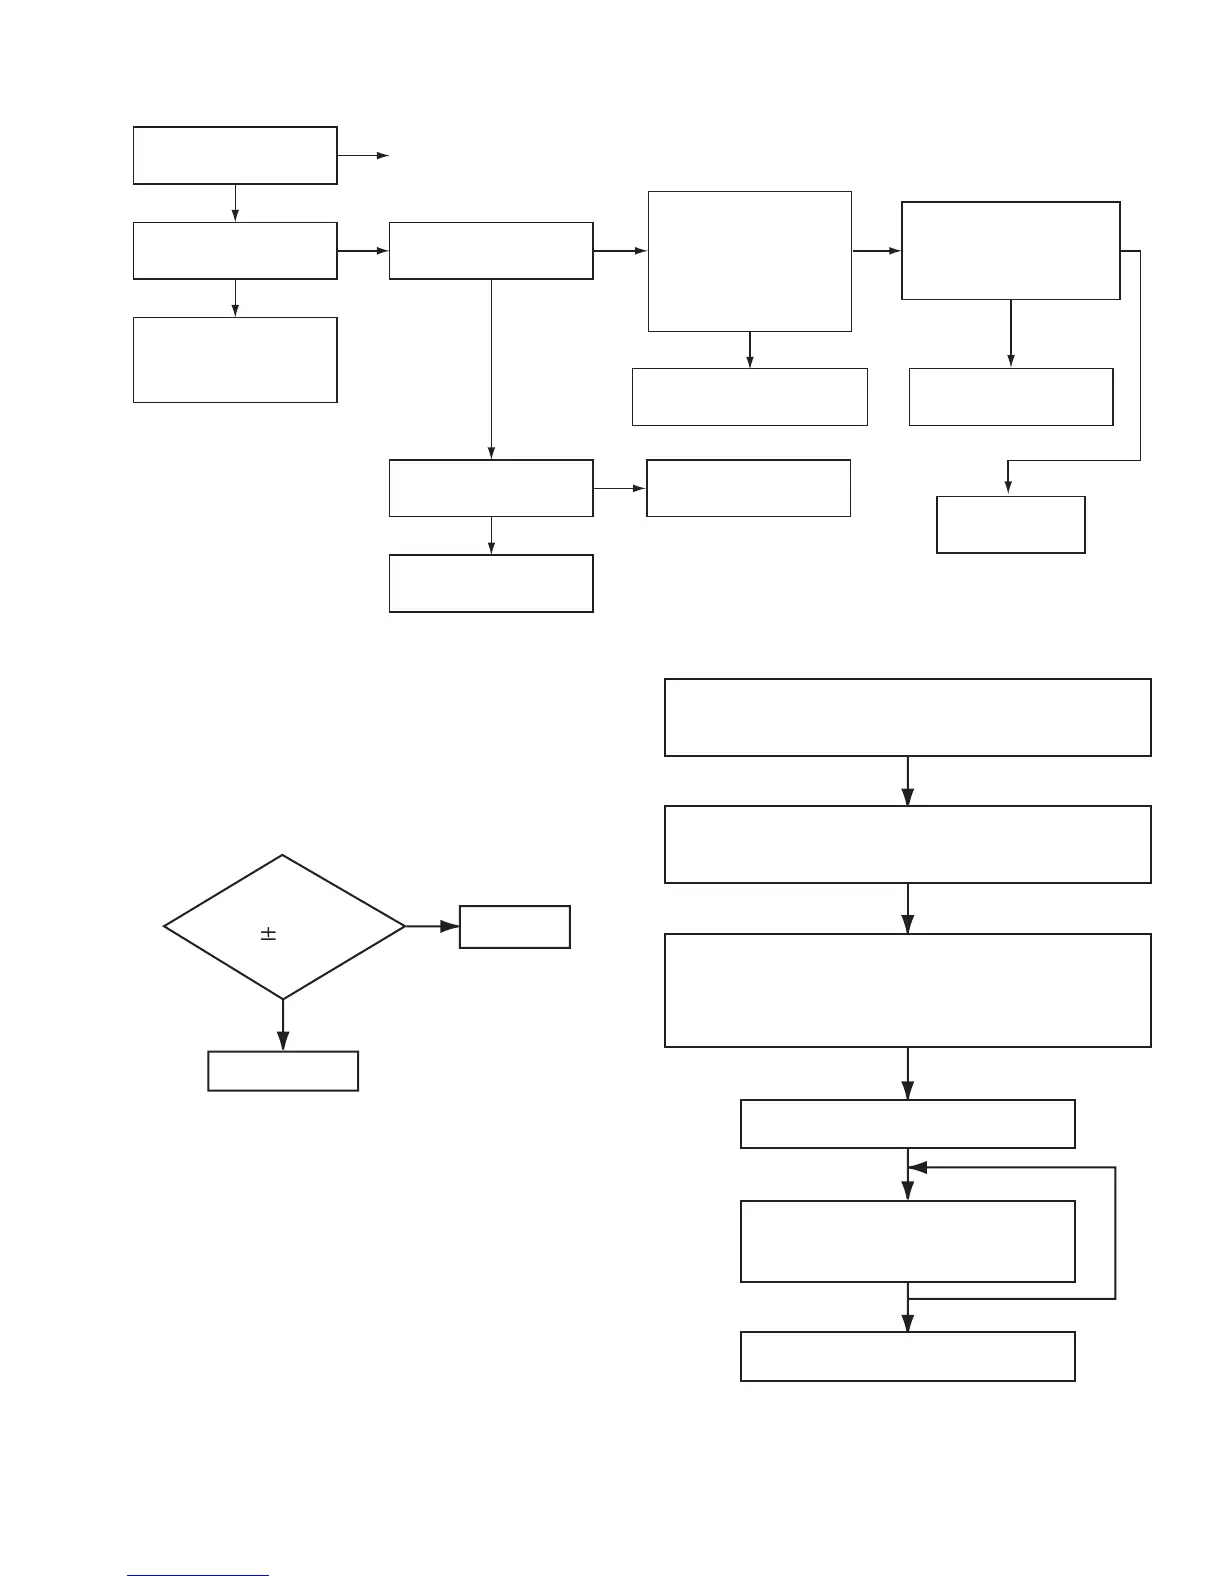
5.5 Signal processing section
5.6 Maintenance of laser pickup
(1) Cleaning the pick up lens
Before you replace the pick up, please try to clean the lens
with a alcohol soaked cotton swab.
(2) Life of the laser diode
When the life of the laser diode has expired, the following
symptoms will appear.
• The level of RF output (EFM output: amplitude of eye
pattern) will be low.
(3) Semi-fixed resistor on the APC PC board
The semi-fixed resistor on the APC printed circuit board
which is attached to the pickup is used to adjust the laser
power.Since this adjustment should be performed to match
the characteristics of the whole optical block, do not touch
the semi-fixed resistor.
If the laser power is lower than the specified value, the la-
ser diode is almost worn out, and the laser pickup should
be replaced. If the semi-fixed resistor is adjusted while the
pickup is functioning normally, the laser pickup may be
damaged due to excessive current.
5.7 Replacement of laser pickup
No sound from either
channel.
Is 9V present at pin 42
of IC350?
Compare the L-ch and
R-ch to locate the
defective point.
Is the sound output from
both channels (L, R)?
YES
NO
Is the audio signal
(including sampling
output components)
output to pins 1 and 7 of
IC904 ,IC905
during playback?
Normal
YES
NO
YES
NO
Check IC904,IC905
and its peripheral circuits.
NO
Is 14V present at pin 6
and pin 20 of IC371?
YES
Check Q351 and its
peripheral circuits.
NO
Check IC371 and its
peripheral circuits.
Is the audio signal output
at pins 28,29,32,33 of
IC350 during playback?
YES
NO
Check IC350 and its
peripheral circuits.
YES
Check the power
amplifier IC371.
Is RF output
1.3 0.4Vp-p?
YES
NO
OK
Replace it.
Turn off the power switch and disconnect the
power cord.
Replace the pickup with a normal one. (Refer
to "Removing the pickup unit" on the previous page.)
Plug the power cord in and turn the power on.
At this time, check that the laser emits for about
seconds and the objective lens moves up and down.
Note: Do not observe the laser beam directly.
Play a disc.
Check the eye-pattern at
RF test point or
ARF test point.
Finish.
 Loading...