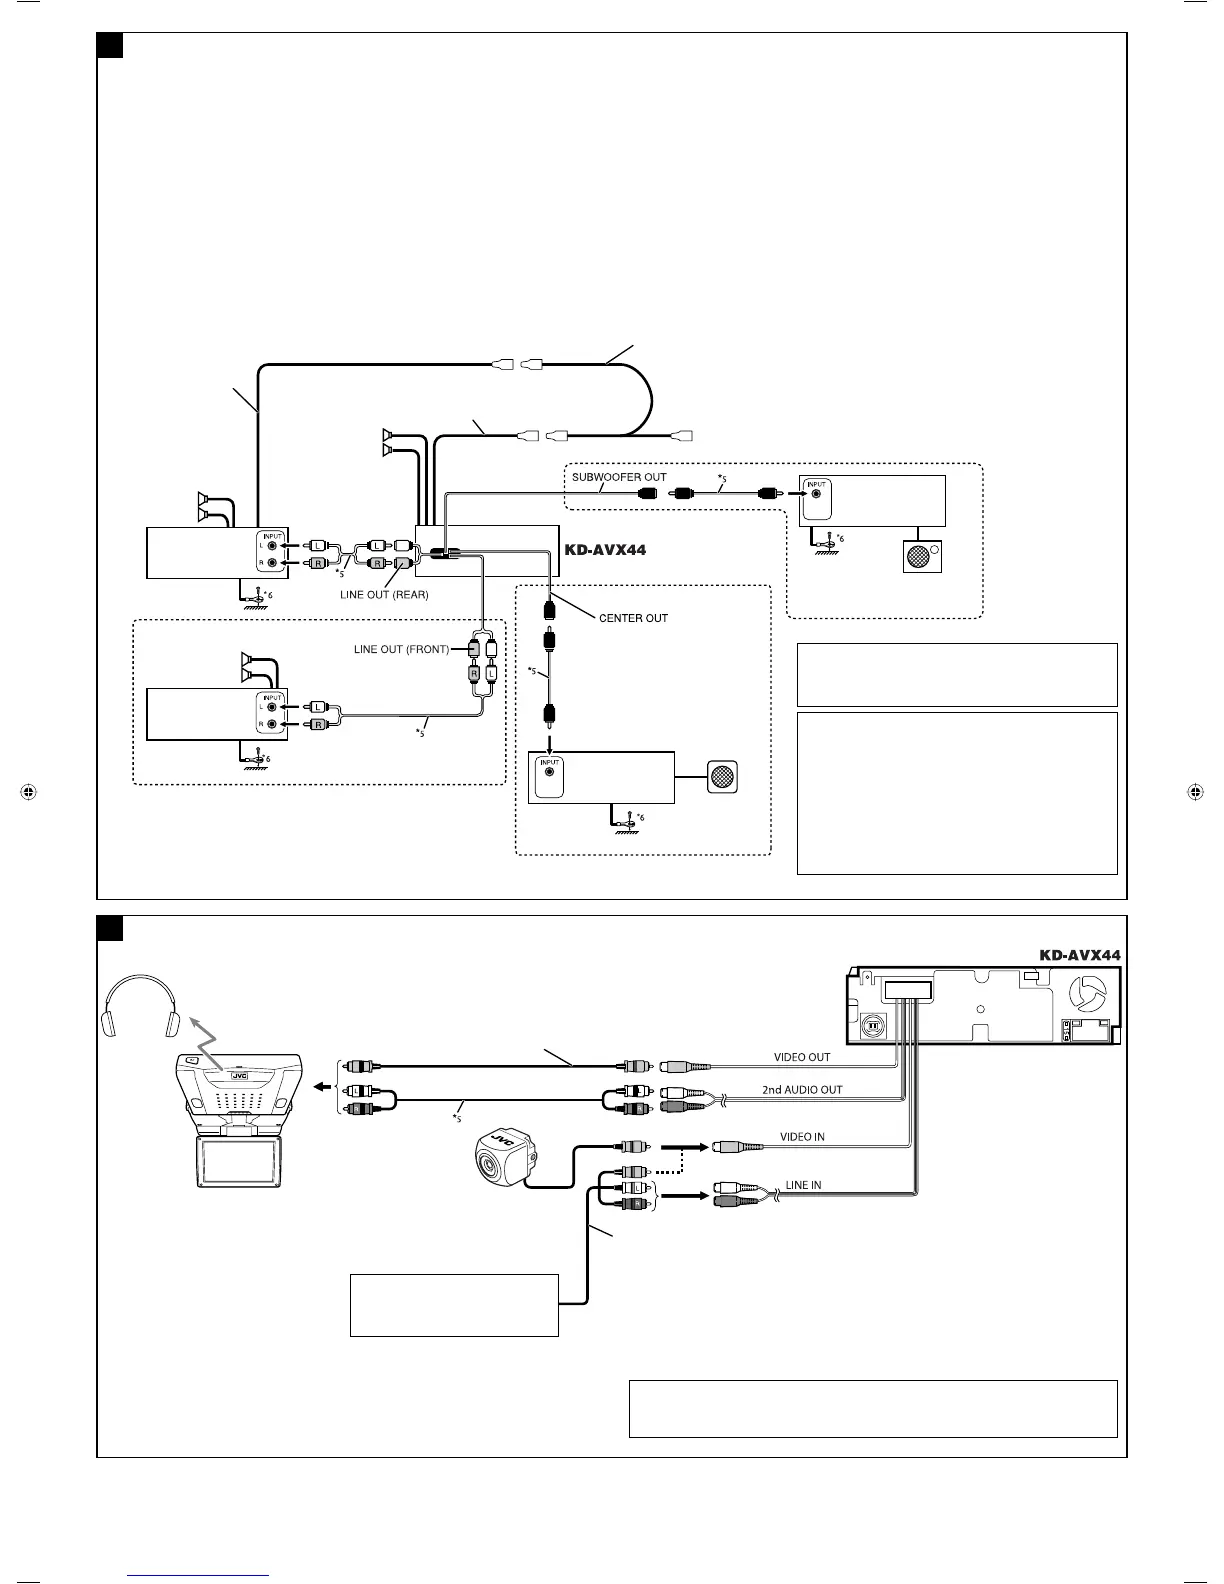
Connecting the external amplifiers / ોг௱ୋ؟ʩወ / °“√µËÕ‡æ‘Ë¡‡µ‘¡‡¢È“°—∫Õÿª°√≥ÏÕ◊Ëπ
You can connect amplifiers to upgrade your car stereo system.
• Connect the remote lead (blue with white stripe) to the remote
lead of the other equipment so that it can be controlled through
this unit.
• For amplifier only:
– After you have connected the center speaker, make sure
to activate the center speaker; otherwise, no sound comes
out of the connected center speaker, see page 51 of the
INSTRUCTIONS.
– Disconnect the speakers from this unit, connect them to the
amplifier. Leave the speaker leads of this unit unused.
– You can switch off the built-in amplifier and send the audio
signals only to the external amplifier(s) to get clear sounds
and to prevent internal heat buildup. See page 53 of the
INSTRUCTIONS.
*
6
Firmly attach the ground wire to the metallic body or to the
chassis of the car—to the place uncoated with paint (if coated
with paint, remove the paint before attaching the wire). Failure
to do so may cause damage to the unit.
*
6
અϙለႩہᚙԾᝂږԆԾנᇟႌંçளᏻ༳ԅ
ЉூٛွᕒႵ(ϨسʵดʕٛွçϚྐለۮçઅٛွ
ս)éϨسʿᆟç๑ᖢʹጅé
*
6
µËÕ≈«¥“¬¥‘π„ÀÈ·πËπ‡¢“°—∫µ—«∂—߇À≈Á° À√◊Õµ—«∂—ß√∂˙µ√ßË«π
∑’ˉ¡Ë¡’’’‡§≈◊Õ∫
(À“°¡’’‡§≈◊Õ∫Õ¬ŸË „ÀÈ¢Ÿ§¥’ÕÕ°°ËÕπ °ËÕπµËÕ≈«¥“¬¥‘π)
À“°‰¡ËªØ‘∫—µ‘µ“¡§”·π–π”π’È ‡§√◊ËÕßÕ“®™”√ÿ¥À√◊Õ‡’¬À“¬‰¥
Center speaker
ˀಙᑵ
”‚æß°≈“ß
Connections for external component playback /௱ஈέᆒ؟ો / °“√µËÕ‡æ◊ËÕ‡≈ËπÕÿª°√≥Ï¿“¬πÕ°
KS-HP2
Cordless headphones (not supplied) *
7
ለЫጅ(ԅЉక) *
7
∑Ÿøíß·∫∫‰√È“¬ ( ‰¡Ë‰¥È„ÀÈ¡“æ√ÈÕ¡‡§√◊ËÕß) *
7
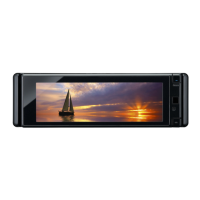
KV-MR9010
9-INCH WIDESCREEN MONITOR (not supplied)
9-ʭᅛܳΕ (ԅЉక)
®Õ°«È“ß 9 π‘È« ( ‰¡Ë‰¥È„ÀÈ¡“æ√ÈÕ¡‡§√◊ËÕß)
Video cord (not supplied)
ඁᏁྐង(ԅЉక)
“¬«‘¥’‚Õ ( ‰¡Ë‰¥È„ÀÈ¡“æ√ÈÕ¡‡§√◊ËÕß)
*
7
To listen to disc playback sound while in Dual Zone operations (see page 26 of INSTRUCTIONS).
*
7
ࠜ࠱ϚᕻࡌዬѕЂγၪᆑ؞ڄᑵࡖ(ቁኌ୶ 26 ࡗڄݣΕ)é
*
7
‡¡◊ËÕµÈÕß°“√øí ß·ºËπ¥‘°Ï¢≥–Õ¬ŸË„π‚À¡¥°“√∑”ß“π·∫∫ Dual Zone (¥ÿÀπÈ“ 26 ¢ÕߧŸË¡◊Õ°“√„™Èß“π)
A
B
*
5
Audio cord (not supplied)
*
5
ࡖᏁྐង(ԅЉక)
*
5
“¬ÕÕ¥‘‚Õ ( ‰¡Ë‰¥È„ÀÈ¡“æ√ÈÕ¡‡§√◊ËÕß)
Remote lead
ჲለ
“¬µ–°—Ë«•–¬–‰°•
To the remote lead of other equipment
вɾށࡖᛏకڄჲለ
µËÕ‡¢È“°—∫Õª°√≥ÏÕË◊π
Y-connector (not supplied for this unit)
Y-ܓለ(ʿᎲʹጅಏա)
¢ÈÕµËÕ√Ÿªµ—« Y ( ‰¡Ë‰¥È„ÀÈ¡“°—∫™ÿ¥ª√–°Õ∫π’È)
Rear speakers
݈ಙᑵ
≈”‚æßÀ≈—ß
Subwoofer
ඟјࡖಙᑵ
´—∫«Ÿ‡øÕ√
Front speakers
ۮಙᑵ
≈”‚æßÀπÈ“
Remote lead (Blue with white stripe)
ჲለ(ᕇиઘЉΎиঙ)
“¬µ–°—Ë«•–¬–‰°• (’πÈ”‡ß‘π≈“¬¢“«)
JVC Amplifier
JVC ؞ʨ
‡§√◊ËÕߢ¬“¬‡’¬ß
JVC
JVC Amplifier
JVC ؞ʨ
‡§√◊ËÕߢ¬“¬‡’¬ß
JVC
JVC Amplifier
JVC ؞ʨ
‡§√◊ËÕߢ¬“¬‡’¬ß
JVC
JVC Amplifier
JVC ؞ʨ
‡§√◊ËÕߢ¬“¬‡’¬ß
JVC
Camcorder, Navigation System, etc.
ᎨߟጅèৃԦçമ
°≈ÈÕß«‘¥’‚Õ √–∫∫π”∑“ß œ≈œ
Audio/video cord (not supplied)
ࡖᏁ/ඁᏁྐង(ԅЉక)
“¬ÕÕ¥‘‚Õ/ «’¥’‚Õ ( ‰¡Ë‰¥È„ÀÈ¡“æ√ÈÕ¡‡§√◊ËÕß)
Front speakers
ۮಙᑵ
≈”‚æßÀπÈ“
§ÿ≥“¡“√∂µËÕ°—∫·Õ¡æ≈‘ø“¬‡ÕÕ√Ï ·–Õÿª°√≥ÏÕ◊òπʉ¥ô ‡æ◊ËÕ‡æ‘Ë¡§ÿ≥
¿“懒¬ß„ÀÈ°—∫√–∫∫‡µÕ√‘‚Õ¢Õß√∂¬πµÏ
•
µËÕ“¬µ–°—Ë«√–¬–‰°≈
(
’πÈ”‡ß‘π≈“¬¢“«
)
‡¢È“°—∫“¬µ–°—Ë«√–¬–‰°≈¢ÕßÕÿª°√≥ÏÕ◊Ëπ
Ê ‡æ◊ËÕ®–“¡“√∂§«∫§ÿ¡‚¥¬™ÿ¥ª√–°Õ∫π’ȉ¥È
• ≈”À√—∫·Õ¡æ≈‘ø“¬‡ÕÕ√χ∑Ë“π—Èπ:
–
À≈—ß®“°∑’˵ËÕ≈”‚æß°≈“ß·≈È« µÈÕß·πË„®«Ë“‰¥È‡ª‘¥„™Èß“π≈”‚æß ¡‘‡™Ëππ—Èπ
®–‰¡Ë¡’‡’¬ßÕÕ°¡“®“°≈”‚æß ¥ŸÀπÈ“
51
§”·π–π”
– ∂Õ¥≈”‚æßÕÕ°®“°™ÿ¥ª√–°Õ∫π’È ·≈È«µËÕ‡¢È“°—∫‡§√◊ËÕߢ¬“¬
∑‘Èß“¬µ–°—Ë«≈”‚æߢÕß™ÿ¥ª√–°Õ∫π’ȉ«È
–
“¡“√∂ªî¥·Õ¡ª≈‘ø“¬‡ÕÕ√ϵ—«∫‘«∑ÏÕ‘π‰¥È ·≈È«Ë߇©æ“–—≠≠“≥‡’¬ß‰ª¬—
ß·Õ¡ªÏµ—«πÕ°‡æ◊ËÕ„Àȉ¥È‡’¬ß∑’˧¡™—¥¬‘Ëߢ÷Èπ ·≈–‡æ◊ËÕ‡ªìπ°“√ªÈÕß°—π°“√‡°‘¥§«“¡
√ÈÕπ¿“¬„π‡§√◊ËÕߥȫ¬ ¥ŸÀπÈ“
53
§”·π–π”
؞ʨಏجౚԾڄࡖᛏԦé
• અჲለ(ᕇиઘЉΎиঙ)֜մ༫ʕڄჲለ
৹գç۔ཫʹጅනмჲé
• ෯բୋ؟ʩወЪʶ:
–
ોˁಚᑶወ݉èᇨۙ૨ˁಚᑶወèѵ۲ˁಚᑶወ
ˀഛᑶࡗèኌ՟·იاڄ୶ 51 ࡗé
– આಚᑶወ֝͵ጆᔄෆèκોʖୋ؟ʩወêઆ͵ጆڅಚᑶወ
ોሉ؟ˀΈê
– ᘕ˖؞ʨ݈અࡖᏁۑ༙෭в௰
؞ʨᐺ֊ଡಣڄᑵࡖ֜ᒼѠʹጅ˖ڄ˖௰᜵ᇊéኌ՟
·იاڄ୶53ࡗé
KV-CM1
Rear view camera (not supplied)
݈ඁຖߟጅ
(ԅЉక)
°≈ÈÕß¡ÕßÀ≈—ß ( ‰¡Ë‰¥È„ÀÈ¡“æ√ÈÕ¡‡§√◊ËÕß)
 Loading...