(No.MB207)1-13
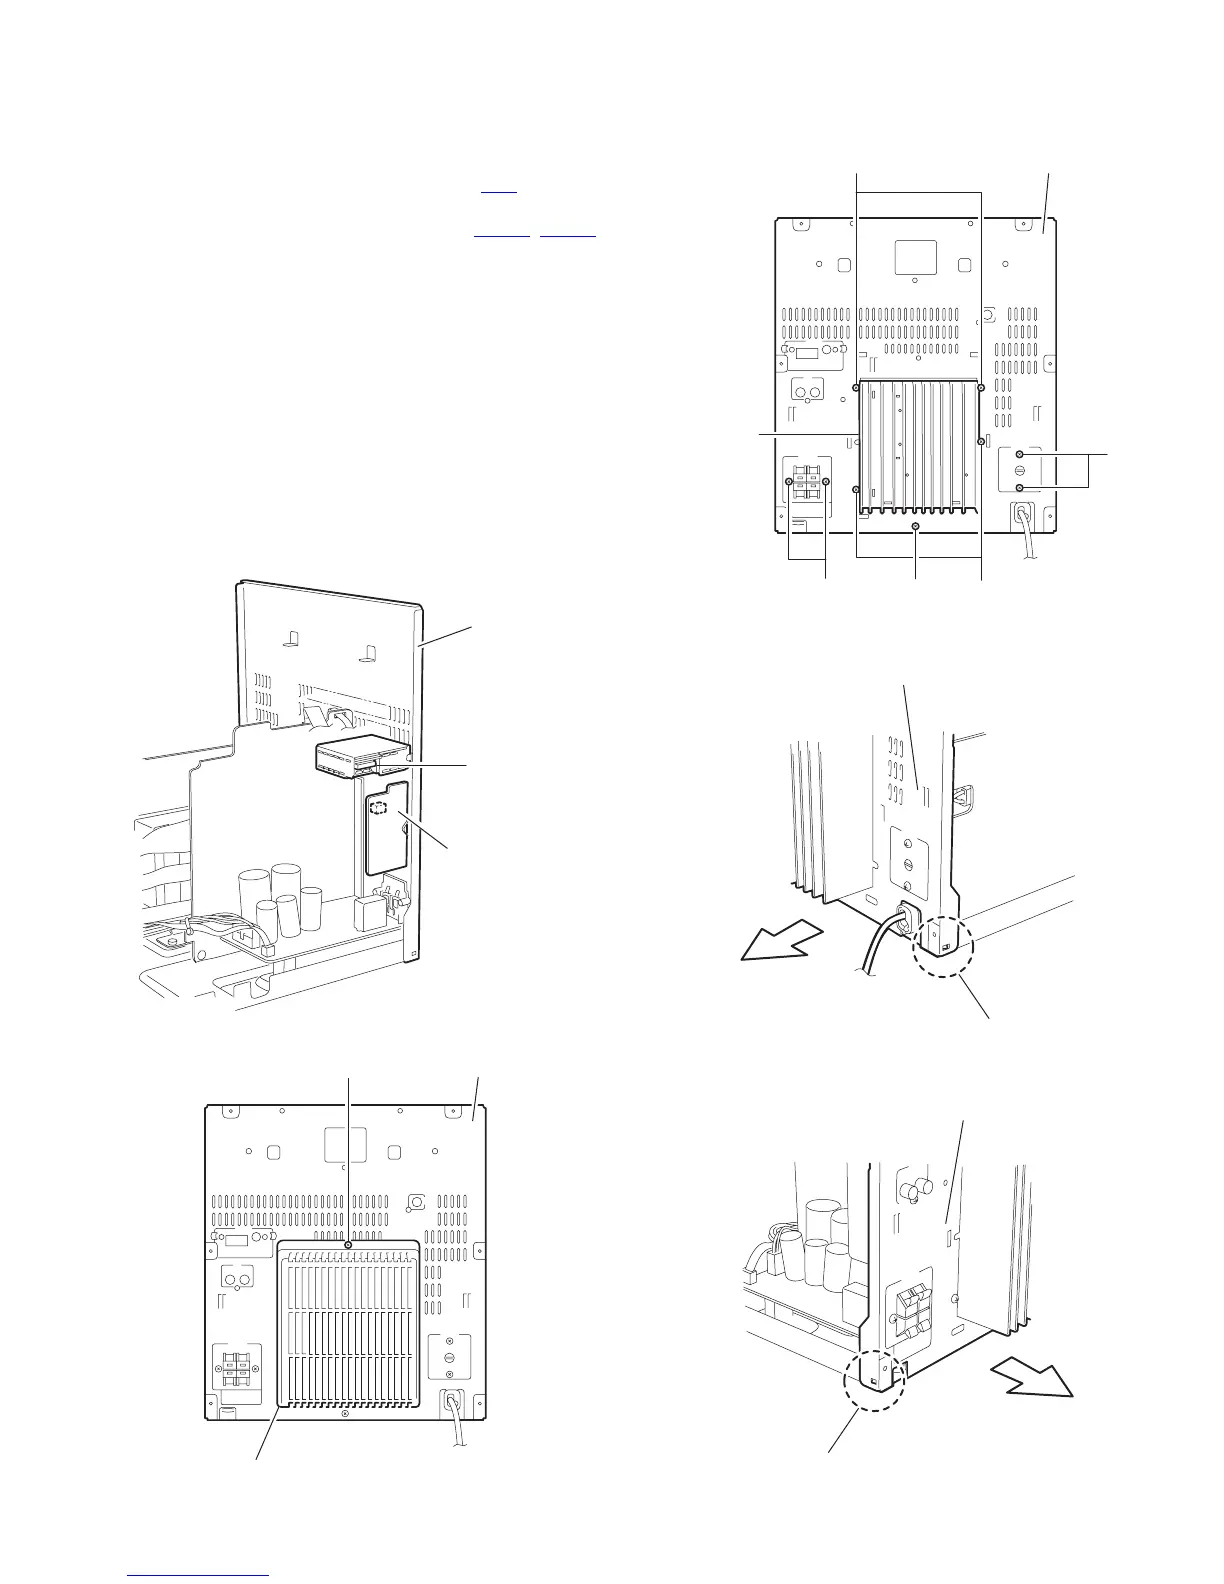
3.1.9 Removing the rear panel
(See Fig.21~25)
• Prior to performing the following procedure, remove the metal
cover and the CD changer unit.
(1) Disconnect the wire from the connector CN1
on the tuner
pack assembly on the right side of the body.
(2) Disconnect the wire from the connector CN411
, CN711 on
the AUX surround board.
(3) Remove the screw K attaching the rear cover on the back
of the body.
(4) Remove the two screws L attaching the speaker board,
and the two screws M attaching the power transformer
board on the back of the body.
(5) Remove the four screws N attaching the heat sink on the
back of the body.
(6) Remove the screw P attaching the rear cover on the back
of the body.
(7) Release the two joints f and g on the bottom of the rear
panel using the screw driver, then detach the rear panel
backward.
Reference: The rear panel comes off with the tuner pack
assembly and the AUX surround board.
Fig.21
Fig.22
Fig.23
Fig.24
Fig.25
Tuner pack
(CN1)
AUX & surroud board
(CN411)
Rear panel
K
Rear panel
Rear cover
N
NP
Rear panel
Heat sink
M
L
f
Rear panel
f
Rear panel