RX-8022PSL
1-6
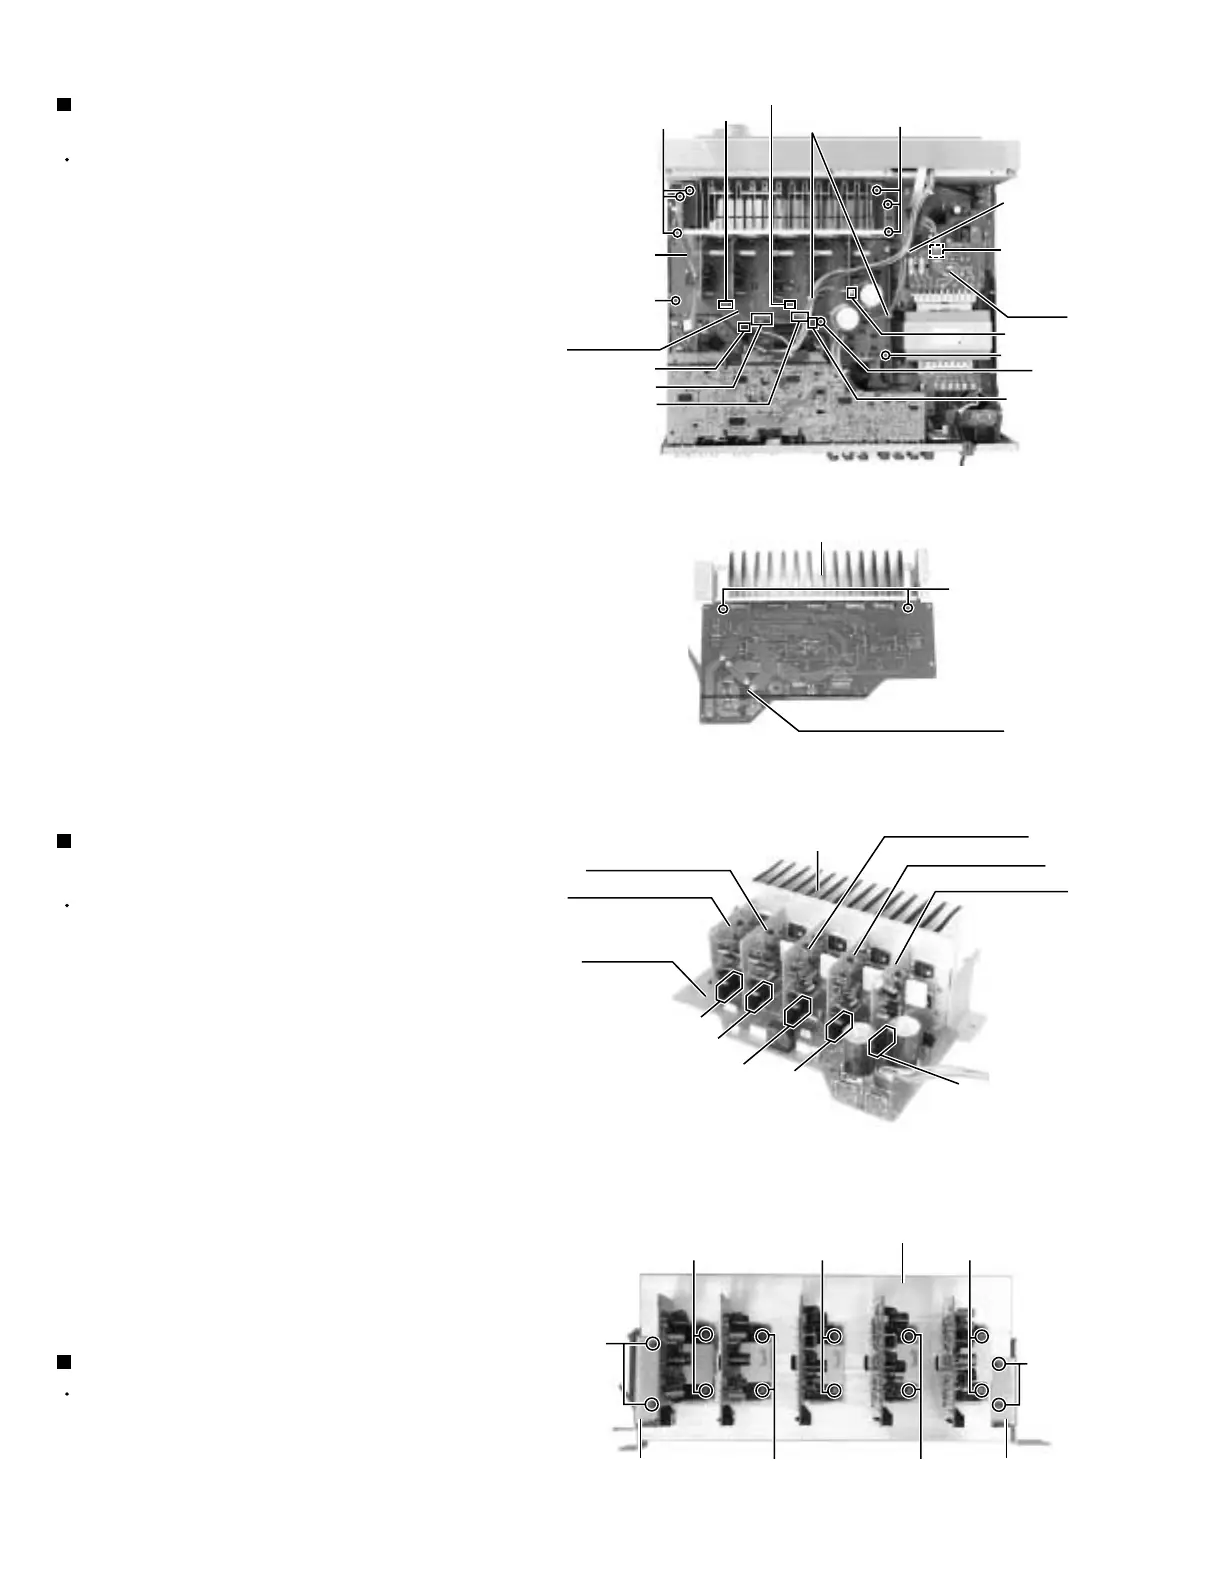
Prior to performing the following procedure, remove
the top cover.
Remove the card wire and cut off the tie bands.
Disconnect the harness from the connector CN721,
CN723, CN813, CN814, CN831 and CN881 on the
main board.
Disconnect the harness from the connector CN722
on the Cch amp. board (see fig.5).
Disconnect the harness from the connector CN811
on the power trans1 board.
Remove the screw K, after removing the relay board
if needed (see fig.11).
Remove the two screws L and the six screws M
attaching the main board.
Remove the two screws N attaching the heat sink to
the main board.
Disconnect the connector of each amp. board.
1.
2.
3.
4.
6.
7.
8.
9.
Removing the main board
(See Fig.13 to 15)
Prior to performing the following procedure, remove
the top cover, main board and each amp. board.
Remove the four screws T attaching the two
brackets to the heat sink and remove the two
brackets.
1.
Removing the Heat sink (See Fig.16)
Prior to performing the following procedure, remove
the top cover and main board.
Remove the two screws O attaching the Cch amp.
board and remove the Cch amp. board.
Remove the two screws P attaching the Lch amp.
board and remove the Lch amp. board.
Remove the two screws Q attaching the Rch amp.
board and remove the Rch amp. board.
Remove the two screws R attaching the RLch amp.
board and remove the SLch amp. board.
Remove the two screws S attaching the RRch amp.
board and remove the SRch amp. board.
1.
2.
3.
4.
5.
Removing the each amp. board of Cch,
Lch, Rch, RLch and RRch (See Fig.16)
Fig.13
Main board (reverse side)
Heat sink
Main board
RRch amp. board
Lch amp. board
Rch amp. board
Cch amp. board
RLch amp. board
Heat sink
T
T
Fig.14
Fig.15
Main board
CN881
CN831
CN814
CN721
CN706
CN705
CN702
CN701
CN703
CN722
CN723
CN813
L
L
K
M
M
Tie band
Tie band
Card wire
CN811
Fig.16
N
Power
trans1
board
Heat sink
Bracket
Bracket
P
(Lch)
O
(Cch)
Q
(Rch)
S
(RRch)
R
(RLch)


 To Next Page