M
Michael GreerAug 8, 2025
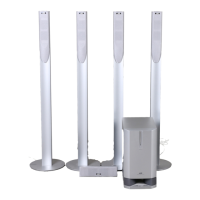
What to do if JVC SP-UXV100 remote control is not working?
- RRichard KaiserAug 8, 2025
If you're unable to operate the remote control for your JVC Speaker System, first, ensure that there is a clear path between the remote control and the sensor on the unit by removing any obstructions. If that doesn't work, replace the batteries in the remote control.